
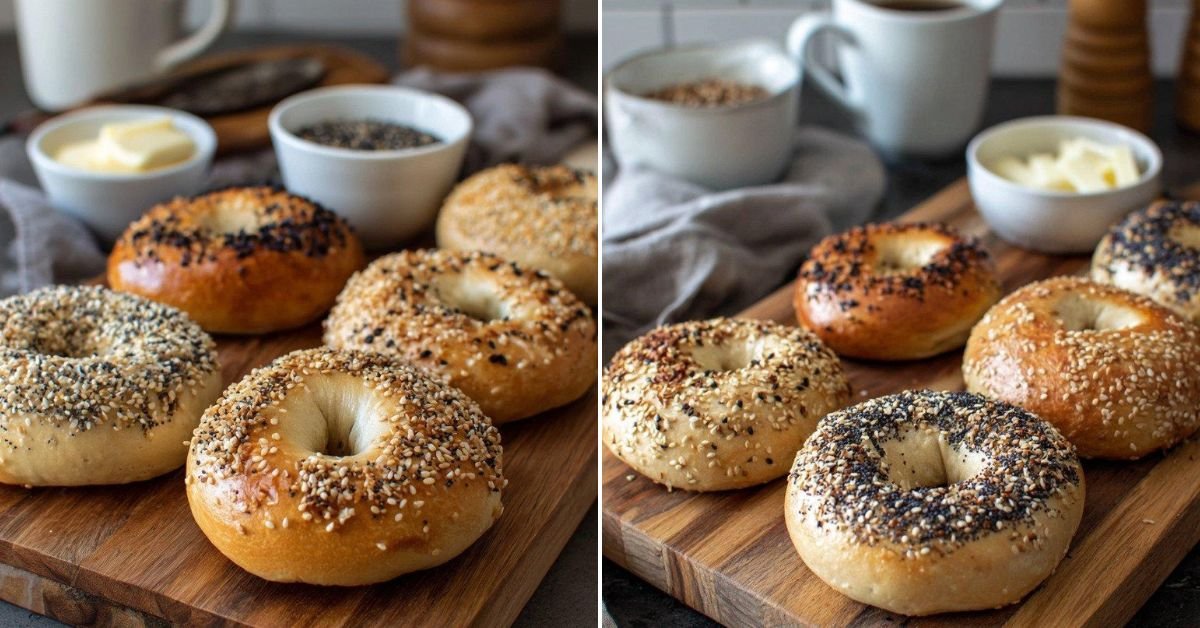
Listen, I’ve been making this bagel recipe for years now, and honestly? Store bought bagels just don’t cut it anymore. There’s something magical about pulling a tray of golden, perfectly chewy bagels out of your own oven. The smell alone is worth it. What I love most is how simple this really is. You don’t need fancy equipment or a culinary degree. Just basic ingredients you probably already have, a little patience (the dough needs time to do its thing), and maybe some good music while you’re shaping them. I started tweaking recipes until I found what works. Some folks like their bagels dense and New York style, others want them softer. This recipe hits that sweet spot where the outside gets this beautiful golden crust, but inside? Soft and chewy perfection. Whether you’re spreading cream cheese, making a breakfast sandwich, or just eating them warm with butter, these bagels are going to become your new weekend tradition. Trust me on this one.
Table of Contents
- 1) Key Takeaways
- 2) Easy Homemade Bagels Recipe
- 3) Ingredients for Homemade Bagels
- 4) How to Make Homemade Bagels
- 5) Tips for Making Homemade Bagels
- 6) Making Homemade Bagels Ahead of Time
- 7) Storing Leftover Homemade Bagels
- 8) Try these Breakfast Recipes next!
- 9) Homemade Bagels Recipe
- 10) Nutrition
1) Key Takeaways
- What makes homemade bagels better than store bought?
- Can you make bagel dough ahead of time?
- Why do you boil bagels before baking them?
- What’s the secret to chewy bagels?
- How long do homemade bagels stay fresh?

2) Easy Homemade Bagels Recipe
I’m going to be straight with you. Once you make this bagel recipe at home, those grocery store bagels are going to seem like a sad substitute. I know that sounds dramatic, but I’ve been there. I used to grab a bag of bagels every week without thinking twice. Then one Saturday morning, I decided to try making them myself, and wow, what a difference.
The thing about this bagel recipe is that it’s surprisingly doable. You don’t need to be a professional baker or have some fancy kitchen setup. Just a bowl, some basic ingredients, and a couple of hours. Most of that time is just waiting around while the dough rises, which means you can clean the kitchen, answer emails, or binge watch that show everyone keeps talking about.
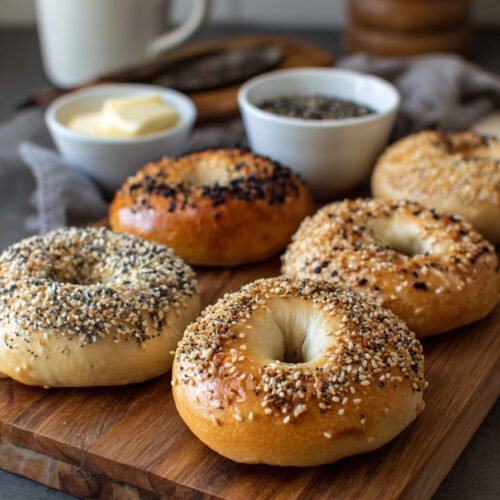
What really gets me is the texture. That perfect combination of a slightly crispy, golden exterior giving way to a soft, chewy inside is something you just can’t find in pre packaged bagels. And the smell? Walking into your kitchen when these are baking is better than any candle you could buy. My neighbors have actually knocked on my door asking what I’m making. It’s become kind of a weekend ritual now.
The best part is how customizable these are. Want everything bagels? Go for it. Cinnamon raisin? Absolutely. Plain with just a sprinkle of sea salt? Classic and perfect. This simple bagel recipe gives you the foundation, and you can take it wherever you want. I’ve made batches with sesame seeds, poppy seeds, even jalapeño and cheese. They all turned out incredible.
And here’s something I didn’t expect when I started making these. It’s actually kind of therapeutic. There’s something satisfying about shaping the dough, poking your thumb through the center, and watching it transform in the oven. It’s one of those recipes where you can actually see your work pay off. Kids love helping with this too, especially the shaping part.
If you’ve been thinking about trying a yeast bagel recipe but felt intimidated, let me tell you, this is the one to start with. It’s forgiving, it’s straightforward, and the results are honestly better than most bakeries I’ve tried. You’ll end up with eight beautiful bagels that’ll disappear faster than you’d think. Trust me, you might want to double the batch.
3) Ingredients for Homemade Bagels
Bread Flour: This is really the star of the show. I know some recipes say you can use all purpose flour, and technically you can, but bread flour makes such a difference. The higher protein content creates more gluten, which gives you that chewy texture we’re after. I tried switching to all purpose once when I ran out, and the bagels were fine but just not quite the same. If you’re serious about nailing this recipe, grab a bag of bread flour. King Arthur is my go to brand, but any good quality bread flour works great.
Instant Yeast: I use instant yeast for this recipe, which you can just mix right into the dry ingredients without proofing first. That said, I still like to let it activate in the warm water with the sugar just to make sure it’s alive and kicking. There’s nothing worse than spending all that time kneading dough only to find out your yeast was dead. If your mixture doesn’t get foamy after five minutes, toss it and start over with fresh yeast. It’s worth the extra packet.
Sugar: Just a tablespoon goes into the dough itself, and it serves two purposes. First, it feeds the yeast and helps it do its thing. Second, it adds just a hint of sweetness to balance out the salt. Not enough to make these taste like dessert, but enough to round out the flavor. Some bagel recipe ideas call for honey or malt syrup in the dough, but I keep it simple with regular granulated sugar.
Salt: Don’t skip the salt. I learned this the hard way when I forgot it once, and the bagels tasted so flat and boring. Salt brings out all the other flavors and makes the whole thing taste more, well, bagel like. I use regular table salt, but if you’ve got kosher salt on hand, that works too. Just use a bit more since the crystals are bigger.
Warm Water: Temperature matters here, folks. You want it around 110°F, which is warm to the touch but not hot. Too cold and your yeast won’t activate properly. Too hot and you’ll kill it. I usually just run the tap until it feels like a comfortable bath temperature. If you want to be precise, use a thermometer, but honestly, after making these a few times, you’ll get a feel for it.
Honey or Brown Sugar for the Water Bath: This goes into the boiling water, not the dough. It might seem weird to boil bread before baking it, but that’s what gives bagels their signature chewy crust. The honey or brown sugar in the water helps with browning and adds a subtle sweetness to the outside. I usually use honey, but brown sugar works just as well. Some people use baking soda or malt syrup, but I find honey gives the best results for this best bagel recipe.
Egg Wash: One beaten egg brushed on top before baking gives the bagels that beautiful shiny, golden finish. It makes them look professional and bakery worthy. If you’re vegan or don’t have eggs, you can use a little milk or even just water, but the egg really does make them shine.
Toppings: This is where you get to have fun. Everything bagel seasoning is probably my favorite, but sesame seeds, poppy seeds, coarse sea salt, dried onion, dried garlic, or a combination are all fair game. For a blueberry bagel recipe variation, you’d skip the savory toppings and fold fresh or frozen blueberries into the dough after kneading. The possibilities are endless, and that’s what makes this recipe so great.
4) How to Make Homemade Bagels
Step 1: Start by mixing your warm water and sugar in the bowl of your stand mixer. Sprinkle the instant yeast over the top and just let it sit there for about five minutes. You’ll see it start to foam and bubble, which means the yeast is active and ready to go. If nothing happens, your water might’ve been too hot or your yeast is old. Either way, start over with fresh ingredients.
Step 2: Once your yeast is nice and foamy, add the bread flour and salt to the bowl. Attach the dough hook to your mixer and start on low speed. Let it mix until everything comes together into a shaggy dough. Then bump it up to medium speed and let the machine do its thing for about 8 to 10 minutes. You’re looking for smooth, elastic dough that pulls away from the sides of the bowl. If it seems too sticky, add a tablespoon of flour at a time. Too dry? Add a tiny splash of water.
Step 3: Shape the dough into a ball and place it in a lightly oiled bowl. I just drizzle a little olive oil in there and turn the dough to coat it. Cover the bowl with a clean kitchen towel or plastic wrap and set it somewhere warm. I usually put mine on top of the fridge or near a sunny window. Let it rise for about an hour until it’s doubled in size. This is a good time to clean up your workspace or start prepping your toppings.
Step 4: When the dough has doubled, punch it down. Literally just give it a good punch to deflate it. It’s oddly satisfying. Turn it out onto your counter and divide it into eight equal pieces. I use a kitchen scale for this to make sure they’re all the same size, but eyeballing it works too. Roll each piece into a smooth ball by tucking the edges underneath and rolling it against the counter with your palm.
Step 5: Now comes the fun part: shaping the bagels. Take one ball and poke your thumb straight through the center. Then stick your other thumb in there too and gently stretch the hole until it’s about two inches wide. It’ll look too big, but trust me, it shrinks when you boil and bake them. If you make the hole too small, it’ll close up completely. Place each shaped bagel on a parchment lined baking sheet. Cover them with a towel and let them rest for 20 minutes.
Step 6: Get a large pot of water boiling on the stove. Add your honey or brown sugar to the water and stir it in. Preheat your oven to 425°F. When the water’s at a rolling boil, gently lower two or three bagels into the pot. Don’t crowd them. Boil for about one minute on each side. They’ll puff up a bit and float to the top. Use a slotted spoon to fish them out and put them back on the baking sheet.
Step 7: Once all the bagels have been boiled, brush each one with the beaten egg. This is when you add your toppings. Sprinkle on whatever you’re using while the egg wash is still wet so it sticks. Be generous with the toppings. Nobody ever complained about too much everything bagel seasoning.
Step 8: Slide the baking sheets into your preheated oven and bake for 20 to 25 minutes. Keep an eye on them after 20 minutes. You want them deep golden brown, not pale. The darker they get, the more flavor they’ll have. When they’re done, transfer them to a wire rack and let them cool for at least 10 minutes. I know it’s hard to wait, but cutting into a hot bagel will make it gummy inside. Once they’ve cooled a bit, slice and enjoy. The hardest part is not eating all eight in one sitting.
5) Tips for Making Homemade Bagels
Let me share some things I’ve learned from making this overnight bagel recipe and its variations about a million times. First up, get yourself a kitchen scale if you don’t have one already. Measuring flour by weight instead of volume makes such a difference in consistency. Four cups of flour can vary wildly depending on how you scoop it, but 500 grams is always 500 grams. It takes the guesswork out of baking.
The water temperature thing is real. I used to just use whatever came out of the tap, and sometimes my bagels would turn out great, sometimes not so much. Then I started actually checking the temperature, and suddenly they were consistent every time. You want that sweet spot around 110°F. If you don’t have a thermometer, test it on your wrist like you would baby formula. It should feel warm and comfortable, not hot.
Here’s something nobody tells you about making bagels at home. The longer you boil them, the chewier the crust gets. I stick with one minute per side, which gives you a nice balance. But if you want a really thick, chewy crust like New York style bagels, you can boil them for up to two minutes per side. Just know they’ll be denser. On the flip side, if you want softer bagels, go for 30 seconds per side.
Don’t be shy with the flour when you’re shaping the bagels. A lightly floured surface keeps them from sticking, but you don’t want to add too much extra flour or they’ll be tough. I keep a small bowl of flour nearby and just dust my hands and the counter as needed. Same goes for when you’re stretching the holes. A little flour on your fingers helps them glide through the dough.
The boiling step can’t be skipped. I see people trying to shortcut this all the time, and it just doesn’t work. That quick dip in boiling water is what sets the outside and creates that distinctive bagel texture. Without it, you basically just have round bread. Not terrible, but not a bagel. So don’t skip it, even if you’re in a hurry.
One more thing about the baking. Your oven probably has hot spots, so rotate your baking sheet halfway through. I learned this when half my bagels would come out perfect and the other half would be pale. Now I rotate them at the 12 minute mark, and they all come out evenly golden. Small thing, big difference.
6) Making Homemade Bagels Ahead of Time
This is where this recipe really shines. You can totally make these ahead, which is perfect for weekend brunch or when you want fresh bagels for breakfast without getting up at the crack of dawn. After you shape the bagels, instead of letting them rest at room temperature, pop them in the fridge overnight. Cover them with plastic wrap so they don’t dry out.
In the morning, take them out and let them sit at room temperature for about 30 minutes while your oven preheats and your water comes to a boil. They’ll puff up a tiny bit more during this time. Then just proceed with the boiling and baking steps as written. The overnight rest actually develops more flavor, so some people prefer this method. I do it whenever I’m having people over for brunch.
You can make the dough ahead too. After the first rise, punch it down, wrap it tightly in plastic wrap, and refrigerate it for up to 24 hours. When you’re ready to make bagels, let it come to room temperature for about an hour, then shape and proceed with the recipe. The cold dough is a bit stiffer and actually easier to work with.
Want to go even further ahead? Shape and boil the bagels, then freeze them before baking. Lay them on a baking sheet and freeze until solid, then transfer to a freezer bag. When you want fresh bagels, bake them straight from frozen at 425°F for about 25 to 30 minutes. They won’t be quite as perfect as fresh, but they’re pretty dang close and so much better than anything you’d buy.
I usually make a double batch and freeze half. That way I always have bagels ready to go. Just pull out however many you want the night before and let them thaw in the fridge, or toast them straight from frozen. Either way works. Having homemade bagels on hand whenever you want them is a serious quality of life upgrade.
7) Storing Leftover Homemade Bagels
Fresh bagels are best eaten the day they’re made, but let’s be real, sometimes you have leftovers. If you’re going to eat them within a day or two, just keep them in a paper bag or bread box at room temperature. Don’t put them in the fridge. I know that seems counterintuitive, but refrigeration actually makes bread go stale faster. Something about the starch molecules, I don’t know the exact science, but trust me on this.
For longer storage, freezing is your best bet. Let the bagels cool completely, then slice them before freezing. I can’t stress this enough: slice them first. Trying to cut through a frozen bagel is dangerous and frustrating. Once they’re sliced, pack them in a freezer bag, squeeze out as much air as possible, and freeze for up to three months. When you want one, just pop it in the toaster straight from frozen. Comes out perfect every time.
If you forgot to slice them before freezing, let them thaw at room temperature for about 20 minutes, then slice. Or you can microwave them for 15 to 20 seconds to soften them just enough to cut safely. Just don’t microwave them too long or they’ll get rubbery. Nobody wants a rubbery bagel.
Here’s a trick I learned from a bakery. If your bagels have gone a bit stale, run them under water for just a second. Not soaking, just a quick rinse. Then bake them in a 350°F oven for about 5 minutes. The moisture helps rehydrate them, and the oven crisps up the outside. It won’t make them taste fresh baked again, but it definitely helps bring them back to life.
One last storage tip for those of you making these bagel recipe ideas in big batches. Label your freezer bags with the date and what kind of bagels they are. I learned this after finding a mystery bag of bagels in my freezer and having no idea if they were plain, everything, or that experimental jalapeño cheddar batch I made six months ago. Save yourself the confusion and label everything.
8) Try these Breakfast Recipes next!
9) Homemade Bagels Recipe
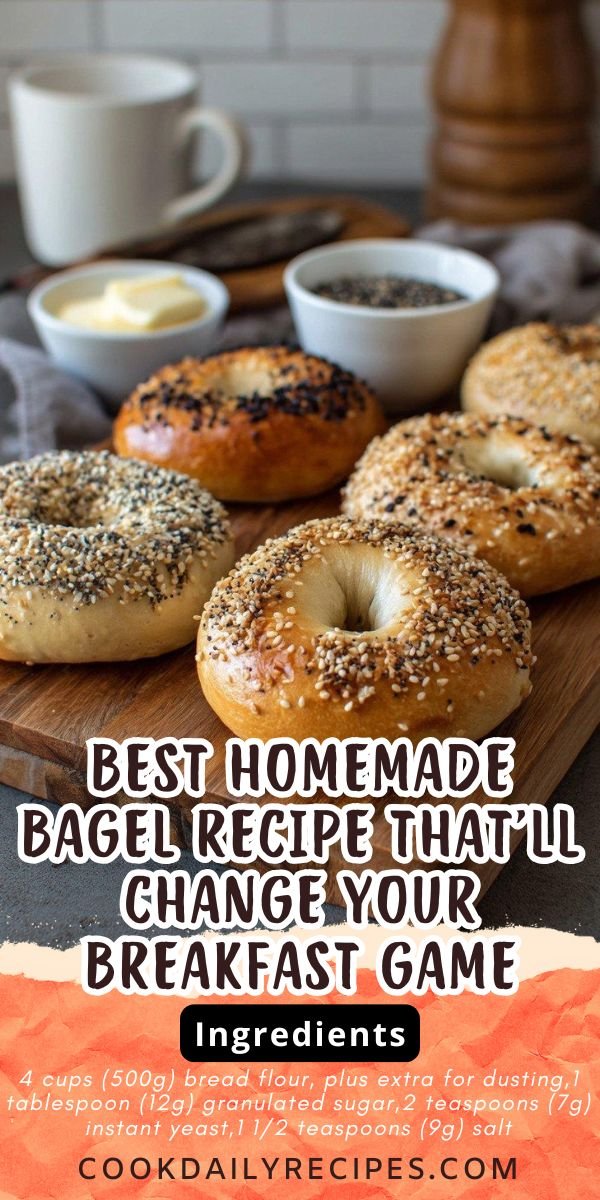
Best Homemade Bagel Recipe That'll Change Your Breakfast Game
Ingredients
- 4 cups (500g) bread flour, plus extra for dusting
- 1 tablespoon (12g) granulated sugar
- 2 teaspoons (7g) instant yeast
- 1 1/2 teaspoons (9g) salt
- 1 1/2 cups (360ml) warm water (around 110°F)
- 2 tablespoons (25g) honey or brown sugar for water bath
- 1 egg, beaten (for egg wash)
- Optional toppings: sesame seeds, poppy seeds, everything bagel seasoning, coarse salt
Instructions
- Mix the warm water with sugar in your stand mixer bowl. Sprinkle the yeast on top and let it sit for about 5 minutes until it gets foamy. If nothing happens, your yeast might be dead (grab a fresh packet).
- Add the flour and salt to the bowl. Using the dough hook attachment, mix on low speed until everything comes together. Then bump it up to medium and let it knead for about 8 to 10 minutes. The dough should be smooth and elastic, pulling away from the sides of the bowl.
- Shape the dough into a ball and place it in a lightly oiled bowl. Cover with a clean kitchen towel and let it rise somewhere warm for about an hour. You want it to double in size.
- Once risen, punch down the dough (so satisfying!) and divide it into 8 equal pieces. Roll each piece into a ball.
- To shape the bagels, poke your thumb through the center of each ball and gently stretch the hole until it's about 2 inches wide. The hole will shrink during boiling and baking, so make it bigger than you think.
- Place the shaped bagels on a parchment lined baking sheet. Cover them again and let them rest for another 20 minutes.
- While they're resting, preheat your oven to 425°F (220°C) and bring a large pot of water to a boil. Add the honey or brown sugar to the boiling water.
- Working in batches, gently drop 2 or 3 bagels into the boiling water. Boil for about 1 minute per side. They should puff up a bit. Use a slotted spoon to transfer them back to the baking sheet.
- Brush each bagel with the beaten egg and sprinkle on your favorite toppings if using.
- Bake for 20 to 25 minutes until they're a beautiful deep golden brown. Let them cool on a wire rack for at least 10 minutes before slicing (I know it's hard to wait!).
10) Nutrition
Serving Size: 1 bagel | Calories: 245 | Sugar: 3.2 g | Sodium: 438 mg | Fat: 1.5 g | Saturated Fat: 0.3 g | Carbohydrates: 50.8 g | Fiber: 2.1 g | Protein: 8.2 g | Cholesterol: 23 mg


Leave a Comment