
I’ve been making this short ribs recipe for years now, and let me tell you, it never gets old. There’s something magical about tossing everything into your crockpot in the morning and coming home to that incredible aroma filling your entire house. The meat literally falls off the bone! What I love most about this smoked beef short ribs recipe is how forgiving it is. You don’t need fancy skills or expensive equipment. Whether you’re trying a chinese short ribs recipe style with soy sauce and ginger, or going with a classic flanked short ribs recipe approach, the slow cooker does all the heavy lifting. I’ve even adapted it as a boneless short ribs recipe ovens version when I’m in a hurry. The secret? Good quality meat and patience. That’s it. This short beef ribs recipe transforms tough cuts into something spectacular. I serve mine over creamy mashed potatoes to soak up all that rich sauce, but honestly, you could eat these beef chuck short ribs recipes with just about anything. My kids beg for this meal at least twice a month, and I’m happy to oblige because prep takes maybe 15 minutes tops.
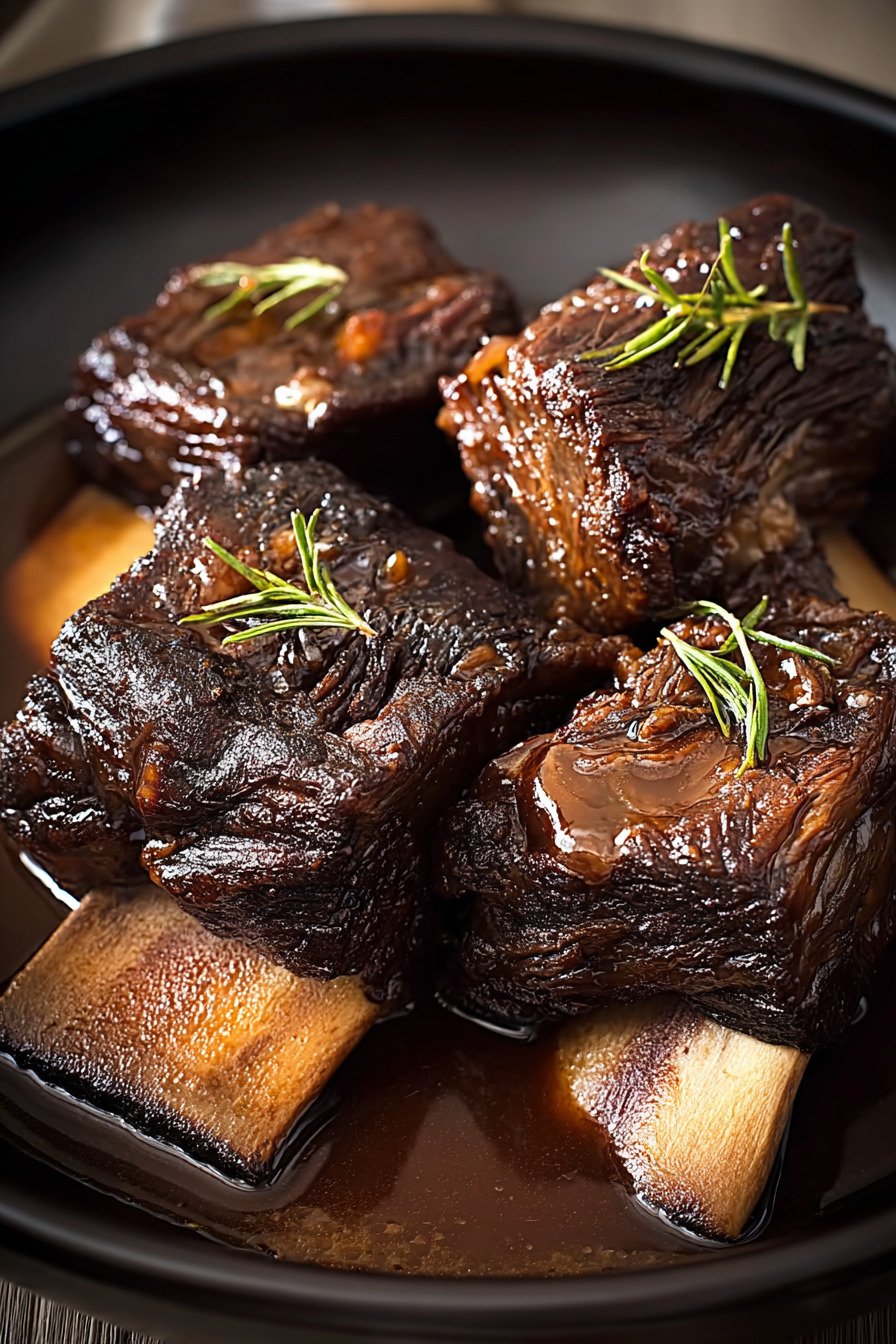
Table of Contents
- 1) Key Takeaways
- 2) Easy Crockpot Beef Short Ribs Recipe
- 3) Ingredients for Crockpot Beef Short Ribs
- 4) How to Make Crockpot Beef Short Ribs
- 5) Tips for Making Crockpot Beef Short Ribs
- 6) Making Crockpot Beef Short Ribs Ahead of Time
- 7) Storing Leftover Crockpot Beef Short Ribs
- 8) Try these Main Course next!
- 9) Crockpot Beef Short Ribs
- 10) Nutrition
1) Key Takeaways
- What cut of meat works best for crockpot short ribs?
- Do you need to brown short ribs before slow cooking?
- How long should beef short ribs cook in a crockpot?
- What liquid is best for braising short ribs?
- Can you make short ribs without wine?

2) Easy Crockpot Beef Short Ribs Recipe
Let me tell you something about this short ribs recipe that changed my weeknight dinners forever. I used to think making restaurant quality beef meant spending hours in the kitchen, but this crockpot method proved me completely wrong. You get tender, fall off the bone meat with maybe 20 minutes of active work. The rest? Your slow cooker handles it.
What makes this short ribs recipe so foolproof is the layering of flavors. We’re talking about that gorgeous caramelized crust from searing, mixed with aromatics that cook down into pure gold, all brought together with a rich braising liquid. I’ve tried countless smoked beef short ribs recipe variations over the years, and this simple approach beats them all. No fancy equipment needed, no complicated techniques. Just good ingredients and time.
The beauty of using your crockpot means you can prep everything the night before if you want. Stick it in the fridge, then dump it all in the slow cooker before work. Come home to the most incredible smell wafting through your house. My neighbor actually knocked on my door once asking what I was cooking because it smelled so good from the hallway! I’ve adapted this into a chinese short ribs recipe style with soy sauce and five spice, tried it as a flanked short ribs recipe with different cuts, and even made a boneless short ribs recipe ovens version when I couldn’t find bone in cuts.
Whether you call this a short beef ribs recipe or beef chuck short ribs recipes, the method stays the same. The crockpot does all the work, breaking down those tough connective tissues into silky, rich gelatin that makes the sauce absolutely luxurious. My kids, who normally turn their noses up at anything that looks remotely healthy, devour these ribs. They fight over who gets the biggest piece. That’s when you know you’ve got a winner.
3) Ingredients for Crockpot Beef Short Ribs
Bone In Beef Short Ribs
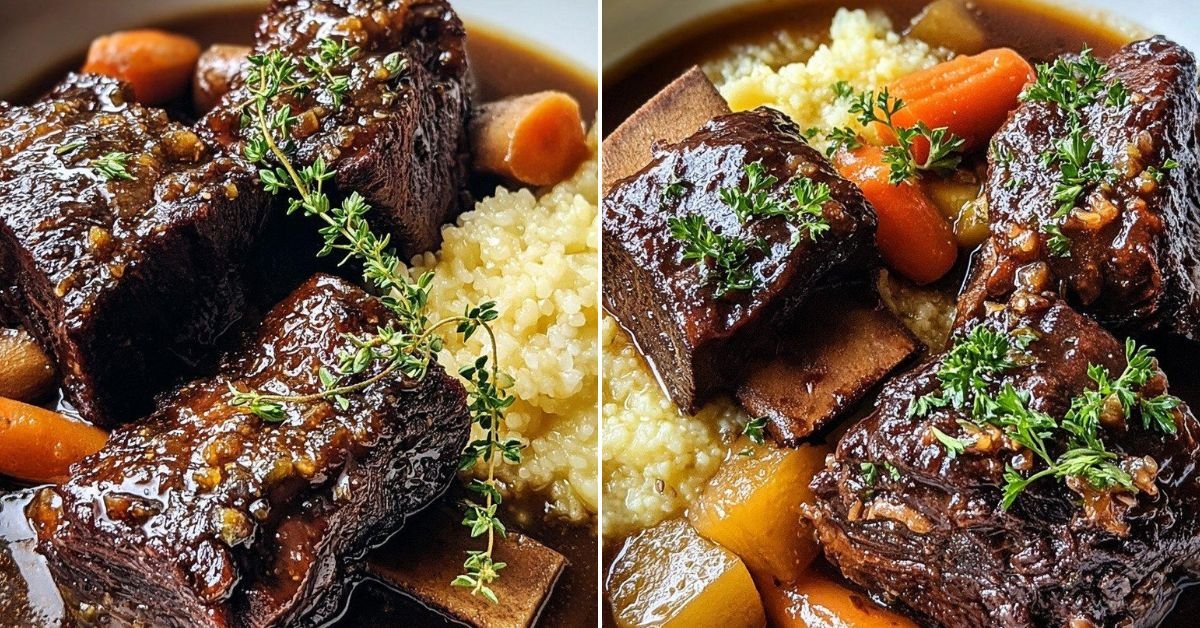
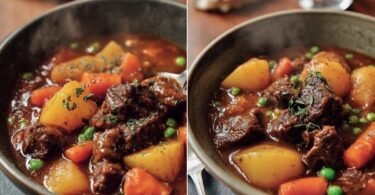
You’ll want 3 to 4 pounds of bone in beef short ribs for this recipe. Look for pieces that have good marbling throughout. That fat is what keeps everything moist and flavorful during the long cooking time. I prefer English cut ribs because they have more meat per bone, but flanken style works great too if that’s what your butcher has available. The bones add so much flavor to your braising liquid, plus they look impressive when you serve this dish. Don’t trim off all the fat! Leave some on there. It renders down and bastes the meat as it cooks. When shopping, press the meat gently. It should feel firm, not mushy. Fresh ribs have a deep red color without any gray spots.
Olive Oil
Two tablespoons of good olive oil gets everything started. You need this for searing the meat and building that flavorful crust. I use regular olive oil, not extra virgin, because we’re cooking at higher heat and you don’t want to waste the good stuff. The oil helps the seasoning stick to the meat and creates a barrier that locks in juices when you sear. Plus, it leaves behind those gorgeous browned bits in your pan that we’ll scrape up for extra flavor. Make sure your oil is hot before adding the meat. You should see it shimmer and move easily around the pan. If it’s smoking, it’s too hot. If the meat doesn’t sizzle when it hits the pan, it’s not hot enough.
Onion
One medium onion, chopped up nice, forms the flavor base. I usually go for yellow onions because they have the best balance of sweet and sharp, but white onions work fine too. Sweet onions like Vidalia are great if you want a mellower taste. Chop them into chunks about the size of your thumbnail. They’ll cook down and almost melt into the sauce. The natural sugars in onions caramelize during cooking, adding this deep, sweet complexity that balances out the rich beef. My secret? I don’t worry about perfect dice here. Rough chunks are fine since everything gets so tender anyway. Save your energy for the important stuff.
Garlic
Four cloves of garlic might seem like a lot, but trust me, you need them all. Garlic transforms during slow cooking, losing that sharp bite and turning sweet and mellow. I mince mine pretty fine so it distributes throughout the sauce. If you’re in a hurry, jarred minced garlic works, but fresh really is better here. The aroma when garlic hits hot oil is one of life’s simple pleasures. It tells your brain that something delicious is about to happen. Fun fact: garlic actually has natural compounds that help tenderize meat, so it’s not just about flavor. If you really love garlic like I do, throw in an extra clove or two. Nobody’s counting.
Beef Broth
Two cups of beef broth keep everything moist and add deep savory notes. I bounce between homemade and store bought depending on what I have around. If you make your own stock, this is the time to use it. The richer your broth, the better your final sauce will be. Store bought works perfectly fine though. Look for low sodium options so you can control the salt level yourself. Some brands are crazy salty. I’ve used bone broth here too, which adds even more body to the sauce. Whatever you choose, make sure it’s something you’d actually want to drink. If it tastes good on its own, it’ll taste great in your ribs.
Red Wine
One cup of dry red wine brings complexity and helps tenderize the meat. I usually grab a Cabernet Sauvignon or Merlot from the shelf. You don’t need anything expensive, but use something you’d drink with dinner. The alcohol cooks off, leaving behind fruity, tannic notes that complement the beef beautifully. Wine also contains acids that break down tough muscle fibers, making your ribs even more tender. If you don’t drink or don’t want to use wine, you can substitute extra beef broth with a splash of balsamic vinegar. Won’t be quite the same, but it still works. I always pour myself a glass while cooking. That’s the chef’s tax.
Tomato Paste
Three tablespoons of tomato paste might not sound like much, but this stuff is concentrated flavor. It adds body, richness, and a subtle tang that rounds everything out. Tomato paste also gives the sauce this gorgeous deep color. I buy the tubes instead of the cans because you can use exactly what you need and store the rest in the fridge. The concentrated tomatoes have natural glutamates that enhance the savory, meaty flavor of the dish. Some people skip this ingredient, but you’ll really notice it’s missing. It’s what takes the sauce from good to restaurant quality. Pro tip: if you have a little leftover paste, freeze it in ice cube trays for next time.
Dried Thyme
One teaspoon of dried thyme adds earthy, slightly floral notes that pair perfectly with beef. Thyme is one of those herbs that gets better with long cooking, releasing its oils slowly over time. Fresh thyme would be amazing here too if you have it. Just triple the amount since dried herbs are more concentrated. I keep dried thyme in my pantry specifically for dishes like this. It’s subtle enough that it won’t overpower the meat, but you’d miss it if it wasn’t there. The herb complements the wine and beef in a way that just makes sense. If your dried herbs are more than a year old, get fresh ones. They lose potency over time.
Dried Rosemary
One teaspoon of dried rosemary brings that classic, woodsy flavor. Rosemary is bold, so a little goes a long way. I actually prefer dried rosemary to fresh in this recipe because the needles soften during cooking. Fresh rosemary can stay tough and woody even after hours in the crockpot. Rosemary and beef are best friends. They were made for each other. The pine like aroma cuts through the richness of the meat and fat. If you only have fresh rosemary, use maybe half a tablespoon and tie it with kitchen string so you can fish it out later. The flavor will still be there, but you won’t be crunching on needles.
Salt and Pepper
One teaspoon each of salt and black pepper seasons the meat and builds flavor at every stage. I use kosher salt because it’s easier to control and doesn’t taste as harsh as table salt. Freshly ground black pepper makes a real difference. Pre ground pepper sits on the shelf forever and loses its punch. Season generously before searing. This is your chance to build flavor directly on the meat. Then taste your sauce at the end and adjust. Every broth is different, so you might need more or less depending on what you used. Don’t be scared of salt. Underseasoned food is sad food. Just add it gradually and taste as you go.
4) How to Make Crockpot Beef Short Ribs
Step 1: Season the Meat
Pull out your short ribs and pat them dry with paper towels. This step matters more than you’d think. Wet meat won’t brown properly, it’ll just steam. Once they’re dry, hit them with salt and pepper on all sides. I’m talking generous seasoning here. Some of it will fall off during cooking, and you want every bite to have flavor. Use your hands to really work that seasoning into the meat. Get it in all the nooks and crannies. If you’re feeling adventurous, you can season them up to 24 hours ahead and let them sit uncovered in the fridge. This dries out the surface even more and helps with browning. The seasoning also has time to penetrate deeper into the meat. Room temperature meat sears better than cold meat, so let them sit out for 20 minutes before cooking if you have time.
Step 2: Sear the Short Ribs
Heat that olive oil in your biggest skillet over medium high heat. You want it hot, really hot. When the oil starts to shimmer, carefully lay in your short ribs. Don’t crowd the pan! If you pile them all in at once, they’ll steam instead of sear. Work in batches if needed. Listen for that sizzle when meat hits pan. That’s the sound of flavor developing. Let each side go for about 3 to 4 minutes without moving them. I know it’s tempting to peek and fiddle, but resist. You want a deep brown crust, almost dark in some spots. That’s where all the good stuff happens. The Maillard reaction creates hundreds of new flavor compounds that make your short ribs taste incredible. Use tongs to turn them. A fork will poke holes and let juices escape. Once all sides are beautifully browned, move the ribs to a plate.
Step 3: Cook the Aromatics
Look at all those gorgeous browned bits stuck to your skillet. Don’t you dare wash that pan! That’s liquid gold. Toss your chopped onion right into the same hot skillet with all those drippings. The moisture from the onions will help loosen up all that stuck on goodness. Stir them around with a wooden spoon, scraping up every bit from the bottom. Let the onions cook for about 5 minutes until they start to soften and turn translucent. Their sharp bite mellows out and they start to caramelize. Then add your minced garlic. Cook for another minute or so until your kitchen smells absolutely amazing. Garlic burns easily, so watch it. You want it fragrant, not brown. All those flavors mixing together in the hot pan is building the foundation for your sauce. This step might seem quick, but it’s making a huge difference in your final dish.
Step 4: Transfer to Crockpot
Scrape every last bit of those cooked onions and garlic into your crockpot. Use a spatula to get it all. That fond stuck to the pan? We’re not wasting any of it. Arrange your seared short ribs on top of the onion mixture. You can stand them up on their sides or lay them flat, whatever fits. If you have multiple layers, that’s fine. They’ll all cook properly. The beauty of the crockpot is that everything gets tender regardless of position. I like to nestle them in there so they’re partially submerged but not completely covered. This way the tops stay a bit exposed and you get different textures. Some people like to deglaze the skillet with a splash of wine first and pour that in too. Extra flavor never hurt anyone.
Step 5: Mix and Add Liquids
Grab a bowl and mix together your beef broth, red wine, tomato paste, thyme, and rosemary. Whisk it up until that tomato paste fully dissolves. You don’t want clumps. This braising liquid is what’s going to transform those tough ribs into something magical. Pour it over and around the short ribs in your crockpot. The liquid should come about halfway up the meat. You don’t want them swimming, but you want enough liquid to create steam and keep everything moist. If your crockpot is larger or smaller than average, you might need to adjust. Just make sure there’s at least an inch of liquid in the bottom. The ribs will release their own juices as they cook too. Give everything a gentle stir to distribute the seasonings.
Step 6: Set It and Forget It
Pop the lid on your crockpot and set it to low. This is where patience pays off. Let those ribs cook for 6 to 8 hours. I usually start mine in the morning before work and they’re perfect by dinner time. If you’re in more of a hurry, you can cook on high for 4 to 5 hours instead. The low and slow method gives you more tender results though. The meat has time to really break down and absorb all those flavors. Don’t keep lifting the lid to check on them! Every time you peek, you let out heat and add 15 minutes to your cooking time. Trust the process. Your house is going to smell incredible. Neighbors might start knocking on your door. Just warning you now.
Step 7: Check for Doneness
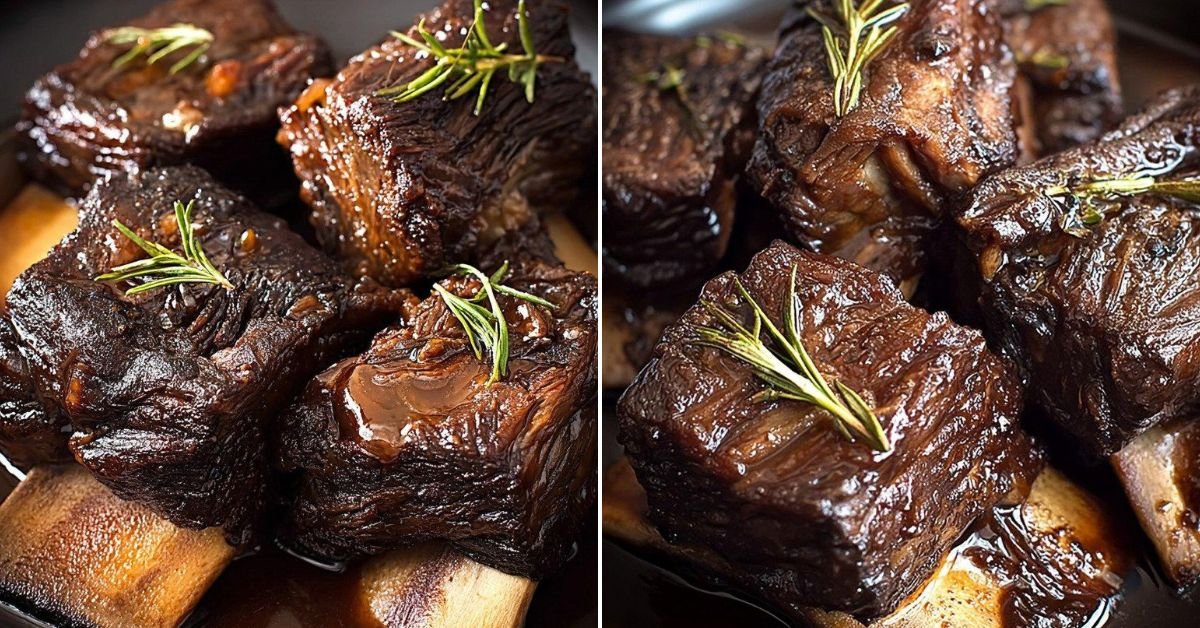
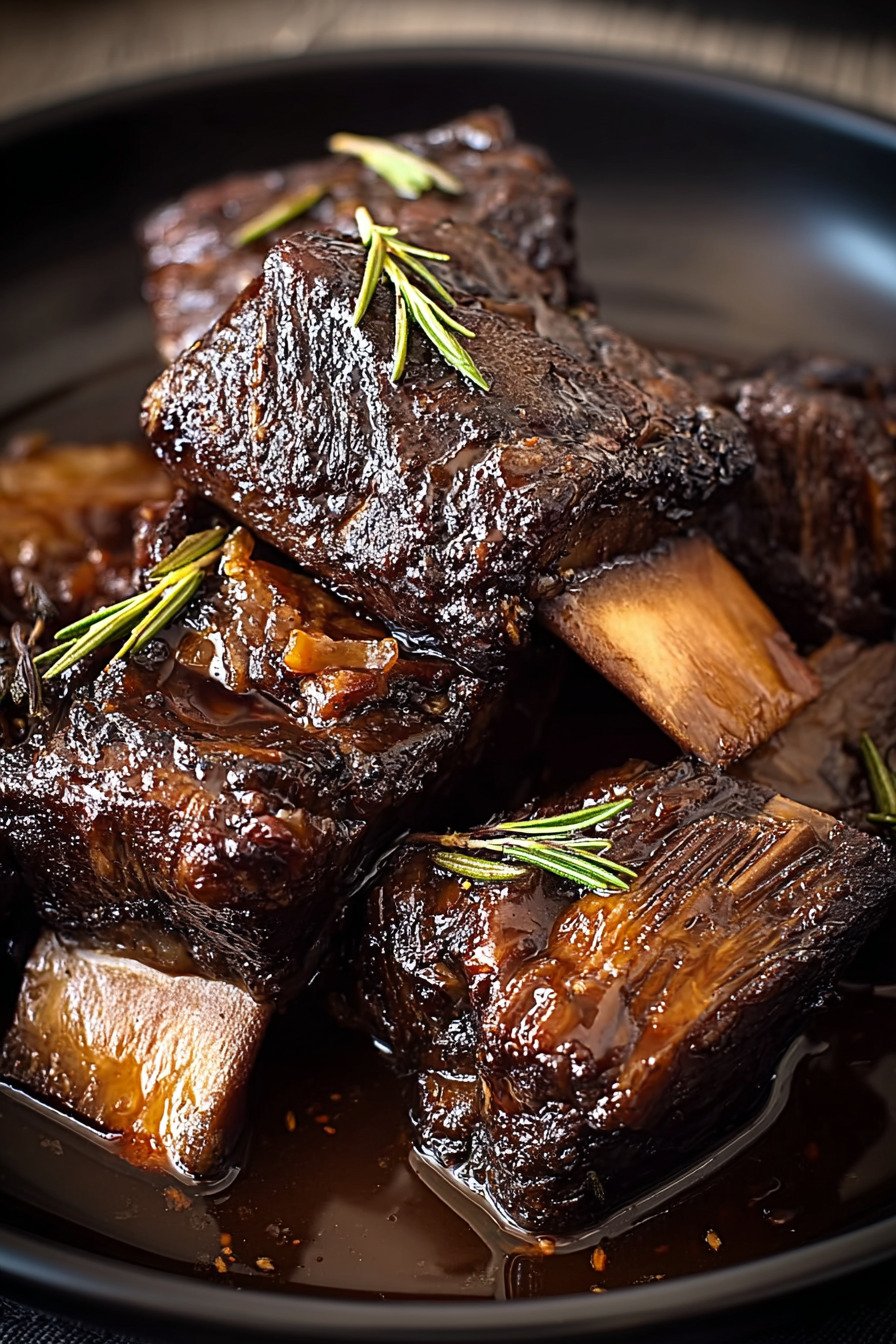
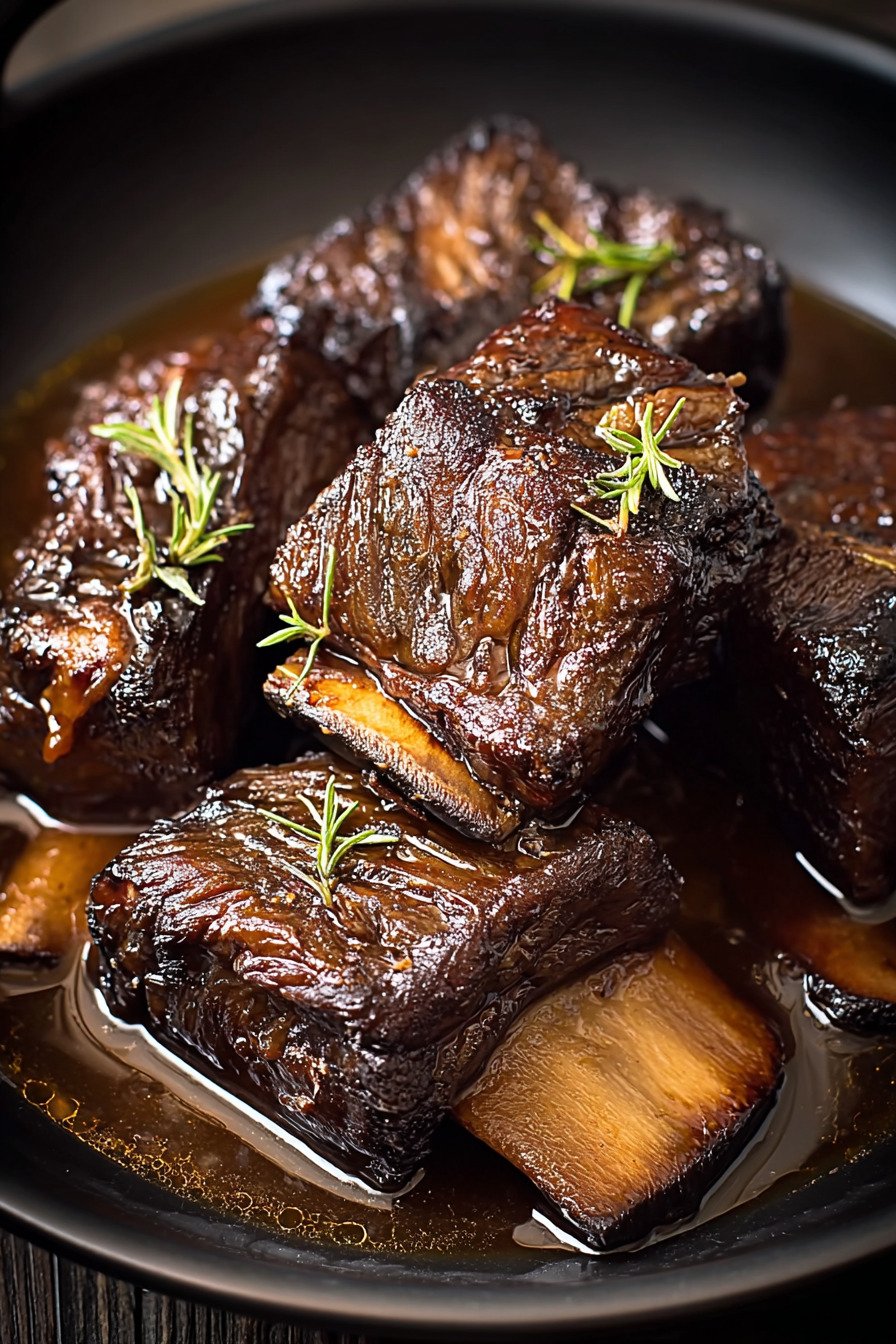
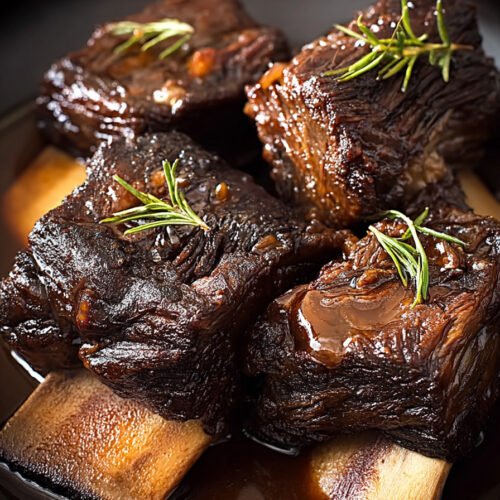
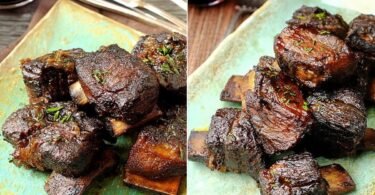
After 6 hours on low, carefully lift the lid and check your ribs. The meat should be so tender it’s practically falling off the bone. Poke it with a fork. If the fork slides in with zero resistance, you’re done. If there’s still some firmness, give it another hour and check again. The bones might actually slip right out when you try to serve them. That’s perfect. Some of the fat will have rendered into the sauce, making it rich and silky. If your sauce seems thin, you can leave the lid off for the last 30 minutes to let it reduce and thicken. Or fish out the ribs and pour the sauce into a pot. Simmer it on the stove for 10 minutes until it coats the back of a spoon. That concentrated sauce is restaurant quality.
Step 8: Rest and Serve
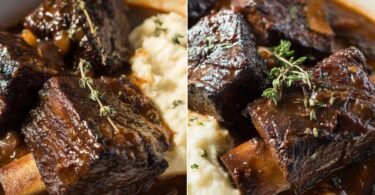
Turn off your crockpot and let those ribs rest for about 10 minutes before serving. This gives the juices time to redistribute back into the meat instead of running all over your plate. Use a slotted spoon or tongs to carefully transfer the ribs to a serving platter. They’ll be so tender they might try to fall apart on you. That’s okay! Falling apart ribs are a sign of success. Spoon that gorgeous braising liquid over the top. If you want to get fancy, strain the sauce through a fine mesh strainer to remove the onion bits and herbs. Or leave it rustic and chunky. Both ways are delicious. Garnish with some fresh parsley if you have it. Serve these bad boys over mashed potatoes, creamy polenta, or buttery egg noodles. Something that can soak up all that incredible sauce. Watch people’s faces light up when they take their first bite.
5) Tips for Making Crockpot Beef Short Ribs
Choose Quality Meat
The quality of your short ribs makes or breaks this dish. Look for well marbled pieces with plenty of meat on the bone. Talk to your butcher. Tell them you’re braising and ask what they recommend. They’ll steer you toward the best cuts. Grass fed beef has great flavor, but it can be leaner. You might want conventional beef here because that extra fat keeps things juicy. Check the color. Fresh beef should be bright red, not brown or gray. Smell it too. Fresh meat smells clean and slightly metallic, not sour or off. If your store only has frozen short ribs, that’s fine. Just thaw them completely in the fridge for 24 hours before cooking. Pat them extra dry before seasoning.
Don’t Skip the Searing
I know the temptation to skip searing is real. You’re using a crockpot specifically to save time, right? But please, don’t skip this step. Those 15 minutes of work make a massive difference in flavor. Searing creates a crust packed with complex, savory flavors you can’t get any other way. It adds depth and richness to your final dish. Think of it as building layers of flavor. The fond left in your pan after searing becomes part of your sauce. All those browned bits dissolve into the braising liquid and make it taste amazing. If you really can’t sear, you can still make the recipe. It just won’t be quite as good. Your sauce will be lighter in color and missing some depth. But sometimes life is busy and shortcuts happen.
Watch Your Liquid Levels
Getting the right amount of liquid is key. Too much and you’re basically boiling your meat, which makes it tough. Too little and things dry out and burn. You want about halfway up the ribs. The steam does most of the work, not the liquid itself. Different crockpots cook at different temperatures and evaporate at different rates. Check your ribs about an hour before they’re done. If the liquid level looks low, add a splash of broth or water. If it looks like soup, take the lid off for the last hour to let some evaporate. The goal is a rich, slightly thickened sauce at the end. Not watery, not paste. Somewhere in between. You’ll get a feel for your particular crockpot after making this once or twice.
Let Fat Work For You
Some people freak out about the fat on short ribs and want to trim it all off. Don’t do that. Fat equals flavor and moisture. During the long cooking time, that fat renders down and bastes the meat from the inside. It’s self basting. Magic. The fat also adds body to your sauce, making it silky and rich instead of thin and watery. Now, you might have a layer of fat floating on top of your finished sauce. That’s normal. You can skim most of it off with a spoon before serving if it bothers you. Or here’s a cool trick: make the ribs a day ahead, refrigerate overnight, and the fat solidifies on top. Just lift it off and toss it. Then reheat the ribs in the sauce. They’ll actually taste better the next day anyway as the flavors meld together.
Adjust Cooking Time for Your Schedule
The beauty of crockpot cooking is flexibility, but you need to understand how your specific model works. Some run hot, some run cool. My old crockpot took a full 8 hours on low. My new one finishes in 6. Start checking at the minimum time. You can always cook longer, but you can’t uncook overcooked meat. If you need them done faster, use the high setting. Just know that low and slow gives you the most tender results. The meat has more time to break down. If you’re leaving for work and won’t be home for 9 or 10 hours, set it on low and don’t worry. Short ribs are forgiving. An extra hour won’t ruin them. Some fancy crockpots have a warm setting that kicks in automatically. Super handy for busy schedules.
Layer Your Flavors
This recipe has multiple opportunities to add flavor, so take advantage of them. Season the meat before searing. That’s layer one. The searing creates new flavors through browning. Layer two. Cooking the aromatics in the fond adds more. Layer three. The braising liquid infuses everything as it cooks. Layer four. See how it builds? You can add even more layers if you want. A tablespoon of balsamic vinegar at the end brightens everything up. A teaspoon of Dijon mustard adds subtle tang. Some people throw in a strip of orange peel for a French inspired twist. A dash of soy sauce deepens the savory notes. Fresh herbs stirred in right before serving wake up the flavors. Don’t go crazy and add everything at once. Pick one or two extras and see how you like them.
6) Making Crockpot Beef Short Ribs Ahead of Time
One of my favorite things about this short ribs recipe is how well it works for meal prep and entertaining. You can actually break this into stages and spread the work across multiple days. Makes life so much easier. If I’m having people over, I’ll sear the meat and cook the aromatics the day before. Let everything cool completely, then store the seared ribs and the onion mixture separately in the fridge overnight. Next morning, I dump it all in the crockpot with the liquids before heading out. Come home to a finished meal with zero stress. The flavors actually improve when the meat sits in the braising liquid overnight.
You can go even further and make the entire dish start to finish a day or two ahead. Let the cooked ribs cool in their sauce, then refrigerate the whole thing. This makes it super easy to skim off any excess fat that solidifies on top. When you’re ready to eat, gently reheat everything in the crockpot on low for an hour or two until heated through. Or transfer to a pot on the stove and warm it up that way for more control. The ribs might be even more tender after sitting overnight as they continue to absorb flavor from the sauce. I’ve made these three days ahead for a dinner party and they were phenomenal.
If you want to prep the ingredients without cooking, you can season the ribs the night before and leave them uncovered in the fridge. This dries out the surface and helps them brown better. Chop your onions and garlic, measure out your liquids and seasonings. Store everything in containers so all you have to do is sear and assemble in the morning. Takes 15 minutes max. The actual searing can’t be done too far ahead because those browned surfaces will get soggy sitting overnight. But everything else? Fair game. This kind of planning makes weeknight cooking actually doable instead of stressful. Future you will thank present you.
For the absolute best results, I sometimes do this: make the ribs completely, let them cool, then separate the meat from the sauce. Shred or chop the meat if you want. Store the meat and sauce in separate containers. Skim the fat off the sauce. When serving, reheat the sauce on the stove until it reduces slightly and thickens. Add the meat back in just to warm through. This method gives you more control over the consistency of your sauce. You can make it as thick or thin as you like. The meat stays tender instead of potentially overcooking during reheating. Restaurant chefs do this all the time. Might seem fussy for home cooking, but the results are worth it if you’re trying to impress someone.
7) Storing Leftover Crockpot Beef Short Ribs
Leftover short ribs are almost better than fresh ones, if you can believe it. All those flavors have time to marry together overnight. The meat gets even more tender somehow. Store your leftovers in an airtight container with plenty of that braising liquid. Don’t drain it off. That sauce is gold. The liquid keeps the meat from drying out and adds so much flavor when you reheat. You can store everything together in one big container, or portion it out into individual servings. Individual portions are great for quick lunches. Just grab one and go. Make sure your containers seal well. You don’t want that garlic and onion smell permeating your whole fridge.
Properly stored short ribs will last 3 to 4 days in the refrigerator. Check them before eating. If they smell off or look slimy, toss them. Better safe than sorry. To reheat, you have options. Microwave works in a pinch, but it can dry out the meat. Better to reheat gently on the stove in a covered pot over low heat until warmed through. Add a splash of broth if things look dry. Or reheat in a covered dish in a 300 degree oven for 20 minutes. The oven method is my favorite for maintaining texture. If the sauce has thickened up too much in the fridge, thin it out with a little water or broth. It should pour easily, not glob.
Freezing short ribs works great if you want to keep them longer. Let everything cool completely first. Divide into portions that make sense for your household. I usually do 2 or 3 servings per container since that’s perfect for my family. Leave about half an inch of space at the top of your container. Liquids expand when frozen and you don’t want lids popping off or containers cracking. Label everything with the date. Frozen short ribs stay good for up to 3 months. Beyond that they’re still safe but the quality starts to decline. Freezer burn becomes an issue if containers aren’t truly airtight.
Thawing is easy. Move your container from freezer to fridge the night before you want to eat. Let it thaw slowly in the cold. Never thaw meat on the counter at room temperature. That’s asking for bacteria problems. If you forget to thaw ahead, you can reheat from frozen. Just add extra time. Put the frozen block of ribs in a pot with a lid and heat on low. It’ll take maybe 30 minutes to break apart and heat through. Stir occasionally to help it along. You can also thaw in the microwave using the defrost setting, but that risks cooking the edges while the center stays frozen. Slow and steady wins the race here. The texture and flavor hold up remarkably well after freezing, so don’t be scared to double the recipe and stash some away for later.
8) Try these Main Course next!
9) Crockpot Beef Short Ribs
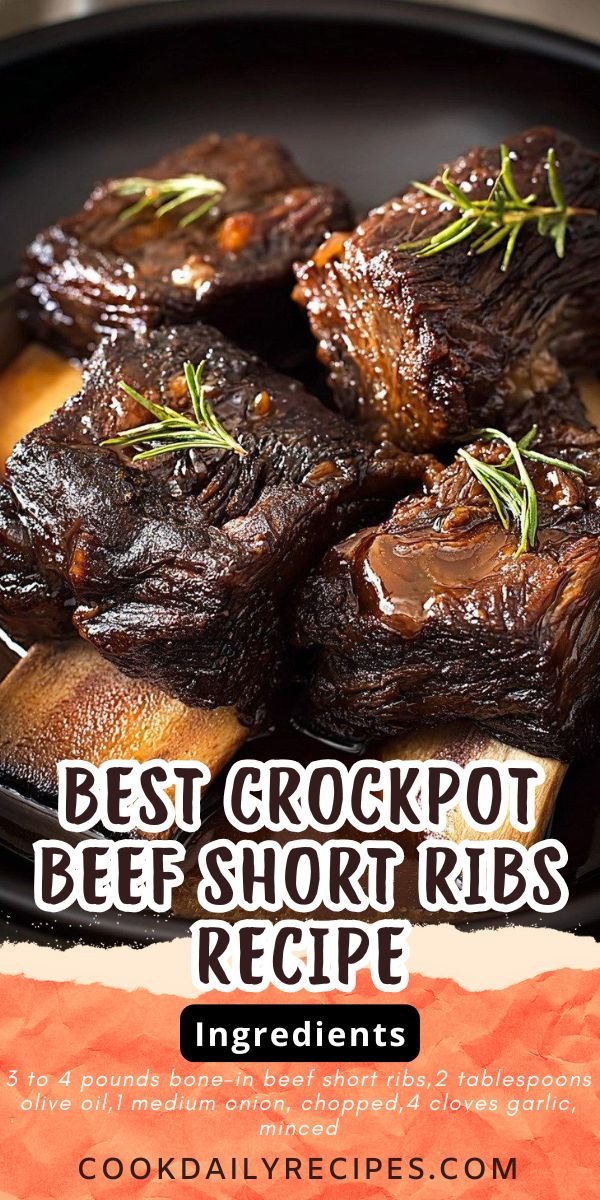
Best Crockpot Beef Short Ribs Recipe
Ingredients
- 3 to 4 pounds bone-in beef short ribs
- 2 tablespoons olive oil
- 1 medium onion, chopped
- 4 cloves garlic, minced
- 2 cups beef broth
- 1 cup dry red wine (like Cabernet Sauvignon)
- 3 tablespoons tomato paste
- 1 teaspoon dried thyme
- 1 teaspoon dried rosemary
- 1 teaspoon salt
- 1 teaspoon black pepper
Instructions
- Heat olive oil in a large skillet over medium high heat. Season your short ribs generously with salt and pepper on all sides.
- Sear the ribs in batches if needed, about 3 to 4 minutes per side until you get a nice brown crust. Don’t skip this step! It adds so much flavor.
- Remove the seared ribs and set them aside on a plate. In the same skillet, toss in your chopped onion and minced garlic. Cook for about 5 minutes until they smell amazing and get soft.
- Scrape all those browned bits from the bottom of your skillet and transfer the onion mixture into your crockpot.
- Place the seared short ribs on top of the onions in your crockpot.
- Mix together the beef broth, red wine, tomato paste, thyme, and rosemary in a bowl. Pour this mixture over the ribs.
- Cover and cook on low for 6 to 8 hours, or on high for 4 to 5 hours. You’ll know they’re ready when the meat is falling off the bone tender.
- Let the ribs rest for about 10 minutes before serving. This helps all those juices redistribute back into the meat.
- Serve over mashed potatoes, polenta, or with crusty bread to soak up that incredible sauce.
10) Nutrition
Serving Size: 1 serving (about 8 oz meat with sauce), Calories: 450, Sugar: 3.2 g, Sodium: 680 mg, Fat: 30 g, Saturated Fat: 12 g, Carbohydrates: 10 g, Fiber: 1.5 g, Protein: 40 g, Cholesterol: 115 mg


Leave a Comment