
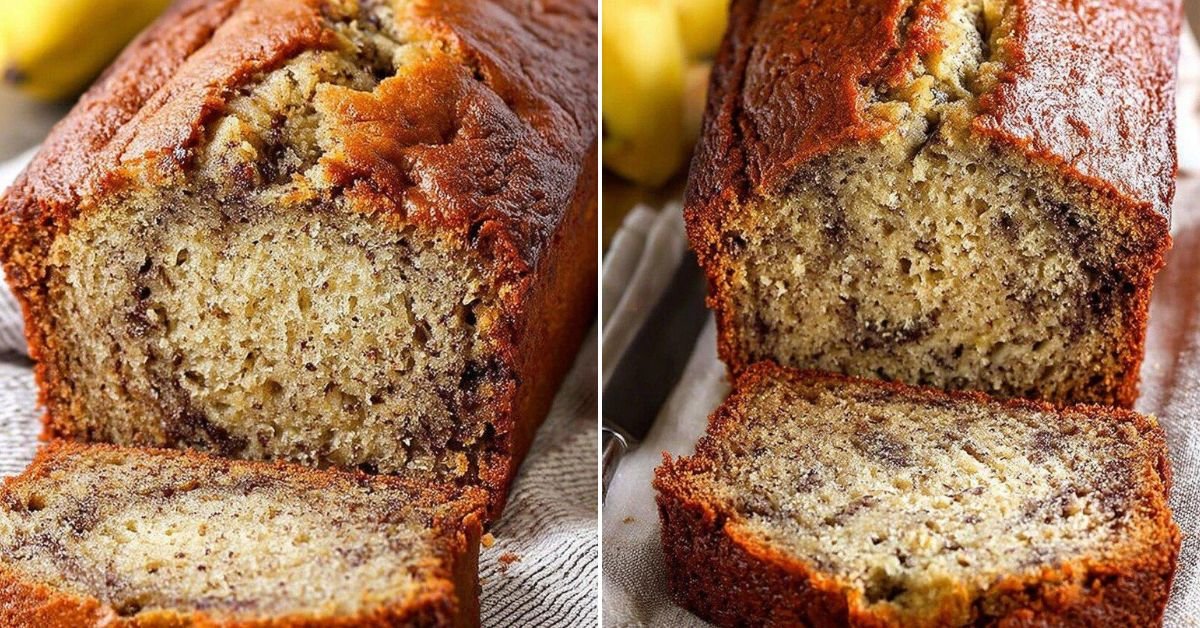
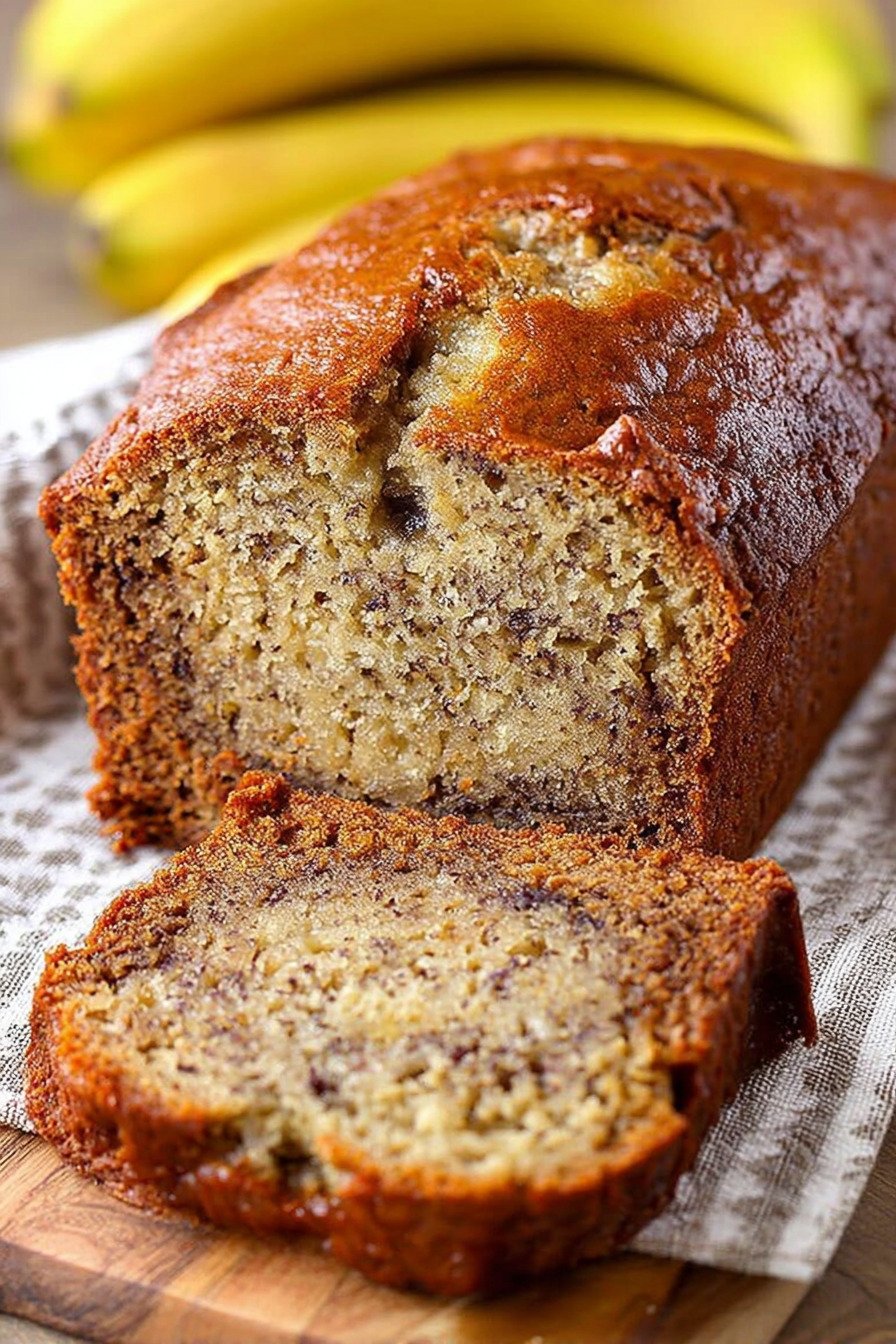
Let me tell you about my absolute favorite way to rescue those sad, brown bananas sitting on your counter. You know the ones I’m talking about? They’ve been sitting there for days, getting spottier by the hour, and you keep walking past them thinking, ‘I should do something with those.’ Well, today’s the day! This banana bread recipe is what I turn to every single time. I’ve tried dozens of banana bread recipes over the years, from 3 ingredient banana bread recipe versions to fancy banana bread with coconut flour experiments. But this 4 banana bread recipe easy method? It’s the one that stuck. We’re talking seriously tender crumb, that perfect golden crust, and the kind of banana flavor that makes people ask for seconds. It beats any best homemade bread you’ll find at the bakery, trust me. What I love most is how simple it is. No fancy mixers, no complicated techniques. Just grab a bowl, mash some bananas, and you’re halfway there. It’s one of those baking bread recipes that makes you feel like a kitchen genius even when you’re still in your pajamas. The bread dough recipe comes together so fast, you’ll wonder why you haven’t been making this every week. Perfect with coffee, amazing as an afternoon snack, or honestly? Just eaten straight from the pan at midnight. Not that I’ve done that or anything.
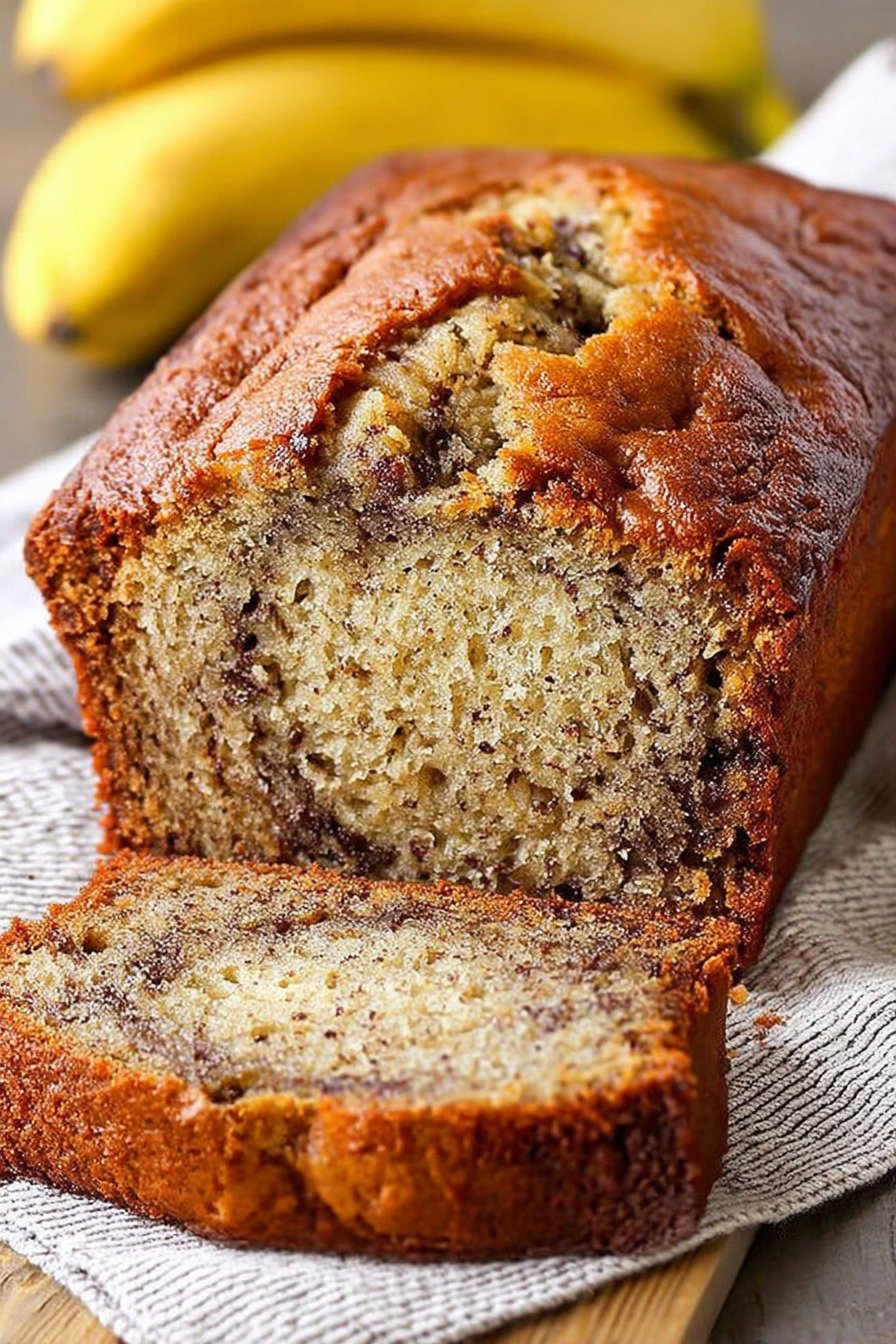
Table of Contents
- 1) Key Takeaways
- 2) Easy Classic Moist Banana Bread Recipe
- 3) Ingredients for Classic Moist Banana Bread
- 4) How to Make Classic Moist Banana Bread
- 5) Tips for Making Classic Moist Banana Bread
- 6) Making Classic Moist Banana Bread Ahead of Time
- 7) Storing Leftover Classic Moist Banana Bread
- 8) Try these Desserts next!
- 9) Classic Moist Banana Bread
- 10) Nutrition
1) Key Takeaways
- What makes banana bread super tender and flavorful?
- Can you freeze banana bread for later?
- What’s the secret to getting that perfect golden crust?
- How ripe should bananas be for the best banana bread recipe?
2) Easy Classic Moist Banana Bread Recipe
I’m Linda from Cook Daily Recipe, and let me tell you something about this banana bread recipe. It’s been my kitchen savior for years now. Every time I see those bananas getting too spotty on my counter, I get excited instead of guilty. Why? This recipe turns them into pure magic.
What makes this banana bread recipe so special is how it stays soft for days. I’m talking genuinely tender, not that dry, crumbly stuff you sometimes get from bakeries. The texture is just right. Not too dense, not too fluffy. It slices clean but still feels like a treat when you bite into it. And the flavor? Rich banana taste in every single bite.
I’ve tested this 4 banana bread recipe easy method against fancier versions. I’ve tried the 3 ingredient banana bread recipe that everyone raves about online. I even went through a phase where I attempted banana bread with coconut flour because I thought I needed to be healthier. Guess what? I always come back to this one. It’s hands down the best homemade bread for banana lovers.
This recipe wins because it’s foolproof. You don’t need any special equipment. No stand mixer required. Just a bowl, a fork, and a little bit of arm work. It’s one of those baking bread recipes that makes beginners feel like pros. The bread dough recipe is so forgiving that even if you mess up a little, it still comes out delicious.
I make this at least twice a month at my house. Sometimes I add chocolate chips. Other times I throw in some walnuts for crunch. My kids devour it for breakfast with a smear of butter. My husband sneaks slices at midnight. I take it to potlucks and people always ask for the recipe. That’s when you know you’ve got a winner.
The best part? You probably have everything you need already sitting in your pantry. Flour, sugar, butter, eggs. The only thing you might need to pick up is bananas, but honestly, if you buy bananas regularly, you always have some that are past their prime. Those are the ones you want. The blacker, the better. Trust me on this.
Making bread at home sounds intimidating to some people. They think it takes too much time or requires too much skill. Not this one. From start to finish, you’re looking at about an hour and five minutes, and most of that is just oven time. The actual hands-on work? Maybe ten minutes. That’s less time than it takes to drive to a bakery and back.
3) Ingredients for Classic Moist Banana Bread
Ripe Bananas: You need three bananas for this banana bread recipe, and I can’t stress this enough. They need to be really, really ripe. I’m talking brown spots all over. Black is even better. When bananas get that ripe, their starches convert to sugars, which means more flavor and natural sweetness. Don’t even think about using those firm yellow ones. They won’t mash properly and your bread will taste bland. If your bananas aren’t ripe yet, throw them in a paper bag for a day or two. Or if you’re impatient like me, bake them in their skins at 300°F for about 15 minutes until they turn black.
Melted Butter: Half a cup of good quality butter makes all the difference. I use unsalted butter so I can control the salt level myself. Melt it in the microwave or on the stove, but let it cool for a few minutes before adding it to your bananas. If it’s too hot, it might start cooking your egg when you mix everything together. Butter gives this bread that rich, tender crumb that makes people come back for seconds. You could use oil instead, but butter tastes better. Plain and simple.
Sugar: Three-quarters of a cup of white granulated sugar sweetens everything up just right. Some people try to cut the sugar down, and I get it. We all want to be healthier. But sugar does more than just sweeten. It helps create that beautiful golden crust and keeps the bread tender. If you really want to reduce it, don’t go below half a cup or your bread will be too bland. You could also try half white sugar and half brown sugar for a deeper, more caramel-like flavor. I do that sometimes when I’m feeling fancy.
Egg: One large egg, beaten before you add it in. The egg acts as a binder, holding everything together. It gives structure to the bread and helps it rise a little. Room temperature eggs work better than cold ones straight from the fridge. They mix into the batter more evenly. If you forget to take your egg out ahead of time, just put it in a bowl of warm water for five minutes. Problem solved. For a vegan version, you can use a flax egg, but I haven’t personally tested that in this recipe.
Vanilla Extract: One teaspoon of pure vanilla extract adds so much depth to the flavor. Don’t skip this. Some people think vanilla is just for cookies or cakes, but it makes a huge difference in banana bread too. It rounds out all the other flavors and makes everything taste more complete. I always use pure vanilla extract, not the imitation stuff. The real thing costs more, but you can taste the difference. If you want to get really creative, try using vanilla bean paste instead. It has those little black flecks that look so pretty.
Baking Soda: One teaspoon is what you need to make this bread rise and get fluffy. Baking soda reacts with the acidity in the bananas and creates carbon dioxide bubbles. Those bubbles make the bread light and airy. Make sure your baking soda is fresh. If it’s been sitting in your cupboard for years, it might not work as well. To test it, drop a little in some vinegar. If it fizzes up immediately, you’re good to go. No fizz? Time to buy a new box.
Salt: Just a pinch, but don’t leave it out. Salt brings out all the other flavors. It balances the sweetness and makes the banana flavor pop. I use fine sea salt, but regular table salt works fine too. If you’re using salted butter instead of unsalted, you might want to cut back on the added salt just a tiny bit. But honestly, a pinch is so small that it probably won’t make much difference either way.
All-Purpose Flour: One and a half cups of good old all-purpose flour. This is the backbone of the bread. It gives structure and holds everything together. I always measure flour by spooning it into my measuring cup and leveling it off with a knife. If you scoop directly from the bag, you’ll pack too much flour in and your bread will be dry. Some people like to use whole wheat flour for half the amount to make it healthier. That works okay, but the texture won’t be quite as tender. Stick with all-purpose for the classic version.
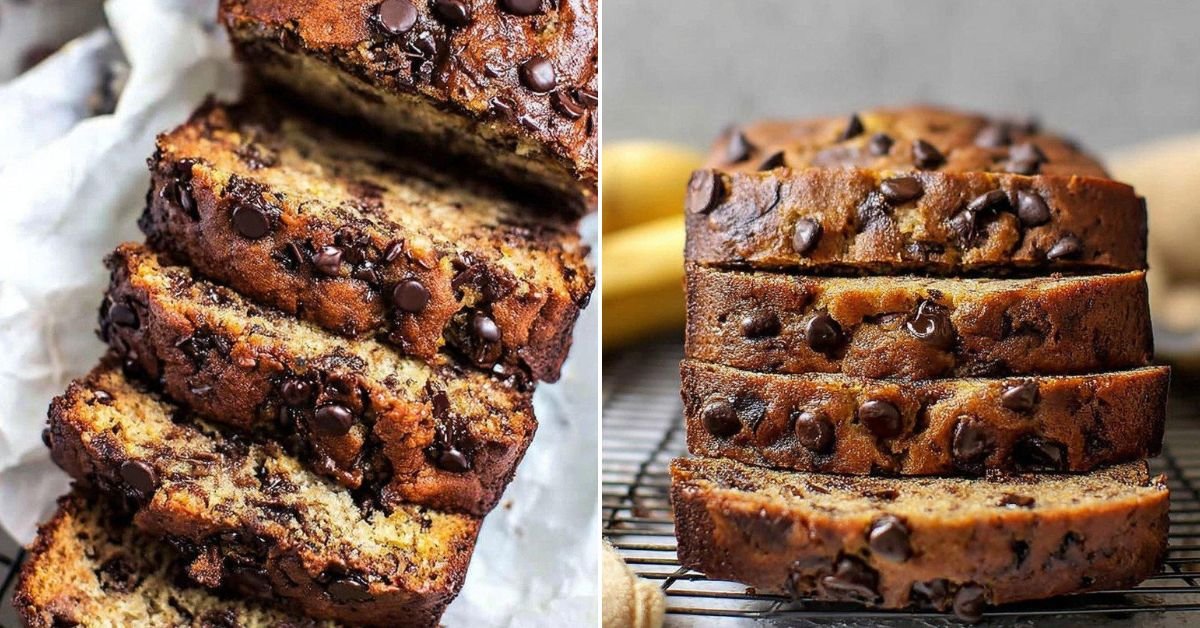
Optional Add-Ins: Half a cup of chopped walnuts or chocolate chips can take this bread to the next level. Walnuts add a nice crunch and a slightly earthy flavor that pairs beautifully with banana. Chocolate chips? Come on. Chocolate and banana are one of the best flavor combinations ever. I usually go with semi-sweet chocolate chips, but dark chocolate works great too if you like things less sweet. You could also try pecans, dried cranberries, or even a swirl of Nutella. Get creative. This recipe is your canvas.
4) How to Make Classic Moist Banana Bread
Step 1: Start by heating your oven to 350°F. This temperature is perfect for banana bread. Not too hot, not too cool. While the oven is warming up, grab your 9×5 inch loaf pan. You can grease it with butter or cooking spray. I prefer lining mine with parchment paper because cleanup is so much easier. Just cut a strip that covers the bottom and goes up the two long sides. Leave some overhang so you can lift the bread out easily later.
Step 2: Peel those brown bananas and drop them into a large mixing bowl. Use a fork to mash them up really well. I mash mine until they’re almost completely smooth with just a few small lumps. The smoother your bananas, the more evenly distributed the flavor will be. Some people like to leave bigger chunks, and that’s fine too if you want a more rustic texture. Just make sure there are no huge pieces that won’t blend in.
Step 3: Pour your melted butter right into the bowl with the mashed bananas. Stir it around with your fork or a wooden spoon until everything looks combined. The butter should coat all the banana pieces. At this point, your kitchen is going to start smelling amazing. There’s something about the smell of butter and banana together that just makes you happy. Take a moment to appreciate it.
Step 4: Now add the sugar, beaten egg, and vanilla extract to your bowl. Mix everything together until it looks like one uniform mixture. Don’t worry about overmixing at this stage. You can stir pretty vigorously here. The mixture should be smooth and slightly glossy. It might look a little thin, and that’s okay. The flour will thicken it up in the next step.
Step 5: Sprinkle the baking soda and salt right over the top of your wet mixture. Give it a quick stir to incorporate them. Some recipes tell you to mix all your dry ingredients in a separate bowl first, but I think that’s unnecessary extra work and another dish to wash. Sprinkling them on top works just fine. You’ll see the baking soda start to react with the acidity in the bananas. That’s what you want.
Step 6: Time to add the flour. Dump it all in at once. Now here’s where you need to be gentle. Use a spatula or wooden spoon to fold the flour into the wet ingredients. Fold gently until you can’t see any more dry flour. Stop mixing as soon as everything is combined. Overmixing develops the gluten in the flour, which makes your bread tough and dense. We want tender bread, so be kind to your batter. A few small lumps are perfectly fine.
Step 7: If you’re adding walnuts or chocolate chips, fold them in now. Just a few gentle stirs to distribute them throughout the batter. Don’t go crazy. You want them evenly spread but you don’t want to overmix the batter. I like to save a few chocolate chips to sprinkle on top before baking. They look pretty and give you little pockets of melted chocolate on the crust.
Step 8: Pour your batter into the prepared loaf pan. Use your spatula to spread it out evenly and smooth the top. The batter will be pretty thick. That’s good. If you added those extra chocolate chips, sprinkle them on top now. Give the pan a gentle tap on the counter to release any air bubbles. Then pop it right into your preheated oven.
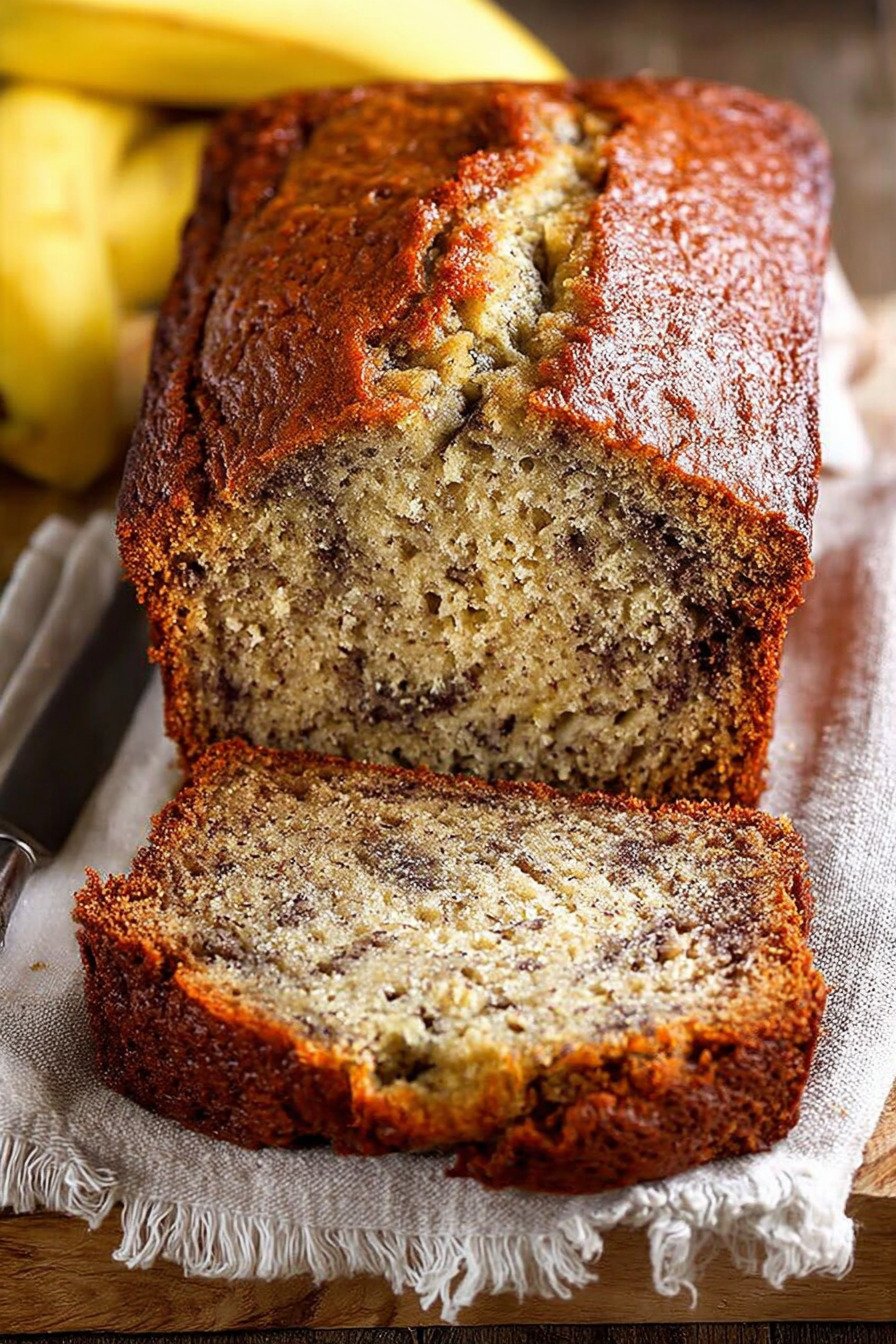
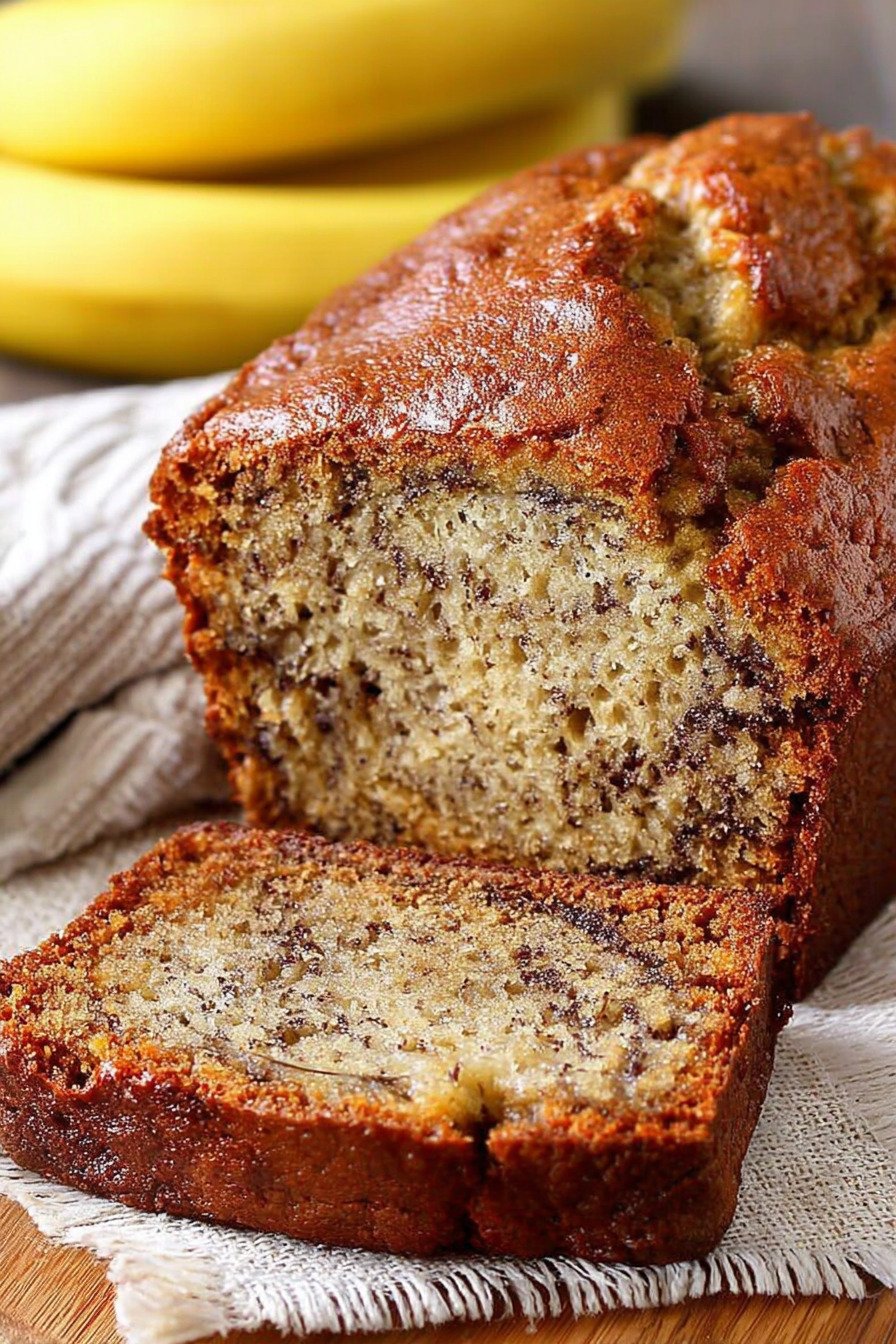
Step 9: Bake for 50 to 60 minutes. Every oven is different, so start checking at 50 minutes. Grab a toothpick or a thin knife and poke it into the center of the loaf. If it comes out clean or with just a few moist crumbs, your bread is done. If there’s wet batter on it, give it another five minutes and check again. The top should be golden brown and might have a crack down the middle. That crack is totally normal and looks beautiful.
Step 10: When your bread is done, take it out of the oven and set the pan on a wire rack. Let it cool in the pan for about 10 minutes. This cooling time lets the bread set up so it won’t fall apart when you remove it. After 10 minutes, use the parchment paper overhang to lift the bread out of the pan. Transfer it to the wire rack to cool completely. I know it’s tempting to cut into it right away. The smell is incredible. But warm bread is harder to slice cleanly. If you can wait until it’s at least lukewarm, you’ll get much nicer slices.
5) Tips for Making Classic Moist Banana Bread
Let’s talk about banana ripeness again, since it’s so critical. The single biggest mistake people make with this banana bread recipe is using bananas that aren’t ripe enough. I see it all the time. Someone gets excited to bake and grabs whatever bananas they have, even if they’re still mostly yellow. Those bananas haven’t developed enough sugar yet. Your bread will taste bland and might not even be sweet enough.
You want bananas that are so ripe you’d be embarrassed to eat them plain. Brown spots covering at least half the peel. Better yet, almost entirely brown or black. Those bananas are perfection for baking. They mash easily, they’re super sweet, and they give your bread the most intense banana flavor. If you buy bananas specifically for baking, get them about five days ahead and let them sit on your counter. Don’t put them in the fridge. That stops the ripening process.
Here’s a trick I learned from my grandma. If you need ripe bananas fast, put unpeeled bananas on a baking sheet and bake them at 300°F for 15 to 20 minutes. The peels will turn completely black. Let them cool, then peel and use them just like naturally ripened bananas. The texture is slightly different, but the flavor is great and it works in a pinch. I’ve done this many times when I promised my kids banana bread but forgot to save ripe bananas.
Measuring flour correctly makes a huge difference in how your bread turns out. Too much flour and you’ll get dry, dense bread. Too little and it might not set up properly. The best way to measure flour is to fluff it up in its container first with a spoon. Then spoon it into your measuring cup. Level it off with a knife. Don’t pack it down. Don’t shake the cup. Just spoon and level. This gives you the right amount every time.
If you have a kitchen scale, even better. One and a half cups of all-purpose flour weighs about 180 grams. Weighing is the most accurate method. I started weighing my flour a few years ago and my baking has been so much more consistent since then. It takes out all the guesswork. You can pick up a decent kitchen scale for like fifteen dollars. Worth every penny.
Don’t skip the step of letting the batter rest for a minute before pouring it into the pan. I’m not talking about a long rest. Just a minute or two after you finish mixing. This gives the flour time to absorb some of the liquid. The batter will thicken up slightly and your bread will have a better texture. I learned this tip from a professional baker friend and it really does make a difference.
Oven temperature accuracy is another thing people don’t think about. Most home ovens run a little hot or a little cool. If your banana bread always comes out too dark on top or too dry, your oven might be running hot. If it never seems to cook through in the time listed, your oven might be running cool. You can buy an oven thermometer for about ten bucks. Hang it inside your oven and check what temperature it’s actually reaching. Then adjust your baking temperature up or down as needed.
The toothpick test is your best friend for checking doneness. Stick a toothpick or thin knife right into the center of the loaf. Pull it out and look at it. If it’s completely clean, your bread might actually be a tiny bit overdone. If it has wet batter on it, it needs more time. What you’re looking for is a toothpick that comes out with a few moist crumbs stuck to it. Those crumbs mean the bread is perfectly done. The center is set but still tender.
Let me tell you about the cooling process because this matters too. When you first take the bread out of the oven, the inside is still cooking from residual heat. Leaving it in the pan for 10 minutes lets it continue to set up without overbaking. If you try to remove it right away, it might fall apart. But if you leave it in the pan too long, the bottom and sides can get soggy from trapped steam. Ten minutes is the sweet spot. Then lift it out and let it finish cooling on a wire rack where air can circulate all around it.
6) Making Classic Moist Banana Bread Ahead of Time
This banana bread recipe is perfect for making ahead. I do it all the time. Sometimes I bake a loaf on Sunday and we eat it all week for breakfast. Sometimes I make two loaves and freeze one for later. The bread stays fresh and delicious for days if you store it properly. Actually, some people think it tastes even better the next day after the flavors have had time to develop and meld together.
If you want to prep ahead but not bake yet, you can mix up the batter and refrigerate it for a few hours. Cover your bowl with plastic wrap and stick it in the fridge. When you’re ready to bake, let it sit at room temperature for about 15 minutes while your oven preheats. Then pour it into your pan and bake as directed. The baking time might be a few minutes longer since the batter will be cold. Just keep an eye on it and use the toothpick test.
You can also freeze the batter if you want to prep way ahead. I don’t do this often, but it works. Put the batter in a freezer-safe container or even directly in a disposable loaf pan. Cover it really well with plastic wrap and then aluminum foil. Freeze for up to three months. When you want to bake it, let it thaw in the fridge overnight. Then bring it to room temperature and bake as usual. The texture might be slightly different from fresh batter, but it’s still really good.
The best way to prep ahead is to bake the bread completely and then store it or freeze it. Baked banana bread keeps at room temperature for three to four days when wrapped properly. After it’s completely cool, wrap it tightly in plastic wrap. Then wrap it again in aluminum foil. The double wrap keeps it from drying out. Store it on your counter or in a bread box. Not in the fridge. The fridge actually makes bread go stale faster.
For longer storage, freeze the whole loaf or individual slices. I usually slice my bread before freezing so I can pull out just one or two pieces at a time. Wrap each slice in plastic wrap. Then put all the wrapped slices in a freezer bag. Squeeze out as much air as possible before sealing. Label the bag with the date. Frozen banana bread stays good for three to four months. Maybe longer, but the quality starts to decline after that.
Thawing frozen banana bread is easy. Just take out however many slices you want and let them sit at room temperature for about an hour. Or unwrap them and microwave for 20 to 30 seconds. If you froze the whole loaf, let it thaw at room temperature for a few hours or overnight. You can also warm thawed slices in a toaster or under the broiler for a minute. They get slightly crispy on the outside and warm and soft inside. So good.
If you’re making banana bread for a specific event or to give as a gift, baking it a day ahead actually works in your favor. The bread slices more cleanly after it’s had time to rest. The flavors are more developed. It’s easier to wrap nicely for gifting. Just make sure you store it properly overnight so it stays fresh. I usually bake mine in the evening, let it cool completely, wrap it up, and leave it on the counter. Perfect for gifting the next morning.
One thing I’ve learned is that banana bread actually improves with a little age. Don’t get me wrong, it’s delicious fresh from the oven. But something magical happens after 24 hours. The crumb becomes more tender. The banana flavor deepens. Everything just comes together in this really satisfying way. So if you can resist eating it all right away, try saving some for the next day. You’ll see what I mean.
7) Storing Leftover Classic Moist Banana Bread
Proper storage keeps your banana bread fresh and delicious for as long as possible. I’ve learned a lot about this over the years through trial and error. The key is keeping moisture in while keeping air out. Sounds simple, but there are definitely right ways and wrong ways to do it. Let me share what works best from my experience at Cook Daily Recipe.
First rule is to make sure your bread is completely cool before you wrap it up. I know you probably want to dig in right away. I do too. But wrapping warm bread creates condensation inside the wrapping. That moisture makes the bread soggy and can even cause mold to grow faster. Let your bread cool all the way to room temperature. It takes a couple hours. Be patient. It’s worth it.
For short-term storage, plastic wrap is your friend. Once the bread is cool, wrap the whole loaf tightly in plastic wrap. Make sure you cover every bit of the surface. No gaps. Then wrap it again in aluminum foil for extra protection. This double wrap method keeps the bread fresh at room temperature for three to four days. Maybe even five if your house isn’t too warm. Store it on your counter or in a bread box. Room temperature is best for bread. The refrigerator actually makes bread go stale faster.
If you’ve already sliced your bread, you can wrap individual slices or wrap the whole loaf back together. I usually leave mine whole until I’m ready to eat a slice. It stays fresher that way. But if you know you’ll be eating it over several days, slicing first can be convenient. Just rewrap carefully after taking out what you need. Press the plastic wrap directly against the cut surface to minimize air exposure.
What about storing at room temperature without wrapping? Not a great idea. The bread will dry out within a day. The outside gets hard and crusty in a bad way. The inside becomes crumbly. If you’re planning to eat the whole loaf within 24 hours and your house isn’t too dry, you could get away with just loosely covering it with a clean kitchen towel. But for anything longer, you really need to wrap it properly.
Now let’s talk freezing for long-term storage. This is where banana bread really shines. It freezes beautifully and tastes almost as good as fresh when thawed. I always make extra loaves specifically to freeze. That way I can have homemade banana bread whenever I want without having to bake every time. The best method is to slice the bread first, wrap each slice individually in plastic wrap, then put all the wrapped slices in a freezer bag.
Get as much air out of the freezer bag as possible before sealing it. Air is the enemy of frozen food. It causes freezer burn and dries things out. I press the bag flat and squeeze from one end to the other, pushing all the air out. Then seal it up tight. Write the date on the bag with a marker so you know how long it’s been in there. Frozen banana bread stays good for three to four months. After that it’s still safe to eat but the quality starts to go downhill.
You can also freeze the whole loaf instead of slices. Wrap it completely in plastic wrap, then wrap again in aluminum foil. Or put the wrapped loaf in a freezer bag. Same rules apply about removing air and labeling. Freezing the whole loaf is fine if you know you’ll eat it all at once when you thaw it. But I prefer slicing first so I can take out just what I need. More flexible that way.
Thawing is straightforward. Take out the number of slices you want and let them sit at room temperature for about an hour. They’ll thaw completely and be ready to eat. You can speed it up by microwaving for 20 to 30 seconds if you’re impatient. Or toast the frozen slices directly. They take a little longer than fresh bread but come out warm and slightly crispy. Really good with butter melting on top.
If you froze a whole loaf, thaw it at room temperature for several hours or overnight in the fridge. Don’t try to speed-thaw a whole loaf in the microwave. It’ll get weird and rubbery. Just plan ahead and let it thaw naturally. Once thawed, eat it within a couple days. Don’t refreeze thawed banana bread. The texture suffers too much from the second freeze.
Here’s a fun storage tip I learned recently. You can toast slightly stale banana bread to bring it back to life. If your bread is a day or two past its prime and starting to dry out, slice it and pop it in the toaster or under the broiler. The heat refreshes it somehow. The outside gets crispy and caramelized. The inside warms up and gets soft again. Spread some butter or cream cheese on top. You’d never know it wasn’t fresh. This trick has saved many a loaf at my house.
8) Try these Desserts next!

9) Classic Moist Banana Bread

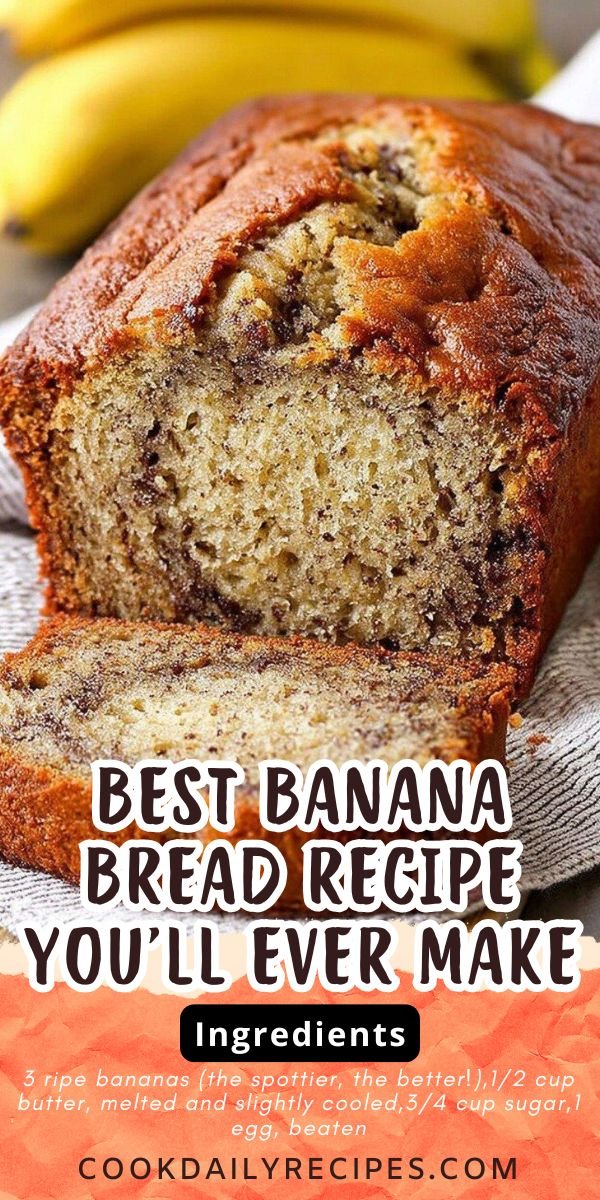
Best Banana Bread Recipe You’ll Ever Make
Ingredients
- 3 ripe bananas (the spottier, the better!)
- 1/2 cup butter, melted and slightly cooled
- 3/4 cup sugar
- 1 egg, beaten
- 1 teaspoon vanilla extract
- 1 teaspoon baking soda
- Pinch of salt
- 1 1/2 cups all-purpose flour
- Optional: 1/2 cup chopped walnuts or chocolate chips (go on, treat yourself)
Instructions
- Get your oven going at 350°F (175°C). Grease up a 9×5 inch loaf pan or line it with parchment paper. I like the parchment method because cleanup is a breeze.
- Grab those bananas and mash them with a fork until they’re nice and smooth. A few small lumps are totally fine. Then stir in your melted butter and mix it around.
- Toss in the sugar, beaten egg, and vanilla. Give it a good stir until everything looks friendly together.
- Sprinkle the baking soda and salt right over your mixture and fold it in gently.
- Now here’s where people mess up: add the flour and fold it in until you JUST don’t see any dry flour. Don’t go crazy mixing or you’ll end up with tough bread. We want tender, remember?
- If you’re feeling fancy, fold in those nuts or chocolate chips now. Both are amazing, but chocolate chips will make you a hero.
- Pour the whole thing into your prepared pan and smooth the top a little.
- Bake for 50 to 60 minutes. You’ll know it’s done when a toothpick poked in the center comes out clean or with just a few moist crumbs.
- Let it cool in the pan for about 10 minutes (I know it’s hard to wait), then turn it out onto a wire rack. Try to let it cool completely before slicing, but I won’t judge if you sneak a warm piece.
10) Nutrition
Serving Size: 1 slice | Calories: 210 | Sugar: 16 g | Sodium: 180 mg | Fat: 6 g | Saturated Fat: 3.5 g | Carbohydrates: 37 g | Fiber: 2 g | Protein: 3 g | Cholesterol: 35 mg


Leave a Comment