
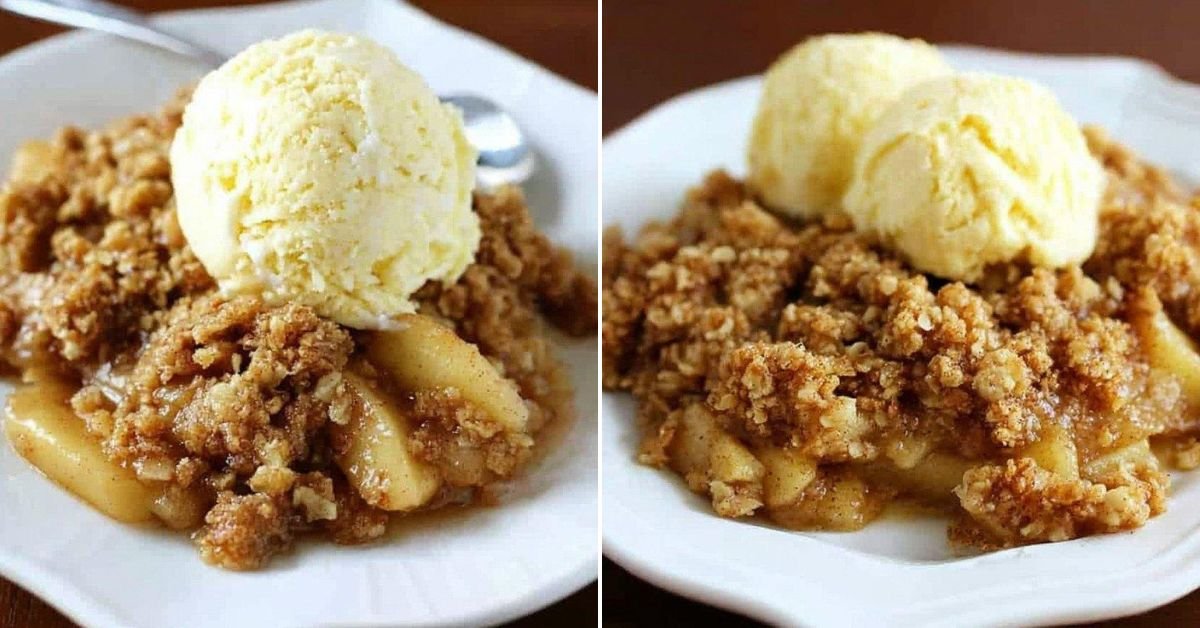
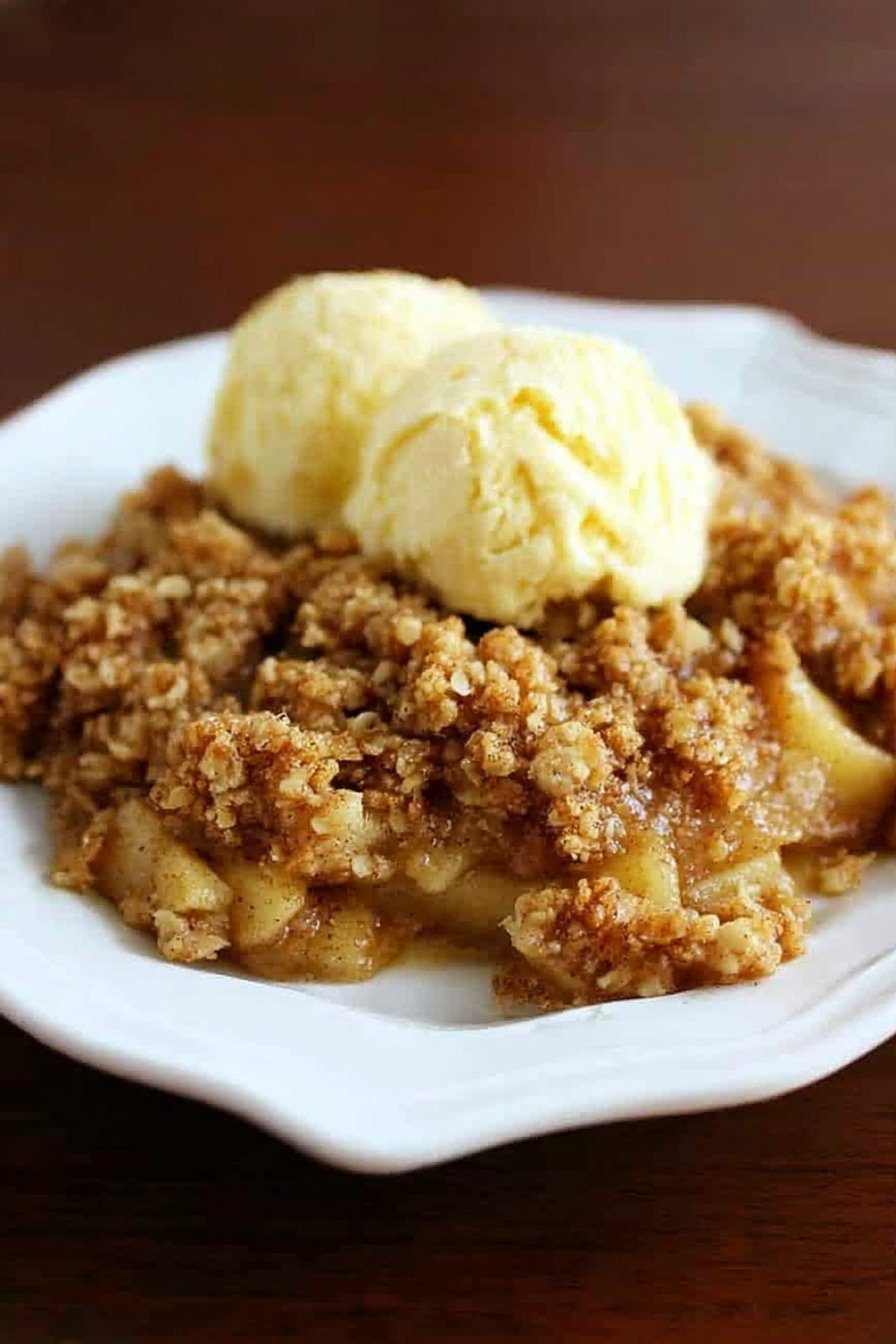
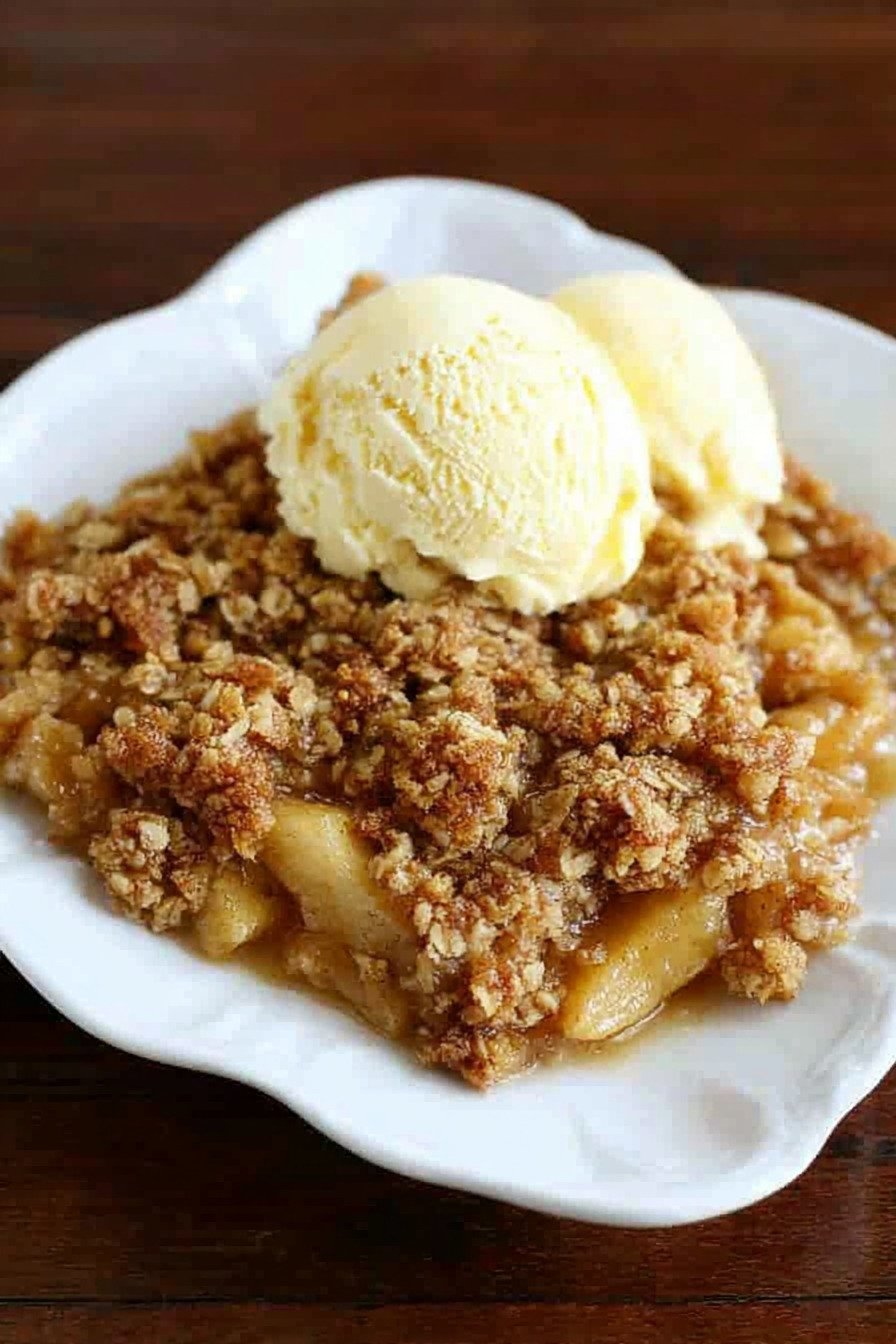
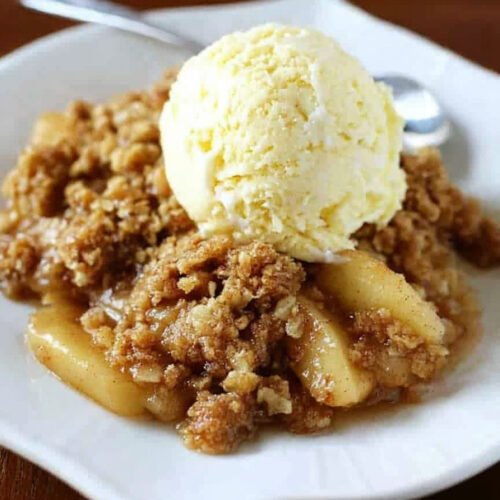
Listen, I’ve been making apple desserts for years, and let me tell you, this apple crisp recipe is the one that gets people coming back for seconds (and thirds, if I’m being honest). What makes it special? We’re talking double the crumb topping here. That’s right, not just on top, but there’s a layer underneath those tender, cinnamon kissed apples too. I remember the first time I tried making this easy apple crisp recipe simple version. My family tree had dropped so many apples that fall, and I needed something that wouldn’t take all day but would still wow everyone. This became my go to. People always ask if it’s some fancy best apple crisp recipe ever, and I just laugh. It’s not complicated, I promise. The secret? Those oats mixed with butter, brown sugar, and just enough cinnamon to make your kitchen smell like heaven. You can totally make this healthy apple crisp recipe by cutting back on the sugar a bit, or stick with the classic. Some folks even make it as an apple crisp recipe without oats, but honestly, the oats give it that perfect texture. And if you’re feeling adventurous, I’ve seen people try an air fryer apple crisp recipe, though I’m old school and stick with my trusty oven. Serve it warm with vanilla ice cream melting over the top, and watch everyone’s faces light up.
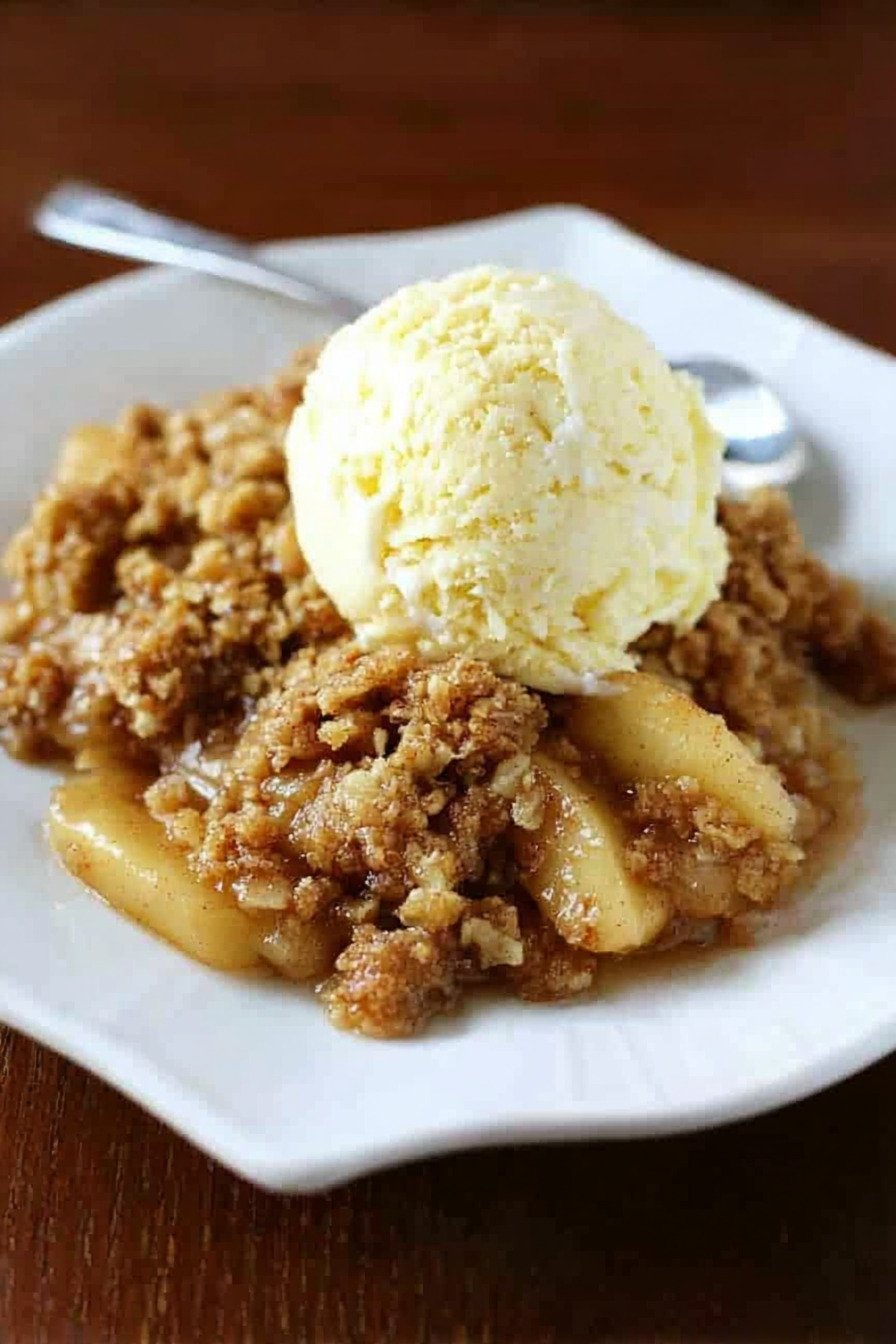
Table of Contents
- 1) Key Takeaways
- 2) Easy Apple Crisp Recipe
- 3) Ingredients for Apple Crisp Recipe
- 4) How to Make Apple Crisp Recipe
- 5) Tips for Making Apple Crisp Recipe
- 6) Making Apple Crisp Recipe Ahead of Time
- 7) Storing Leftover Apple Crisp Recipe
- 8) Try these Desserts next!
- 9) Apple Crisp Recipe
- 10) Nutrition
1) Key Takeaways
- What makes this apple crisp recipe different from others?
- Can you make apple crisp with any type of apples?
- How do you keep the topping crispy and not soggy?
- What’s the secret to getting tender apples with the perfect texture?
2) Easy Apple Crisp Recipe
You know what makes this apple crisp recipe stand out? That double crumb layer I was telling you about. We’re not messing around with just a thin sprinkle of topping here. This best apple crisp recipe ever strategy means you get crumbs underneath the apples AND on top. Yeah, I know it sounds like overkill, but trust me on this one.
Here’s the thing about making a simple apple crisp recipe. Most folks think it’s all about the apples, and sure, they’re important. But what really makes people remember your dessert is that buttery, crunchy topping that shatters when you dig your spoon in. That’s why I went with this double layer approach. The bottom layer gets all soaked up with those apple juices and turns into something almost pie crust like, the kind of texture that makes you close your eyes when you take a bite.
I’ve tried making this as a healthy apple crisp recipe by cutting the sugar, and you know what? It still works. The apples bring their own sweetness, especially if you’re using a mix of tart and sweet varieties. Some of my friends swear by making an apple crisp recipe without oats, substituting more flour and adding crushed graham crackers instead. I haven’t gone down that road myself, but I respect the creativity.
The beauty of this easy apple crisp recipe simple approach is that you don’t need fancy equipment. No stand mixer, no food processor. Just a bowl, a fork or pastry cutter, and your hands to press that bottom layer down. My neighbor even made a version in her air fryer apple crisp recipe style, cooking it in smaller portions. Came out great, though I prefer the traditional oven method myself. There’s something about that even heat that gets the whole pan perfect.
What I love most? This recipe doesn’t judge you. Got some apples that are starting to get a little soft? Perfect for this. Feeling fancy and want to use those expensive Honeycrisp apples? Go for it. It’s forgiving, it’s flexible, and it feeds a crowd without breaking your budget or your back.
3) Ingredients for Apple Crisp Recipe
Old Fashioned Oats
Let’s talk oats. I reach for old fashioned every single time I make this. They’ve got that hearty texture that stays put when you bake them. Quick oats work if that’s all you’ve got in the pantry, but they can get a little mushy on you. Old fashioned oats hold their shape, giving you that satisfying chew in every bite. Plus, they toast up beautifully in the oven, getting all golden and nutty smelling. If you’re making a bigger batch for a potluck, these oats are your best friend.
Brown Sugar
We’re going with packed brown sugar here, and I mean really packed. Don’t be shy about pressing it down into that measuring cup. The molasses in brown sugar gives this whole dessert a deeper, richer flavor than white sugar ever could. It also helps that topping get crispy while staying a little chewy underneath. I’ve used light brown and dark brown, and both work great. Dark brown gives you a more intense molasses taste, which I’m into. Light brown is a bit more mellow. Pick your adventure.
All Purpose Flour
Regular flour does the job perfectly here. It binds everything together and helps create that crumbly texture we’re after. I’ve never felt the need to get fancy with cake flour or bread flour for this recipe. Just good old all purpose flour straight from the bag. It works with the butter to create little clumps that bake up crispy on the outside and tender on the inside.
Ground Cinnamon
You need a full tablespoon in the topping, and then more for the apples. This isn’t the time to be stingy with cinnamon. It’s what makes your kitchen smell like fall, like home, like everything good in the world. Fresh cinnamon makes a difference if you’ve had that jar in your spice cabinet since 2019. But honestly? Even the older stuff works fine. Just maybe use a little extra.
Salt
Don’t skip the salt. I mean it. A teaspoon might seem like a lot for a dessert, but salt balances out all that sweetness and makes every other flavor pop. Without it, your apple crisp tastes flat, one dimensional. With it, you can actually taste the apples, the cinnamon, the butter. It’s like turning up the volume on your taste buds.
Softened Butter
This is key. Not melted butter, not rock hard butter. Soft butter that your finger can press into easily. If you forget to take it out of the fridge ahead of time, cut it into small cubes and let it sit for 20 minutes. Or do what I do and put it in a bowl near your preheating oven. The ambient heat softens it up just right. The butter is what makes this topping incredible, so use the real stuff, not margarine.
Chopped Pecans or Walnuts
Nuts are optional, but I almost always include them. Pecans are my go to because they’re buttery and sweet, a natural match for apples. Walnuts work too and they’re usually cheaper. Chop them up roughly, not too fine. You want to bite into actual nut pieces, not nut dust. If you’re allergic or just not into nuts, skip them. The recipe works fine without them.
Apples
Fourteen apples sounds like a lot, and it is. But they cook down and you want that pan full. Granny Smiths are my first choice because they’re tart and they hold their shape. They don’t turn to mush like some varieties. I also love Jonathan apples and Braeburn when I can find them. Sometimes I do half Granny Smith and half Golden Delicious for a nice balance of tart and sweet. Peel them all, slice them thin, and try to keep the slices about the same thickness so they cook evenly.
Granulated Sugar and Cinnamon for the Apples
This little mixture gets sprinkled right over the apples before the top layer of crumbs goes on. It’s just a quarter cup of sugar mixed with half a teaspoon of cinnamon, but it makes those apples taste like apple pie filling. The sugar draws out the juice from the apples as they bake, creating that delicious syrup that soaks into the bottom crust. Don’t skip this step.
4) How to Make Apple Crisp Recipe
Step 1. Preheat and Prep Your Pan
Get your oven going at 350 degrees F. Take a minute to spray your 9×13 inch pan really well with cooking spray. I’ve forgotten this step before and ended up with half my dessert stuck to the pan. Not a fun time. Make sure you get the corners too.
Step 2. Mix the Crumb Topping
Grab your biggest mixing bowl and dump in the oats, brown sugar, flour, that tablespoon of cinnamon, and the salt. Add your soft butter on top. Now use a pastry cutter or just a fork and start working everything together. You want it to look crumbly, like wet sand at the beach. Some bigger clumps are fine, actually they’re good. Those turn into the best crispy bits. Toss in your chopped nuts now if you’re using them.
Step 3. Create the Bottom Crust
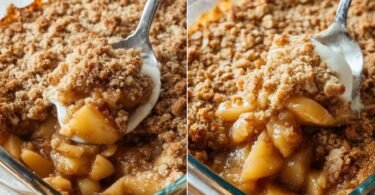
Here’s where it gets fun. Take about a third of your crumb mixture and dump it into your prepared pan. Use your hands to press it down firmly across the whole bottom. You’re making a crust here, so really press it. Don’t be gentle. I usually use the bottom of a measuring cup to really pack it down. This bottom layer is going to soak up all those amazing apple juices and turn into something magical.
Step 4. Prepare the Apples
Time to deal with those apples. Peel every single one. Yeah, it takes a few minutes, but leaving the skins on changes the texture in a way I don’t love. Slice them about a quarter inch thick. I don’t measure this, just eyeball it. You want them thin enough to cook through but thick enough to have some bite. Spread them evenly over your bottom crust. Try to fill in any gaps so you’ve got apples edge to edge.
Step 5. Season the Apples
Mix up that quarter cup of sugar with the half teaspoon of cinnamon in a small bowl. Sprinkle this all over your apples. Try to get decent coverage, but it doesn’t have to be perfect. As everything bakes, this sugar cinnamon mixture will melt and spread around. This step is what makes your apples taste like pie filling instead of just baked fruit.
Step 6. Add the Top Crumb Layer
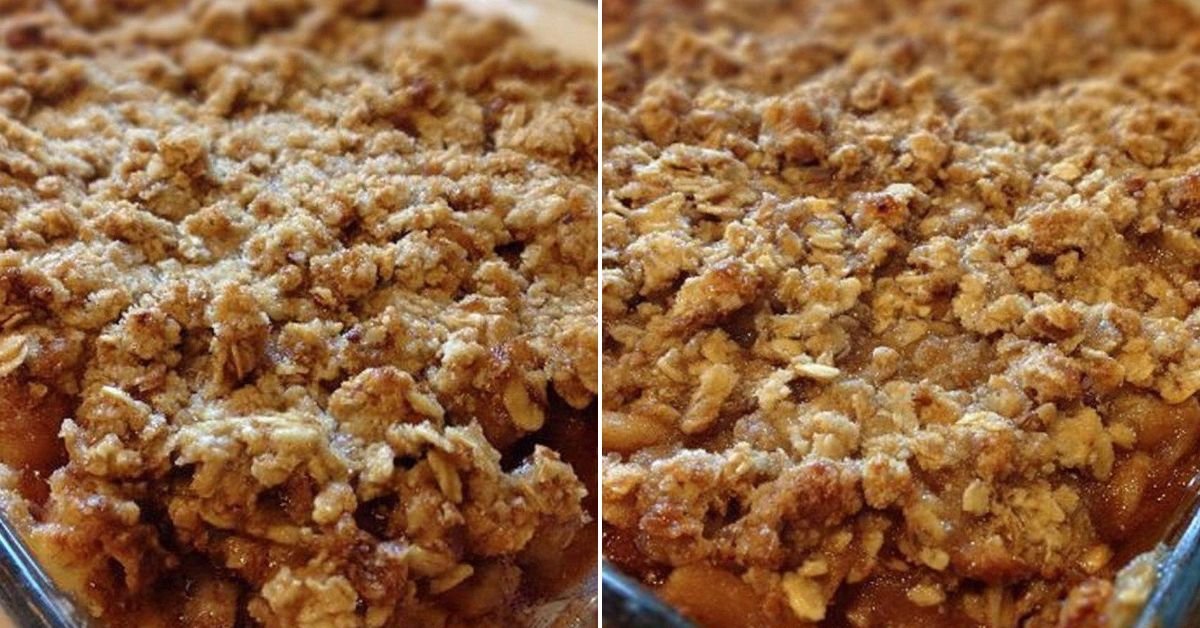
Take all the remaining crumb mixture and sprinkle it evenly over the top of your apples. Use it all. This is the layer that’s going to get crispy and golden, so spread it around until you can’t see the apples anymore. Some clumps are good. Actually, lots of clumps are good. They create different textures.
Step 7. Bake Until Golden and Bubbly
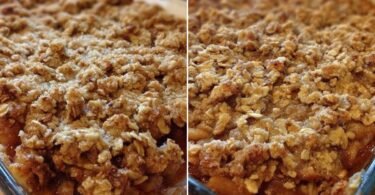
Slide that pan into your preheated oven. Set a timer for 40 minutes, but know that it might need up to 50 minutes total. You’re looking for that topping to be golden brown and for the apple juices to be bubbling up around the edges. If the top starts getting too dark before the apples are tender, tent some foil over it and keep baking. Better to have it in there a few extra minutes than to pull it too early with crunchy apples.
Step 8. Let It Rest Before Serving
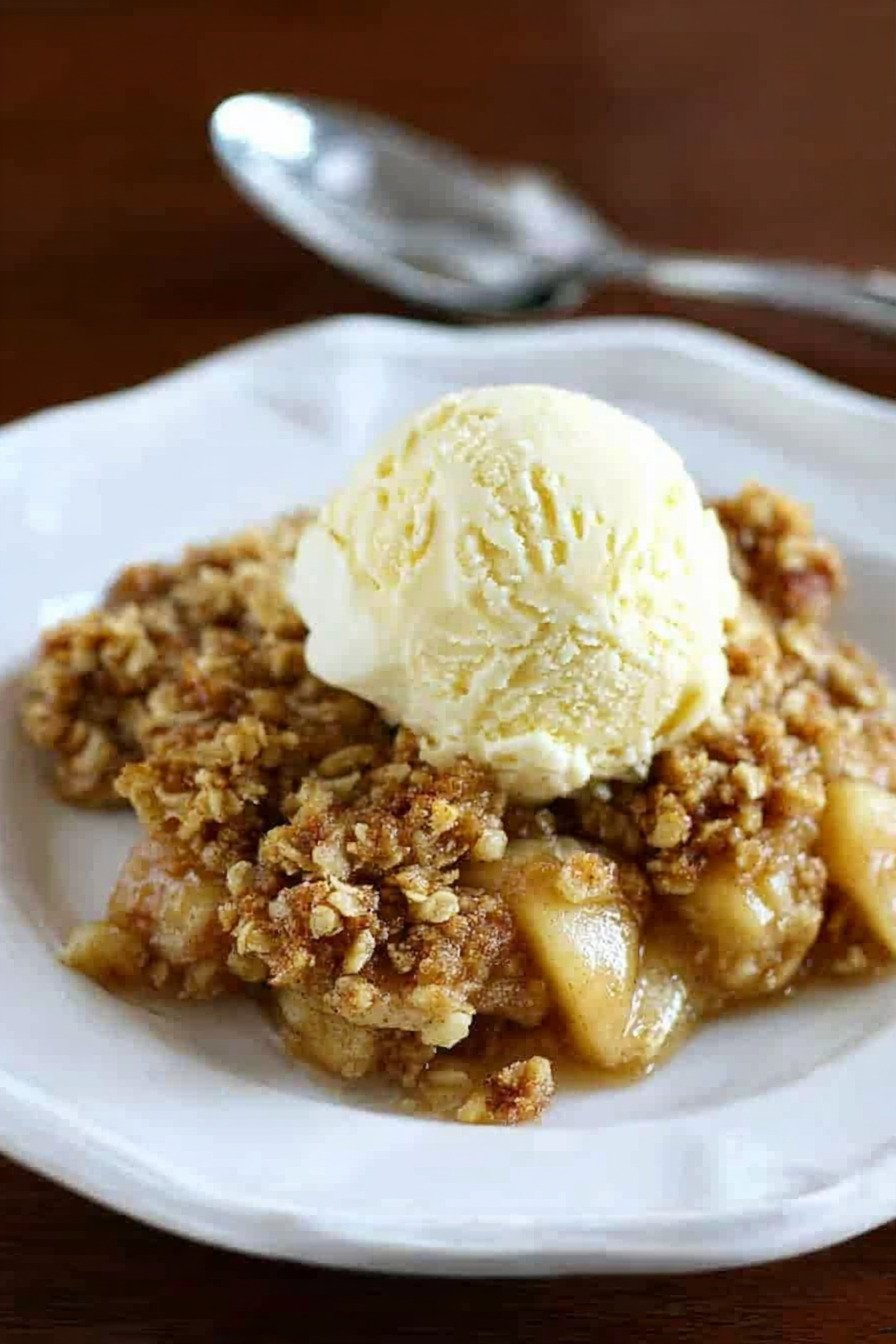
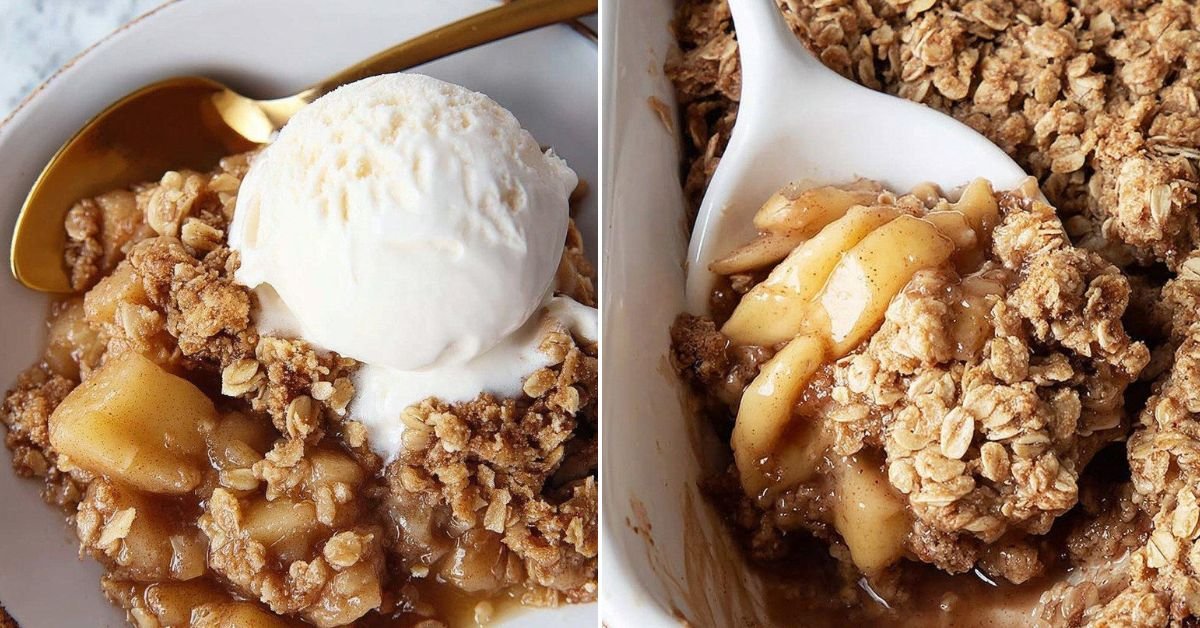
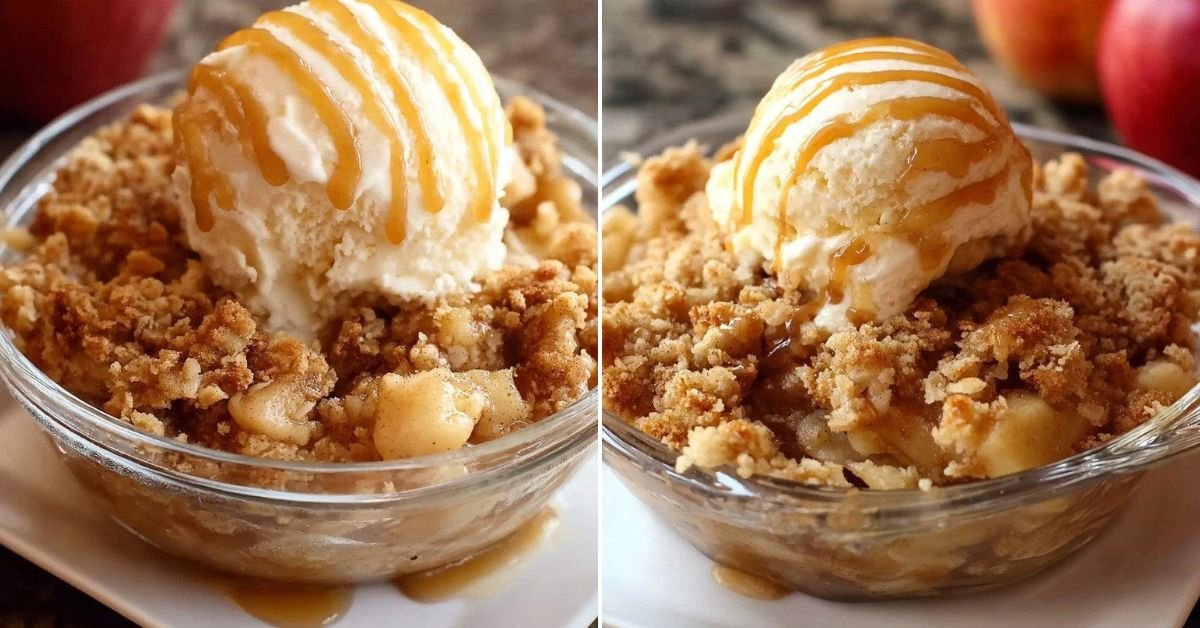
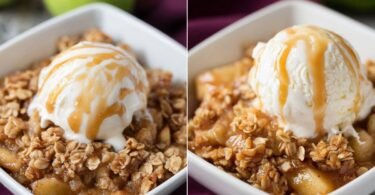
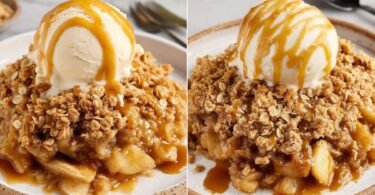
I know it’s hard, but let this sit for at least 10 or 15 minutes after it comes out of the oven. The filling is molten lava hot, and you need to give it a chance to settle and thicken up slightly. This also lets you cut cleaner pieces if you care about that sort of thing. Me? I usually just dig in with a spoon. Serve it warm with a big scoop of vanilla ice cream on top. Watch that ice cream melt down into all the nooks and crannies. That’s the stuff right there.
5) Tips for Making Apple Crisp Recipe
Choose the Right Apples
Not all apples are created equal when it comes to baking. Some turn to applesauce the minute they hit heat. Granny Smiths are reliable workhorses that keep their shape and give you that tart bite that balances the sweet topping. Honeycrisp apples cost more but they’re worth it for special occasions. They stay firm and have great flavor. Avoid Red Delicious and Gala if you can. They get mealy and weird when baked. If you’re not sure, ask the produce person at your store which apples they recommend for baking.
Press That Bottom Layer Firmly
When you’re making that bottom crust layer, really get in there and press it down. I see people barely pat it and wonder why it doesn’t hold together. You want it compact, almost like you’re making a graham cracker crust. Use the back of a measuring cup or your whole palm and push down hard. This creates a barrier that keeps some structure between the filling and the pan, and it gives you that amazing crispy layer on the bottom that people always ask about.
Don’t Overmix the Crumb Topping
When you’re combining the topping ingredients, you want crumbs, not a paste. Mix it just until everything comes together into clumps. If you keep working it, the butter will get too warm and you’ll end up with something closer to cookie dough than a crumb topping. Big pieces and small pieces are both good. That variety in size gives you different textures in the finished dish.
Slice Apples Uniformly
Try to keep your apple slices about the same thickness. If some are super thin and others are chunky, they’ll cook unevenly. You’ll end up with mushy apples mixed with crunchy apples, and not in a good way. I’m not saying break out a ruler, but pay attention as you’re slicing. Aim for that quarter inch thickness across the board.
Use a Metal Pan
Glass baking dishes are pretty, but metal pans conduct heat better. Your bottom crust will get crispier and more golden in a metal pan. If you only have glass, that’s fine, just know you might need to add a few minutes to the baking time. The dessert won’t brown quite as nicely on the bottom, but it’ll still taste great.
Check for Doneness Properly
The topping can look perfect and golden, but if you haven’t checked the apples, you might be pulling it out too early. Insert a knife into the center of the pan. It should slide through the apples easily. If you hit resistance, those apples need more time. Give it another 5 or 10 minutes and check again. Better to slightly overbake than underbake with apple crisp.
6) Making Apple Crisp Recipe Ahead of Time
The crumb topping is your friend when it comes to advance prep. You can mix up all those dry ingredients with the butter up to two days ahead. Just keep it covered in the fridge. When you’re ready to bake, let it sit out for about 15 minutes to soften slightly, then proceed with the recipe as written. This saves you a bunch of time on the actual day you want to serve it.
Now, about those apples. I’m going to level with you. Slicing them ahead isn’t my favorite move. They oxidize and turn brown, and even if you toss them with lemon juice, the texture changes a bit. But if you absolutely need to prep them early, do it no more than a few hours ahead. Keep them covered tightly in the fridge and maybe add a squeeze of lemon. The cinnamon you’ll eventually sprinkle on them will hide most of the browning anyway.
Here’s what I actually do when I’m planning ahead. I’ll peel all the apples and keep them whole in a bowl of cold water with a little lemon juice squeezed in. Then when I’m ready to start assembly, I drain them and slice them right before they go in the pan. Takes maybe 10 extra minutes and the apples taste way fresher. No weird oxidized flavor or mushy texture.
If you want to go all in and make the entire thing ahead, you can assemble the whole dessert in the pan, cover it tightly with plastic wrap, and refrigerate it for up to 24 hours before baking. Just add about 10 to 15 minutes to the baking time since you’re starting with a cold pan. The texture won’t be quite as perfect as fresh, but it’s pretty close and way better than stressing yourself out trying to do everything last minute.
Another strategy I use is baking it completely, letting it cool, then covering and refrigerating. Reheat individual portions in the microwave for about a minute, or warm the whole pan in a 300 degree oven for 20 minutes or so. The topping won’t be quite as crispy as fresh from the oven, but it’s still really good. Sometimes I’ll stick reheated portions under the broiler for just a minute to crisp up the top again.
7) Storing Leftover Apple Crisp Recipe
Leftovers of this apple crisp recipe last surprisingly well. At room temperature, covered with foil or plastic wrap, you’re good for about a day, maybe two max. The topping will soften up a bit as it sits, but the flavor is still on point. I usually just keep it on the counter if I know we’re going to finish it that day or the next morning for breakfast. Yeah, I said breakfast. Don’t judge me.
For longer storage, the fridge is your best bet. Transfer portions to an airtight container or just cover the whole pan tightly. It’ll keep for a good four or five days in there. The cold air does firm up the butter in the topping, so you’ll definitely want to reheat it before eating. Nobody likes cold, hard apple crisp straight from the fridge. It’s just not the same experience.
When you’re ready to eat those leftovers, the microwave works great for single servings. Thirty seconds to a minute usually does the trick. For a whole pan, or if you want to try to recrisp that topping, use your oven. Cover it with foil so the top doesn’t burn, heat it at 325 degrees for about 15 or 20 minutes. Then remove the foil and give it another 5 minutes uncovered. Won’t be exactly like fresh, but it’s pretty close.
I’ve never frozen apple crisp myself, but I know people who have done it successfully. If you’re going that route, let it cool completely first. Wrap individual portions really well in plastic wrap, then in foil, then into a freezer bag. Label it with the date. It should keep for two or three months. Thaw it in the fridge overnight, then reheat as described above. The texture might be a little different, but the flavor should still be there.
One thing I’ve learned is that the topping loses its crispness over time no matter how you store it. That’s just physics. The moisture from the apples migrates up into the crumb topping and softens it. You can fight this by storing the topping separately if you’re feeling ambitious, then sprinkling it on and reheating. But honestly? Life’s too short. I just reheat and enjoy it as is, maybe with extra ice cream to compensate.
8) Try these Desserts next!
9) Apple Crisp Recipe
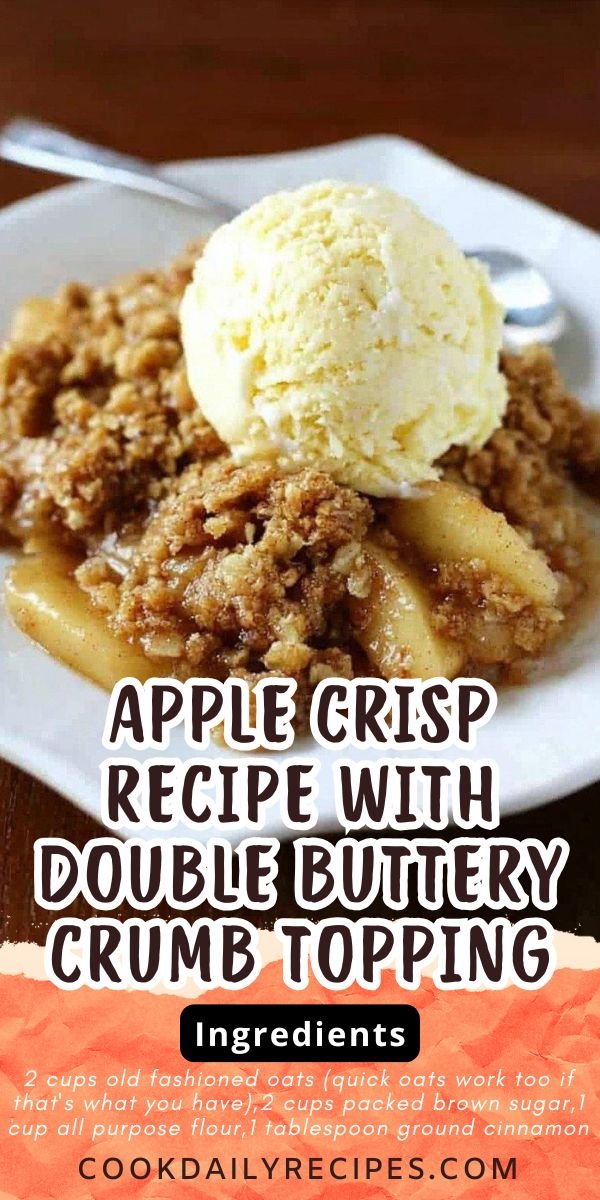
Apple Crisp Recipe with Double Buttery Crumb Topping
Ingredients
For the Crumb Topping
- 2 cups old fashioned oats (quick oats work too if that’s what you have)
- 2 cups packed brown sugar
- 1 cup all purpose flour
- 1 tablespoon ground cinnamon
- 1 teaspoon salt
- 1 cup softened butter (not melted, just soft)
- 1/2 cup chopped pecans (or walnuts, your call)
For the Apple Filling
- 14 medium apples, peeled and sliced about 1/4 inch thick (that’s roughly 11 cups)
- 1/4 cup granulated sugar
- 1/2 teaspoon ground cinnamon
Instructions
- First things first, crank your oven up to 350 degrees F. Give your 9×13 inch baking pan a good spray with cooking spray so nothing sticks later.
- Grab a big mixing bowl and toss in the oats, brown sugar, flour, that tablespoon of cinnamon, and salt. Add your soft butter and use a pastry cutter or just a regular fork to mix everything till it looks crumbly and delicious. Stir in those chopped nuts if you’re using them.
- Now here’s the fun part. Take about a third of that crumb mixture and press it right into the bottom of your prepared pan. Don’t be shy, really press it down so it forms a nice crust.
- Time to prep those apples. Peel them, slice them thin (about a quarter inch), and spread them evenly over that bottom crust you just made.
- Mix together the 1/4 cup sugar with the half teaspoon of cinnamon, then sprinkle this mixture all over your apples. This is what gives them that sweet, spiced flavor we all love.
- Take all the remaining crumb topping and sprinkle it evenly over the apples. Make sure you cover them completely.
- Pop that pan in your preheated oven and bake for 40 to 50 minutes. You’ll know it’s done when the apples are nice and tender and that topping looks golden brown and crispy.
- Let it cool for just a few minutes, then serve it up warm. A scoop of vanilla ice cream on top is pretty much mandatory in my house.
10) Nutrition
Serving Size: 1/12 of the apple crisp, Calories: 524 kcal, Sugar: 62 g, Sodium: 329 mg, Fat: 20 g, Saturated Fat: 10 g, Carbohydrates: 88 g, Fiber: 7 g, Protein: 4 g, Cholesterol: 41 mg


Leave a Comment