
I’ll be honest with you, I’ve been making mac and cheese for years, trying different methods, tweaking ingredients, and testing what works best. And let me tell you, this mac and cheese recipe is the one that finally got my whole family quiet at the dinner table (which is saying something!). We’re talking seriously creamy, cheesy goodness that’s neither too dry nor swimming in sauce. Just perfect. What makes this different from other mac and cheese recipe videos you might’ve seen? Well, I skip the fancy stuff and focus on what actually matters: real cheese (grated fresh, never pre-shredded), a silky smooth sauce, and that golden bubbly top we all crave. This isn’t some complicated home made mac and cheese recipe that requires culinary school. Nope, it’s straightforward and works every single time. Whether you’re looking for a broccoli mac and cheese recipe variation, a creamy mac and cheese recipe crockpot style, a fast mac and cheese recipe for busy weeknights, or that classic southern mac and cheese recipe baked to perfection, this base recipe has got you covered. You can dress it up or keep it simple. Either way, you’re gonna love it.

Table of Contents
- 1) Key Takeaways
- 2) Easy Creamy Baked Mac and Cheese Recipe
- 3) Ingredients for Creamy Baked Mac and Cheese
- 4) How to Make Creamy Baked Mac and Cheese
- 5) Tips for Making Creamy Baked Mac and Cheese
- 6) Making Creamy Baked Mac and Cheese Ahead of Time
- 7) Storing Leftover Creamy Baked Mac and Cheese
- 8) Try these Main Course next!
- 9) Creamy Baked Mac and Cheese
- 10) Nutrition
1) Key Takeaways
- What makes baked mac and cheese extra creamy?
- Should you rinse pasta for mac and cheese?
- What’s the secret to preventing grainy cheese sauce?
- Can you make mac and cheese ahead of time?
2) Easy Creamy Baked Mac and Cheese Recipe
Look, I’ve made my fair share of mac and cheese disasters over the years. There was that time I used pre-shredded cheese and ended up with a grainy, separated mess that looked more like cheese soup than anything edible. Then there was the incident where I overbaked it and basically created a pasta brick. But after countless tries and plenty of taste testing (tough job, I know), I finally nailed down this mac and cheese recipe that actually works every single time.
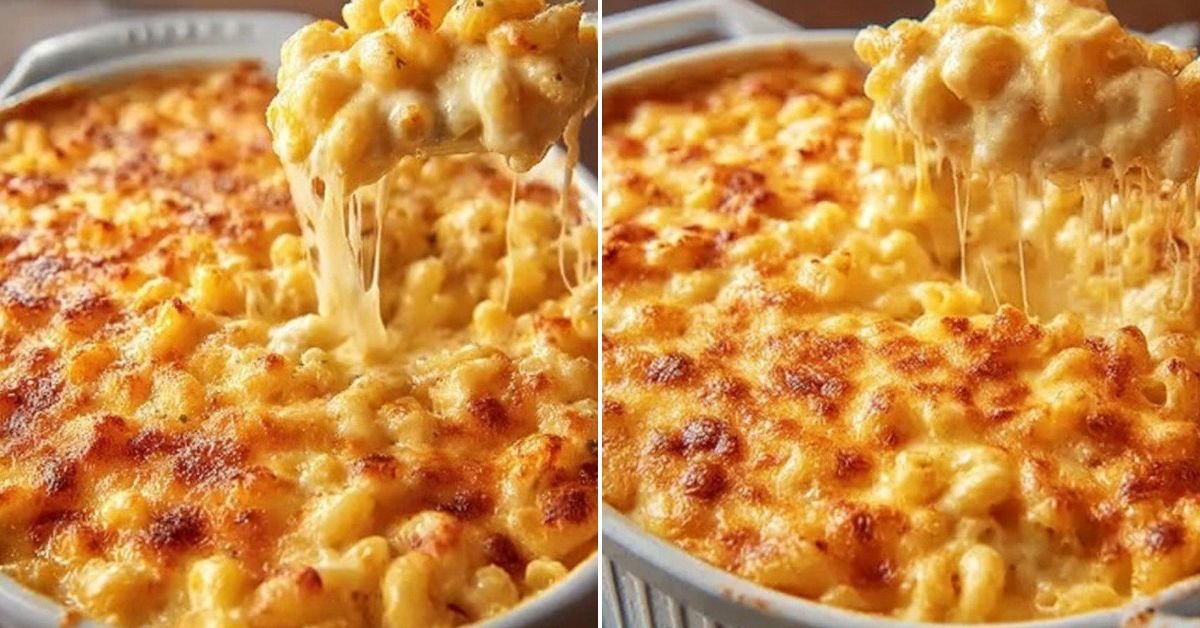
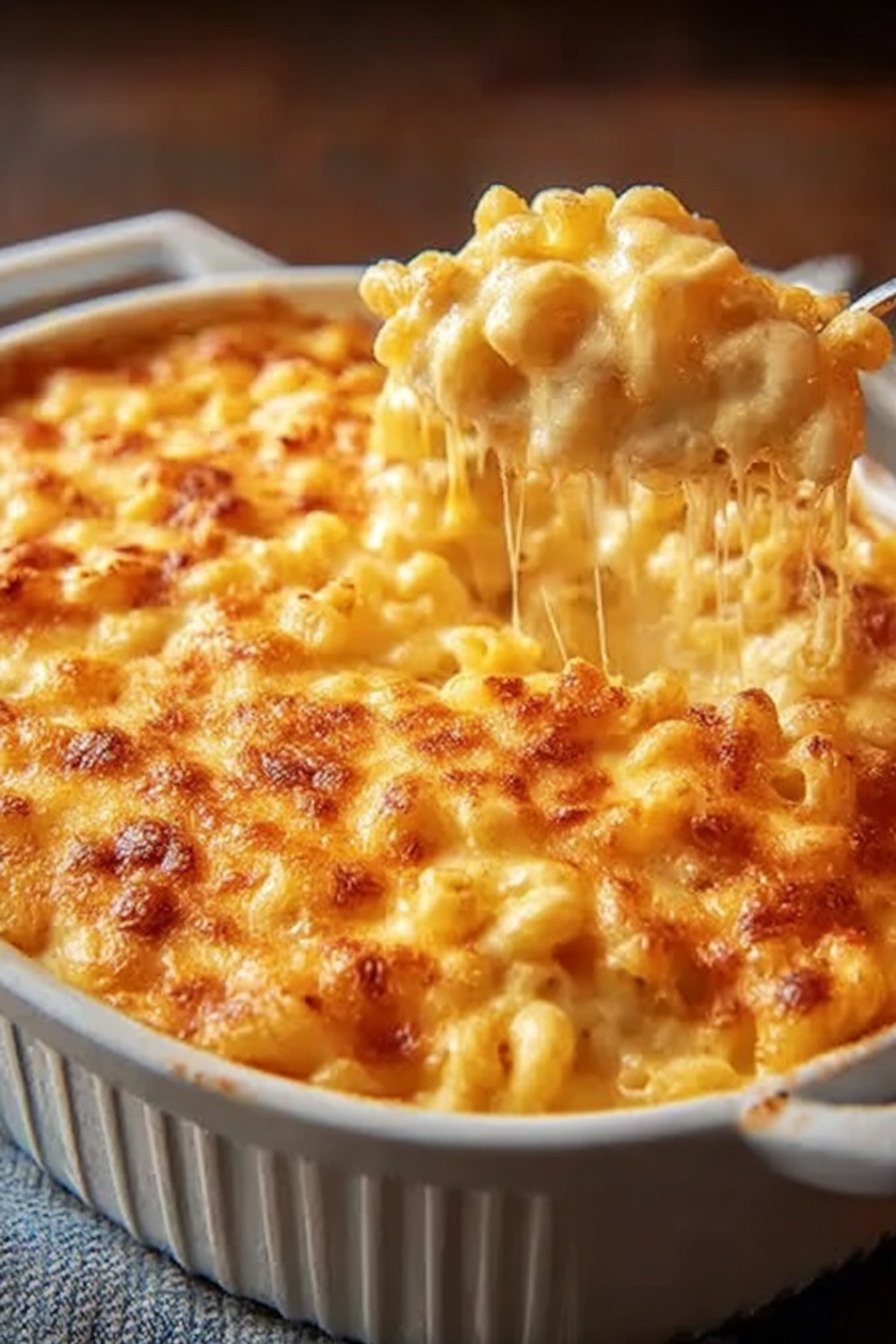
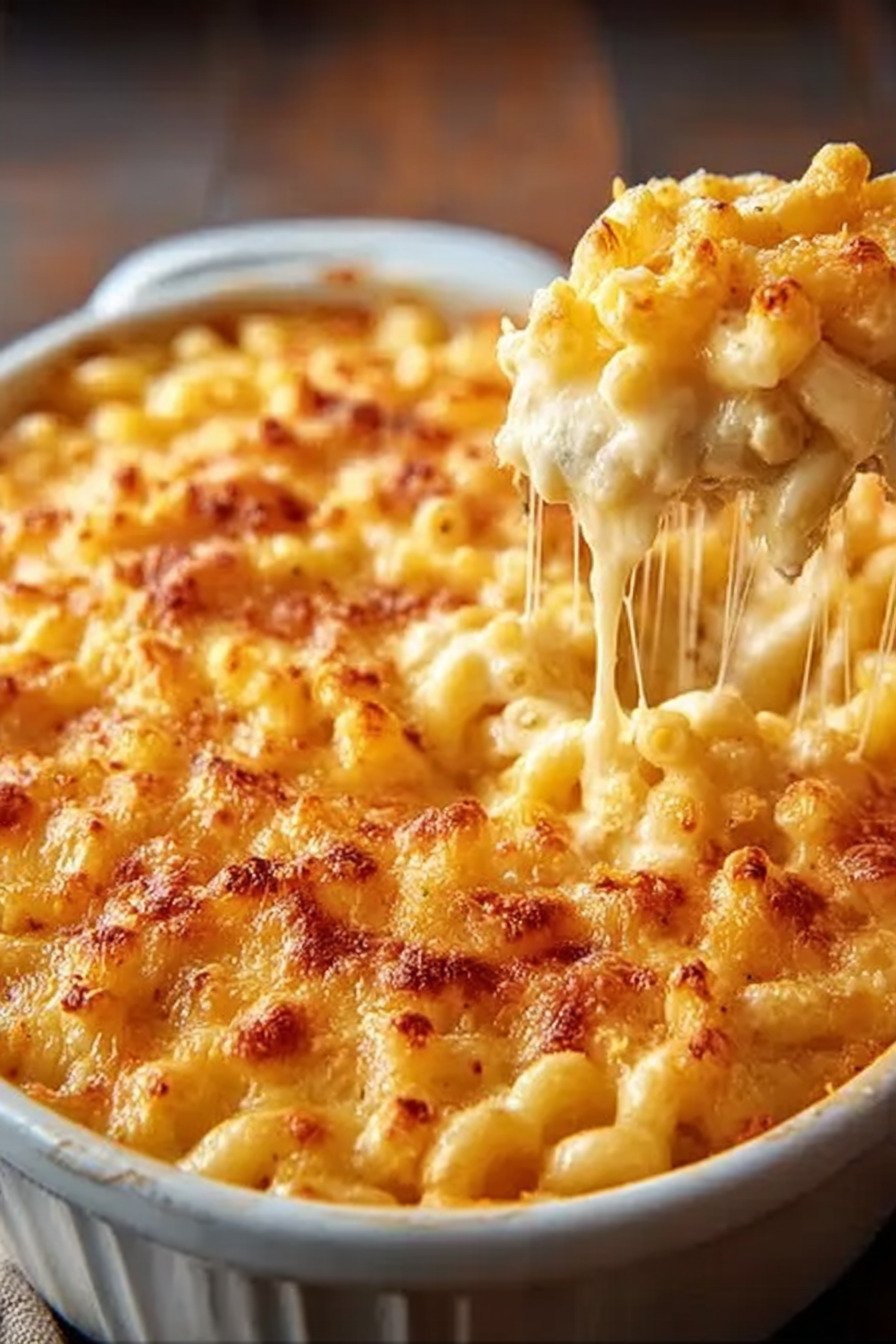
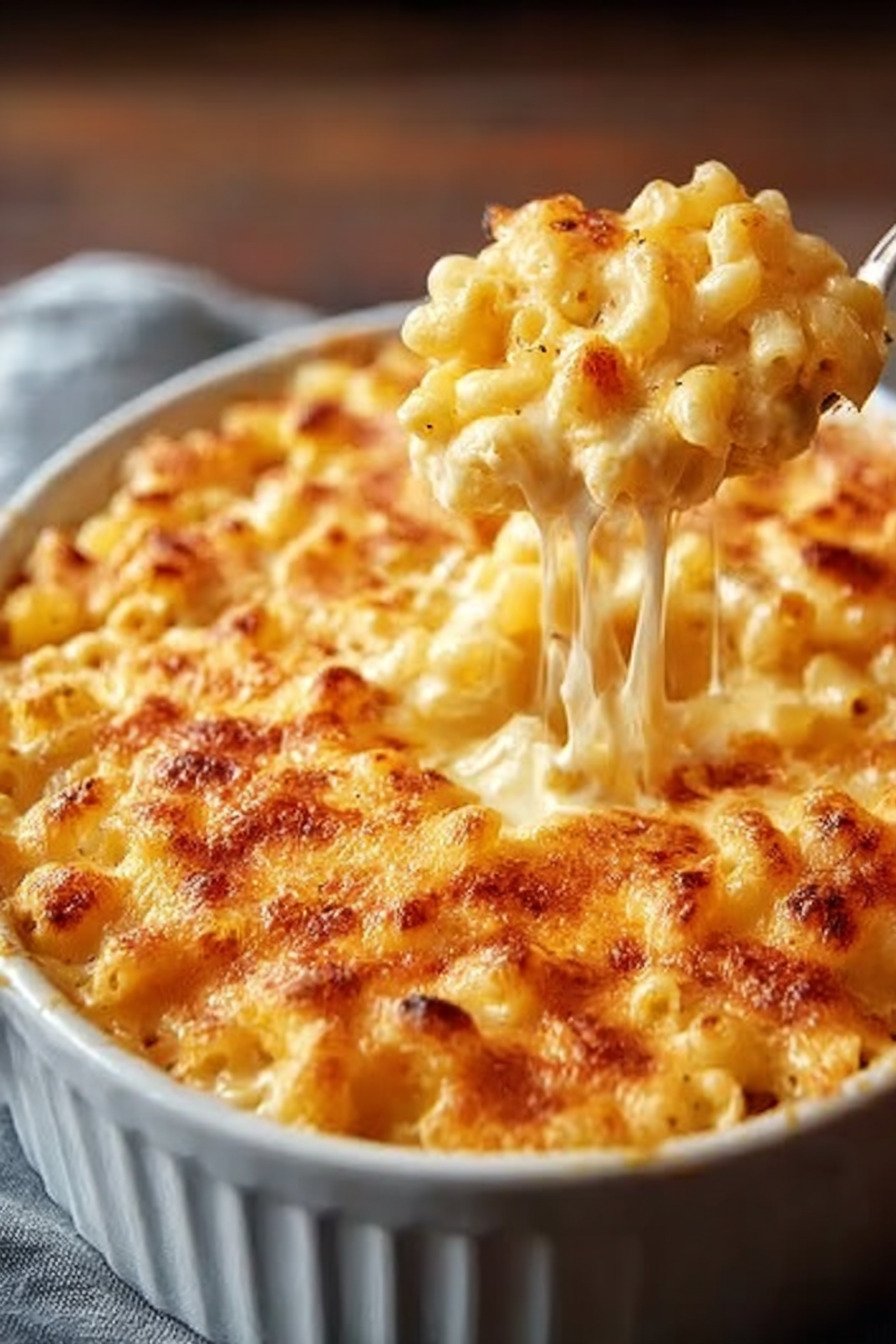
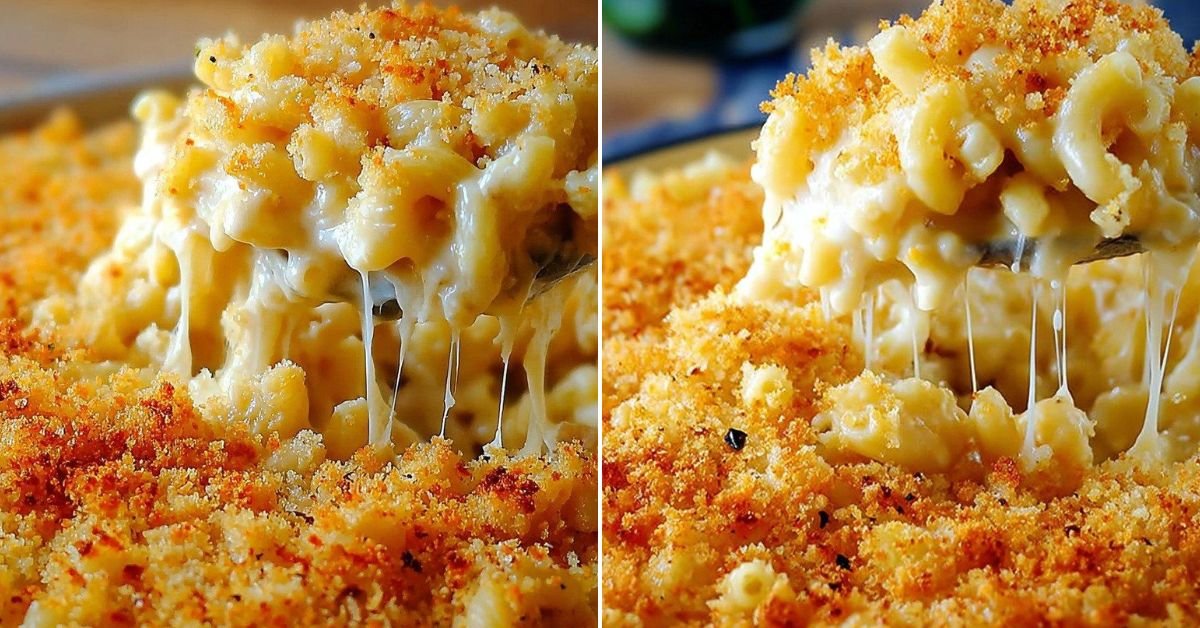
What makes this different from all those other mac and cheese recipes floating around? For starters, we’re using three types of cheese here, not just one. Sharp cheddar brings that classic tangy flavor, Gruyere adds this nutty richness that’s just chef’s kiss, and mozzarella makes everything stretchy and gooey. When you scoop this onto your plate, you get those cheese pulls that make you wanna snap a photo before diving in.
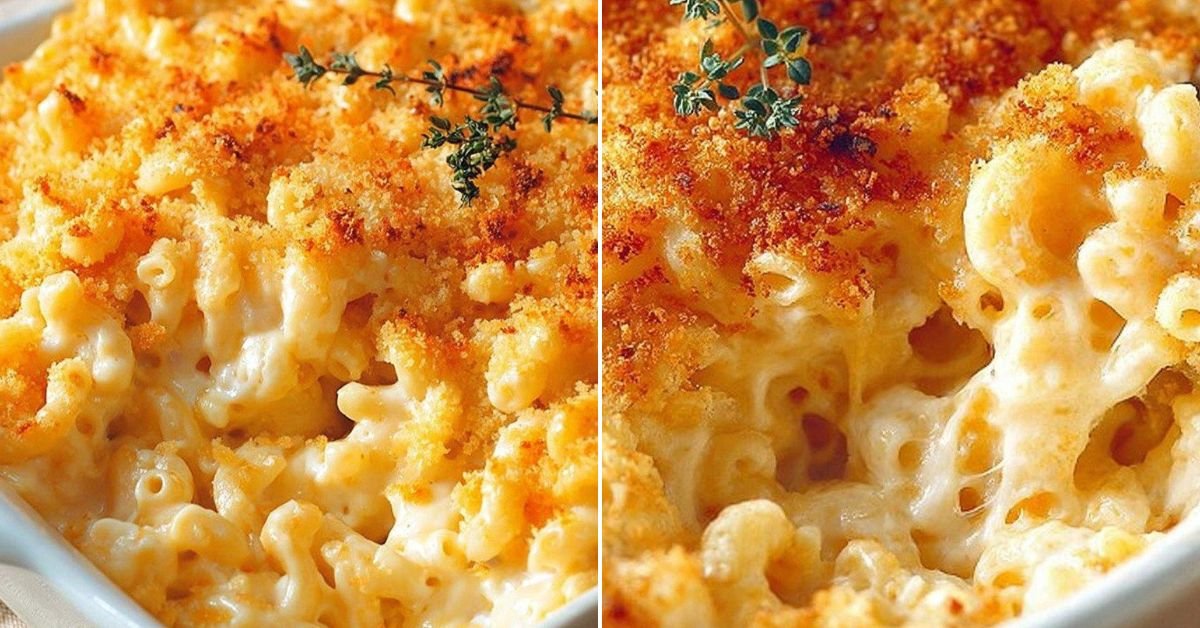
The texture is what really sets this apart. It’s creamy without being soupy, rich without being heavy, and that golden top? Crispy perfection. Whether you’re making this for a holiday dinner where you need to impress the in-laws or just a random Tuesday when you need comfort food that actually comforts, this recipe delivers. My kids ask for it at least twice a month, and honestly, I’m not complaining. It reheats beautifully, which means leftovers for lunch the next day (if there are any leftovers, that is).
Here’s the best part though. This isn’t one of those recipes where you need to stand over the stove for an hour stirring constantly. You make a simple sauce, mix everything together, pop it in the oven, and boom. Dinner’s done. Total time from start to finish? About 45 minutes. That includes boiling the pasta, making the cheese sauce, and baking. Pretty reasonable if you ask me.
3) Ingredients for Creamy Baked Mac and Cheese
Elbow Macaroni: I’m sticking with classic elbows here, but you can totally switch things up. Cavatappi (those corkscrew guys) are fantastic because they hold onto the sauce like nobody’s business. Shells work great too. Basically any pasta with ridges or curves will catch all that cheesy goodness. Cook it about a minute less than the package says since it’ll keep cooking in the oven. Nobody wants mushy pasta.
Butter: Real butter, not margarine. This is comfort food we’re talking about, not diet food. The butter creates the base of our sauce and adds that rich, creamy flavor that makes everything taste better. I use unsalted so I can control the salt level myself, but salted works fine too if that’s what you’ve got.
All Purpose Flour: This is what thickens up our cheese sauce. When you whisk it with the butter, you’re making what fancy people call a roux. Sounds complicated but it’s literally just butter and flour cooked together for a couple minutes. That’s it. This is what keeps your sauce from being watery and sad.
Whole Milk and Half and Half: Using both gives you that perfect creamy consistency without going overboard with heavy cream. Some recipes use all heavy cream and honestly? That’s way too rich. You can’t even finish a serving. This combo keeps things creamy but not overwhelming. If you only have one or the other, just use 4 cups of whichever milk you’ve got. It’ll still work.
Seasonings: Garlic powder, onion powder, paprika, salt, and black pepper might seem basic, but they make a huge difference. The paprika especially adds this subtle smoky undertone that makes people ask “what’s in this?” Don’t skip these. They take your mac and cheese from “yeah it’s good” to “can I have the recipe?”
Sharp Cheddar Cheese: This is your main cheese here, and it needs to be sharp. Not mild, not medium. Sharp. The sharp cheddar gives you that tangy, bold cheese flavor that screams “mac and cheese!” And please, for the love of all that’s cheesy, grate it yourself. Pre-shredded cheese has coatings on it to prevent clumping, and those same coatings prevent smooth melting. You’ll end up with a grainy sauce and nobody wants that.
Gruyere Cheese: Okay, I know Gruyere sounds fancy and maybe a little intimidating. But trust me on this one. It melts like a dream and adds this incredible nutty, slightly sweet flavor that takes your mac and cheese from good to “holy cow what is this amazing thing?” If you absolutely can’t find it or it’s too pricey, Swiss cheese works as a substitute. Not quite the same, but still delicious.
Mozzarella Cheese: This is your secret weapon for those Instagram-worthy cheese pulls. Mozzarella doesn’t have a super strong flavor on its own, but it melts beautifully and creates that stretchy, gooey texture we all love. Low-moisture mozzarella works better here than fresh mozzarella, which has too much water and can make things soupy.
4) How to Make Creamy Baked Mac and Cheese
Step 1: Get your oven heated to 350°F and butter up your 9×13 baking dish. Don’t skip the butter coating or you’ll be scraping stuck-on cheese off the sides later. Been there, done that, learned my lesson.
Step 2: Boil a big pot of water with a good handful of salt. Like, actually salt it. Your pasta water should taste like the ocean. Once it’s boiling, add your pasta and cook it one minute less than the box says. So if it says 8 minutes, cook it for 7. The pasta will finish cooking in the oven and you don’t want it turning to mush. Drain it well and set it aside.
Step 3: Using the same pot (why dirty another dish?), melt your butter over medium heat. Once it’s melted, add the flour and start whisking. Keep whisking for about 2 minutes until the mixture is bubbly and smells kinda toasty. This cooks out the raw flour taste. If you skip this step, your sauce will taste chalky. Not good.
Step 4: Now comes the part where you need to pay attention. Slowly pour in your milk and half and half while whisking constantly. And I mean constantly. This prevents lumps from forming. If you do get a few stubborn lumps, just whisk harder or switch to a whisk if you were using a spoon. Keep stirring until the sauce thickens up and coats the back of your spoon. This takes about 5 to 8 minutes. You’ll know it’s ready when you can run your finger through the sauce on the spoon and it leaves a clear path.
Step 5: Take the pot off the heat. This is really important. If the sauce is still on the burner when you add the cheese, it can get too hot and the cheese will separate and get weird. Off the heat, stir in your garlic powder, onion powder, paprika, salt, and pepper. Then add about 2 cups of the cheddar and 1 cup of the Gruyere. Stir until everything melts into this gorgeous, smooth, dreamy sauce.
Step 6: Add your cooked pasta back into the pot and give it a good stir so every noodle gets coated in that cheese sauce. Then fold in another cup of cheddar and all your mozzarella. You’re basically creating pockets of melty cheese throughout the dish. This is what gives you those amazing cheese pulls later.
Step 7: Pour half of your cheesy pasta into your prepared baking dish. Sprinkle some of your remaining cheese over the top. Add the rest of the pasta, then cover the whole thing with whatever cheese you have left. Don’t be shy here. That cheese layer on top is what creates that golden, crispy, bubbly crust everyone fights over.
Step 8: Bake uncovered for 25 to 30 minutes. You’re looking for it to be bubbling around the edges and golden brown on top. If you want an extra crispy top (and who doesn’t?), turn on your broiler for the last 2 to 3 minutes. But watch it like a hawk. Broilers work fast and you can go from golden to burnt in about 30 seconds.
Step 9: Let it cool for about 5 minutes before serving. I know it’s tempting to dig in right away, but this stuff comes out of the oven at approximately the temperature of molten lava. Give it a few minutes to settle and you’ll thank me later when you don’t burn the roof of your mouth.
5) Tips for Making Creamy Baked Mac and Cheese
Grate your own cheese. I’m gonna keep saying this until everyone listens. Pre-shredded cheese is coated with cellulose or potato starch to keep it from clumping in the bag. That same coating prevents it from melting smoothly. You’ll end up with a grainy, separated sauce instead of the creamy perfection you’re after. Yeah, grating cheese takes an extra 5 minutes, but it makes all the difference. If you’ve got a food processor with a grater attachment, use it. Makes the job way easier.
Take the pot off the heat before adding cheese. This is probably the most common mistake people make with cheese sauces. If your liquid is boiling when you add the cheese, the proteins in the cheese can seize up and separate from the fat. You end up with a greasy, grainy mess instead of smooth sauce. Let the sauce cool down for just a minute after you turn off the heat, then add your cheese. Stir gently and watch it melt into silky perfection.
Don’t overbake it. The pasta keeps cooking in the oven, and if you leave it in too long, you’ll bake away all that beautiful creamy sauce. You want it bubbly and golden on top, not dried out. Set a timer and check it at 25 minutes. Every oven is different, so yours might be done sooner or need a couple extra minutes. You’re looking for bubbling around the edges and a golden top.
Layer your cheese. Yeah, you could just dump all the cheese on top and call it a day. But if you layer it like I describe in the recipe, you get cheese throughout the entire dish. Every bite has that gooey, melty cheese pull. It’s worth the extra 30 seconds it takes to add that middle layer. Your guests will notice the difference even if they don’t know why it tastes better.
Use the right size baking dish. A 9×13 pan is perfect for this recipe. If you use something smaller, the mac and cheese will be too thick and won’t cook evenly. Too big and it’ll be spread too thin and dry out. If you want to double the recipe for a crowd, use two 9×13 pans rather than trying to cram everything into one giant dish.
6) Making Creamy Baked Mac and Cheese Ahead of Time
Mac and cheese is one of those dishes that’s actually perfect for making ahead. Real talk here, it tastes even better the next day when all those flavors have had time to hang out together. Here’s what you do if you want to prep this in advance.
Make the whole thing exactly as directed, but stop before you put it in the oven. Assemble everything in your baking dish, cover it tightly with plastic wrap or foil, and stick it in the fridge. It’ll keep for up to 2 days like this. When you’re ready to bake it, take it out of the fridge and let it sit on the counter for about 30 minutes to take the chill off. Then bake as directed. You might need to add an extra 5 to 10 minutes to the baking time since you’re starting with cold mac and cheese.
Can you freeze it? I’ve had mixed results with freezing baked mac and cheese. The texture can get a little grainy when you reheat it. But if you need to freeze it, assemble it unbaked, wrap it really well (I’m talking double wrap with plastic wrap and then foil), and freeze for up to 3 months. Thaw it completely in the fridge overnight before baking. The key is making sure it’s wrapped tight so it doesn’t get freezer burn.
If you’re taking this to a potluck or holiday dinner, you can bake it at home, keep it warm in the dish wrapped in towels, and it’ll stay hot for about an hour. Or bake it most of the way at home (like 20 minutes), then finish it off in the oven wherever you’re going. Just remember to coordinate oven space with whoever’s hosting.
7) Storing Leftover Creamy Baked Mac and Cheese
Leftovers are actually fantastic with this recipe, which is good news because this makes a lot. Let the mac and cheese cool down to room temperature first. Don’t put hot food straight into the fridge or it’ll raise the temperature in there and mess with your other food. Once it’s cooled, transfer it to an airtight container. It’ll keep in the fridge for 3 to 4 days.
When you’re ready to reheat it, you’ve got options. The microwave is fastest, just heat individual portions for a minute or two, stirring halfway through. Add a splash of milk before microwaving to help restore some of that creaminess. It won’t be quite as creamy as fresh, but it’s still really good. If you’ve got time, reheating in the oven works better. Put your leftovers in an oven-safe dish, add a little milk or cream, cover with foil, and bake at 350°F for about 15 to 20 minutes until heated through.
Pro tip for leftovers: if your mac and cheese seems a little dry after being in the fridge, stir in some milk, cream, or even a little butter before reheating. The pasta absorbs liquid as it sits, so adding a bit back in brings it back to life. Start with a couple tablespoons and add more if needed. You’re looking to restore that creamy, saucy consistency.
8) Try these Main Course next!
9) Creamy Baked Mac and Cheese

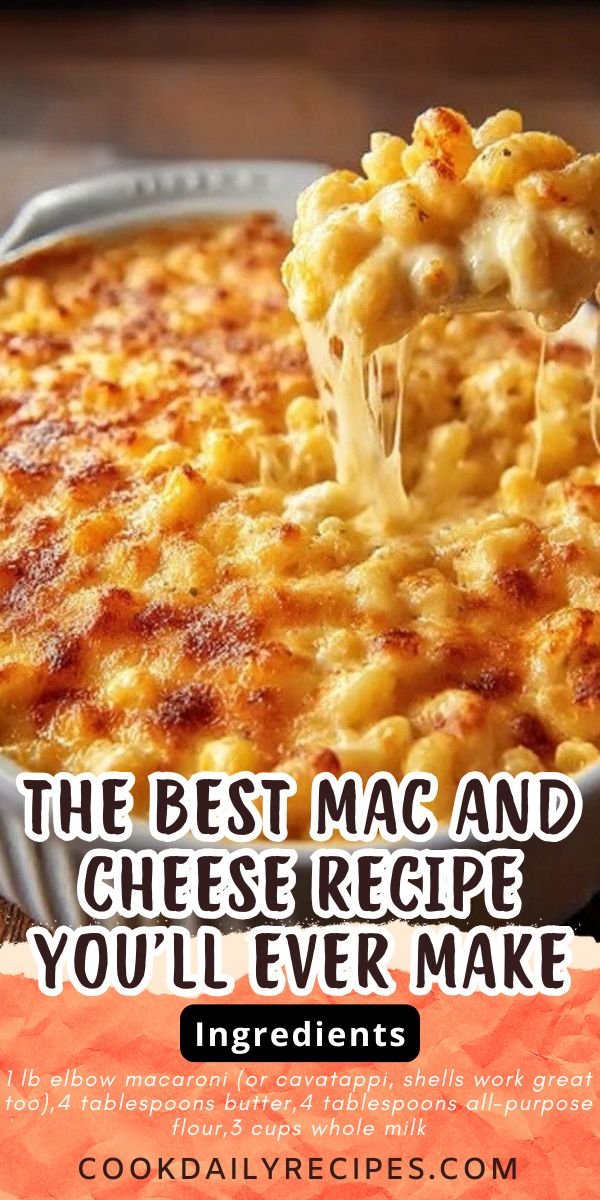
The Best Mac and Cheese Recipe You’ll Ever Make
Ingredients
- 1 lb elbow macaroni (or cavatappi, shells work great too)
- 4 tablespoons butter
- 4 tablespoons all-purpose flour
- 3 cups whole milk
- 1 cup half and half
- 1/2 teaspoon garlic powder
- 1/2 teaspoon onion powder
- 1/2 teaspoon paprika
- 1/2 teaspoon salt (plus more for pasta water)
- 1/2 teaspoon black pepper
- 3 cups sharp cheddar cheese, freshly grated
- 2 cups Gruyere cheese, freshly grated
- 1 cup mozzarella cheese, freshly grated
Instructions
- Get your oven going at 350°F. Grab a 9×13 inch baking dish and give it a light butter coating.
- Boil a big pot of salted water and cook your pasta about 1 minute less than the package says. We want it slightly firm since it’ll keep cooking in the oven. Drain it well and set aside.
- In the same pot (less dishes to wash, right?), melt the butter over medium heat. Toss in the flour and whisk it around for about 2 minutes until it’s all bubbly and smells kinda nutty.
- Slowly pour in the milk and half and half, whisking constantly so you don’t get lumps. Keep stirring until the sauce thickens up and coats the back of a spoon, about 5 to 8 minutes.
- Take the pot off the heat (this is important!) and add your garlic powder, onion powder, paprika, salt, and pepper. Stir it in.
- Now add about 2 cups of the sharp cheddar and 1 cup of the Gruyere. Stir until everything melts into this gorgeous creamy sauce.
- Add your cooked pasta back to the pot and mix it all together. Then fold in another cup of cheddar and the mozzarella.
- Pour half of this cheesy pasta goodness into your baking dish. Sprinkle some of the remaining cheese on top. Add the rest of the pasta, then cover the whole thing with whatever cheese you’ve got left.
- Bake uncovered for about 25 to 30 minutes until it’s bubbling and the top is golden. If you want it extra crispy on top, pop it under the broiler for 2 to 3 minutes at the end (but watch it like a hawk!).
- Let it cool for about 5 minutes before serving. Trust me, it’s lava hot straight from the oven and you’ll thank me for this tip.
10) Nutrition
Serving Size: 1/8 of dish, Calories: 485, Sugar: 6.2 g, Sodium: 720 mg, Fat: 28 g, Saturated Fat: 17 g, Carbohydrates: 38 g, Fiber: 1.5 g, Protein: 22 g, Cholesterol: 85 mg


Leave a Comment