

I’m not gonna lie, this pudding recipe has fooled me more than once. The first time I pulled it from the oven, I was convinced I’d done something terribly wrong. The batter looked split, the dish wobbled like jelly on a bumpy car ride, and I kept wondering if I’d accidentally created some weird lemon soup instead of dessert. But then I dug my spoon in and boom! Magic happened right there in my kitchen. There was this fluffy, golden sponge sitting on top of the most incredible silky lemon sauce you’ve ever tasted. That’s what we call the surprise element in these pudding recipes, and let me tell you, it gets me every single time I make it. This classic from Nigella Lawson’s collection is what I reach for when I need comfort with a citrus kick. It’s tart but not mouth puckering, sweet but not cloying, and the contrast between that airy top and the tangy sauce underneath? Pure genius. Perfect for those evenings when you want something warm and satisfying but not too heavy. Trust me on this one, you’re gonna want seconds.
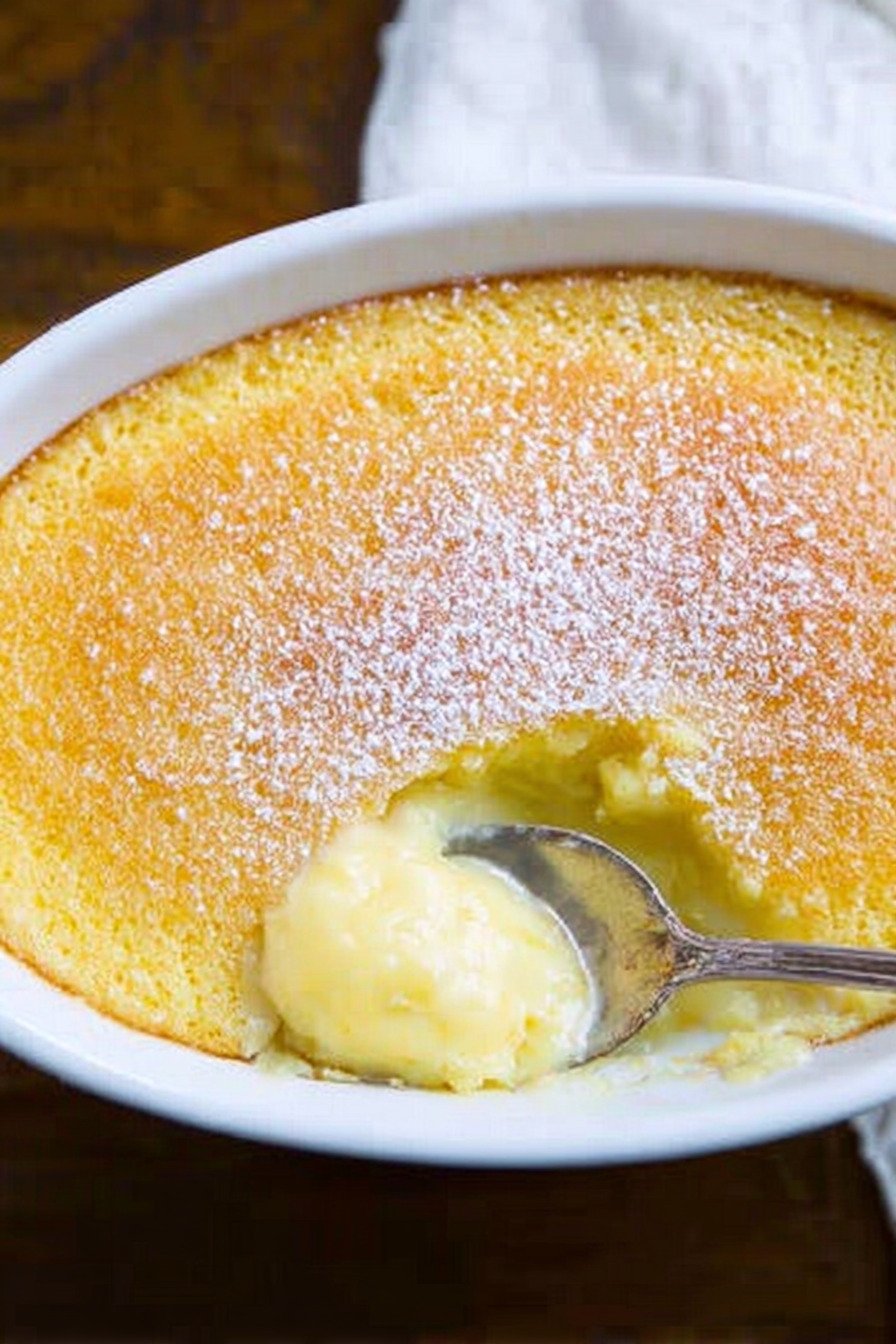
Table of Contents
- 1) Key Takeaways
- 2) Easy Nigella Lemon Surprise Pudding Recipe
- 3) Ingredients for Nigella Lemon Surprise Pudding
- 4) How to Make Nigella Lemon Surprise Pudding
- 5) Tips for Making Nigella Lemon Surprise Pudding
- 6) Making Nigella Lemon Surprise Pudding Ahead of Time
- 7) Storing Leftover Nigella Lemon Surprise Pudding
- 8) Try these Desserts next!
- 9) Nigella Lemon Surprise Pudding
- 10) Nutrition
1) Key Takeaways
- What makes this pudding surprise itself during baking?
- Can you make lemon pudding without it curdling?
- What causes the sauce layer to form underneath?
- How do you know when surprise pudding is done?

2) Easy Nigella Lemon Surprise Pudding Recipe
Look, I’m gonna be straight with you about these pudding recipes. The first time I made this particular one, I thought my kitchen skills had completely abandoned me. The batter split like a bad relationship, and I was ready to toss the whole thing. But then something wild happened in that oven. This British recipes traditional dessert does something absolutely magical while it bakes, creating two distinct layers from one single batter.
What makes this one of my favorite lemon desserts is how forgiving it actually is. You’re supposed to see that curdled mess. That’s not a mistake, that’s the recipe doing its thing. I’ve made these pudding recipes dozens of times now, and every single batch has looked terrible going into the oven and gorgeous coming out. The top puffs up into this golden sponge situation while underneath, like some kind of culinary sorcery, a tangy lemon sauce appears out of nowhere.
This surprise pudding lives up to its name in the best way possible. I remember serving it to my sister without telling her what to expect. She took one bite and her eyes went wide. “Wait, how is there sauce in here?” she asked, digging her spoon back in for more. That’s the reaction I get every time. People can’t believe one simple batter transforms itself into something this good. Plus, it comes together faster than you’d think, which is perfect when you need comfort food but don’t want to spend all evening in the kitchen.
The beauty of table pudding recipes like this is they work for any occasion. Want something warm after dinner on a Tuesday night? Done. Need to impress guests without breaking a sweat? This does the job. I’ve served this at casual family dinners and slightly fancier gatherings, and it fits right in everywhere. The pudding recipes that British cooks have been making for generations just hit different, you know? There’s something about that combination of comfort and elegance that modern desserts sometimes miss.

3) Ingredients for Nigella Lemon Surprise Pudding
Eggs You’ll need 2 medium eggs for this British breakfast turned dessert favorite, and here’s the thing about eggs in pudding recipes. You’ve gotta separate them, which sounds fancier than it is. Just crack each egg and pass the yolk back and forth between the shell halves while the white drops into a bowl. Keep the yolks in a different bowl. One tiny speck of yolk in your whites means they won’t whip up properly, and trust me, I learned that the hard way. Room temperature eggs separate easier and whip up fluffier, so pull them out of the fridge about 20 minutes before you start.
Butter Just 1 ounce, plus a bit extra for greasing your baking dish. I always use unsalted butter in my lemon desserts so I can control the salt level myself. Some people swear by salted, but with something this delicate, I like keeping things predictable. Make sure it’s soft enough to cream with the sugar and egg yolks. If you forgot to take it out ahead of time, cut it into small pieces and it’ll soften up faster. Don’t microwave it though, or you’ll end up with melted butter and that changes the whole texture of these surprise pudding creations.
All Purpose Flour You only need 1 rounded tablespoon, which seems like nothing, right? But that small amount is doing heavy lifting here. It gives the sponge top just enough structure to hold together without making it dense or cakey. I’ve accidentally added too much before, thinking more flour equals better results, and ended up with a pudding that was more bread than magic. Stick to the measurement. If you need gluten free, a good quality GF flour blend works fine, but make sure you sift it first because those blends can get clumpy in the bag.
Superfine Sugar The recipe calls for 6 ounces, which is about 3/4 cup if you’re measuring. Superfine sugar, sometimes called caster sugar in British recipes traditional collections, dissolves faster than regular granulated sugar. That matters when you’re beating it with egg yolks because you want it smooth, not grainy. Don’t have superfine sugar sitting around? No problem. Toss regular white sugar in a food processor and pulse it a few times. Boom, you’ve got superfine sugar. The pudding recipes from across the pond often call for this stuff, and now you know the workaround.
Lemon One large unwaxed lemon gives you both zest and juice, and this is where the magic really starts in these table pudding recipes. Unwaxed means you can grate that peel without worrying about weird coating ending up in your dessert. If you can only find waxed lemons, scrub them really well under hot water first. When you zest it, only get the yellow part. That white pith underneath tastes bitter and will mess up your pudding. I use a microplane for zesting because it’s faster and gets more flavor out of the lemon. After zesting, roll the lemon on the counter with your palm pressing down. This breaks up the juice sacs inside and you’ll get way more juice out of it.
Milk You need 8 fluid ounces, which is 1 cup. Whole milk works best in pudding recipes like this one because the fat content helps create that silky sauce layer. I’ve tried it with 2% milk and it still works, just not quite as rich and creamy. If you’re dairy free, I’ve had decent luck with oat milk, but almond milk can taste a bit thin. Soy milk works too. Whatever you use, make sure it’s cold from the fridge. When you add it to the lemon mixture, everything will look curdled and wrong. That’s supposed to happen, so don’t freak out like I did the first time.
Boiling Water You’ll need about 1 pint of boiling water for the water bath. This isn’t an ingredient that goes in the pudding itself, but you definitely need it. The water bath, called a bain marie if you wanna get fancy about it, keeps the pudding from cooking too fast on the bottom while the top is still raw. It creates this gentle, even heat that lets the surprise pudding do its layer separating thing. I just boil water in my electric kettle while the oven heats up. Easy and one less pot to wash later. Make sure you’ve got enough because the water needs to come halfway up your pudding dish.

4) How to Make Nigella Lemon Surprise Pudding
Step 1 Turn your oven on to 180°C, which is 350°F if you’re using Fahrenheit like me. Let it heat up completely while you’re putting everything together. A properly heated oven makes all the difference in how this British recipes traditional dessert rises and sets. I usually give mine a good 15 minutes to really get there. Grab your 2 pint ovenproof dish and smear butter all over the inside. Don’t skip this step or you’ll be scraping stuck pudding off the sides later, and that’s no fun for anyone. Get into all the corners and go a bit heavy handed with it.
Step 2 Set that buttered dish inside a deeper roasting pan. This is setting up for your water bath, which is gonna cook these pudding recipes evenly without drying them out or burning the bottom. I learned this trick from making cheesecakes, and it works just as well here. The roasting pan needs to be deep enough that water can come up the sides of your pudding dish without spilling over. If your roasting pan is kinda shallow, you might need to reduce the water amount slightly, but try to keep that water level as high as you safely can.
Step 3 Crack those eggs and separate them carefully. Yolks go in one bowl, whites in another. This is where steady hands help, but even if you break a yolk, just start over with a fresh egg. You really cannot get yolk in with the whites or they won’t whip up. I keep a third small bowl handy and crack each egg into that first, then transfer the white and yolk to their separate bowls. That way if one egg is bad or I mess up the separation, I haven’t ruined the whole batch. Takes an extra minute but saves a lot of headaches.
Step 4 Take your egg yolks, butter, flour, and sugar and beat them together until everything looks pale and creamy. I use a hand mixer for this, but a whisk and some elbow grease works too if that’s what you’ve got. The mixture should get lighter in color and increase in volume a bit. This usually takes about 2 minutes with an electric mixer or maybe 4 to 5 minutes by hand. You want the sugar mostly dissolved and everything smooth. This is the base of your lemon desserts magic, so take your time here and get it right.
Step 5 Grate in all that lemon zest right into your bowl. The smell at this point is incredible. Then squeeze in the juice from your lemon. You should get about 3 tablespoons of juice from a good sized lemon. If yours is on the small side, you might need a lemon and a half. Don’t stress too much about exact measurements here though. Lemons vary, and this surprise pudding is pretty forgiving. Once the zest and juice are in there, give everything a good stir. It might look a little separated at this stage, but that’s totally normal and nothing to worry about.
Step 6 Pour in your milk and stir it all together. Here’s where it looks like everything went wrong. The mixture will curdle and separate and look absolutely terrible. The first time I made table pudding recipes like this, I nearly threw the whole thing away at this point. But this curdled mess is exactly what’s supposed to happen. The acid from the lemon is reacting with the milk, and somehow this nasty looking mixture turns into something beautiful in the oven. Just keep stirring until everything is combined, even if it looks lumpy and split. You’re doing it right, I promise.
Step 7 Now grab those egg whites you separated earlier. Using clean beaters and a clean bowl is really important here because any grease or residue will keep the whites from whipping properly. Beat them until they form stiff peaks. That means when you lift the beater out, the peaks of egg white stand up straight instead of flopping over. This usually takes about 3 to 4 minutes with an electric mixer. Your arm will get tired if you’re doing it by hand, but it’s doable. Just keep going until those peaks are firm and glossy.
Step 8 Time to fold the whipped whites into your curdled lemon mixture. Use a spatula and fold gently, not stirring. Folding means you cut down through the middle, scrape along the bottom, and bring the spatula back up the side. Rotate the bowl a quarter turn and repeat. Do this in three batches so you don’t deflate all the air you just beat into those whites. The mixture will look lumpy and weird, with streaks of white running through it. That’s perfect. Don’t overmix trying to make it smooth. Those air bubbles in the egg whites are what makes the top layer light and fluffy.
Step 9 Pour everything into your prepared dish. Then carefully pour boiling water into the roasting pan until it comes about halfway up the sides of your pudding dish. Be careful not to splash any water into the pudding itself. I like to pull out the oven rack first, set the roasting pan with the pudding dish on it, then pour the water. That way I’m not trying to carry a heavy pan full of boiling water across my kitchen. Much safer, especially if you’ve got kids or pets running around.
Step 10 Slide everything into your preheated oven and bake for 40 minutes. Don’t open the oven door during baking because you’ll let all the heat out and mess up how the pudding rises. I know it’s tempting to peek, but resist. You’ll know it’s done when the top is golden brown with little cracks forming and your kitchen smells like a lemon grove. The pudding should wobble just slightly when you give the pan a gentle shake. Let it cool for about 5 minutes before serving. These pudding recipes are best eaten warm, not piping hot, so that little rest time is perfect.
5) Tips for Making Nigella Lemon Surprise Pudding
Don’t panic when the mixture looks curdled after adding the milk. I cannot stress this enough. Every single person I’ve taught these pudding recipes to has had a moment of panic at this stage. They look at that separated, lumpy mess and think they’ve ruined it. You haven’t. That curdled appearance is exactly what should happen when lemon juice meets milk. The acid curdles the milk proteins, and somehow during baking, this all transforms into smooth sauce and fluffy sponge. Just accept that it looks wrong and keep going. The oven fixes everything.
Use room temperature eggs if you can remember to take them out ahead. Cold eggs are harder to separate cleanly, and the whites don’t whip up as high. I forget this step half the time, but when I remember, the results are noticeably better. The yolks also mix more smoothly with the butter and sugar when they’re not fridge cold. If you forgot and need to warm them up fast, put the whole eggs in a bowl of warm tap water for 5 minutes. That’s usually enough to take the chill off without actually cooking them.
Make sure your butter is actually soft before you start. I’ve tried to shortcut this by microwaving hard butter, and it always ends badly. You end up with melted butter instead of soft butter, and that changes the texture of the final pudding. Real soft butter should hold its shape but dent easily when you press it. If you’re the planning ahead type, leave it on the counter for an hour. If you’re like me and forget these things, cut it into small cubes and it’ll soften in 15 or 20 minutes.
Get every last bit of lemon zest before you juice it. That yellow peel is packed with oils that smell amazing and taste even better. I run my lemon over the grater in strips, rotating as I go, and try to get as much of the yellow part as possible without hitting the white pith underneath. That white layer tastes bitter and will throw off the balance of your lemon desserts. Once you’ve zested it, the lemon looks kinda naked and pale, but you’ve gotten all the good stuff out of it.
Beat those egg whites until they’re really stiff, not just foamy. When you lift the beaters out, the peaks should stand straight up, maybe curling just slightly at the very tip. If the peaks flop over immediately, keep beating. Under beaten whites won’t give you that light, airy top layer that makes this surprise pudding so good. Over beating is harder to do than you’d think, so err on the side of beating longer rather than stopping too soon. You’ll see the whites go from clear and bubbly to white and foamy to thick and glossy. Keep going until glossy.
Fold the egg whites in gently, not stirring them. I used to just dump them in and stir everything together, and my puddings came out dense and flat. Folding keeps all those air bubbles intact. Cut down through the center with your spatula, scrape along the bottom, bring the spatula up the side. Turn the bowl and repeat. It feels awkward at first, but you get the hang of it. Some streaks of white showing through is fine. Don’t mix until it’s perfectly smooth or you’ll deflate all that air you worked so hard to create.
Check that your oven temperature is accurate if this is your first time making these table pudding recipes. My oven runs about 15 degrees hot, which I learned the hard way after burning several batches of cookies. You can buy an oven thermometer for like ten bucks, and it’s worth every penny. Too hot and your pudding will rise too fast and crack badly on top. Too cool and it won’t set properly. The right temperature gives you that perfect golden top with just a few attractive cracks.
6) Making Nigella Lemon Surprise Pudding Ahead of Time
I’m gonna level with you about making these pudding recipes ahead of time. It’s not really ideal, but it can be done if you need to. The absolute best way to eat this surprise pudding is straight from the oven after it’s cooled for 5 minutes. That’s when the texture contrast between the sponge top and the sauce bottom is most dramatic, and the whole thing just tastes better. But life happens, and sometimes you need to bake stuff in advance.
If you must prep ahead, here’s what I’ve learned works okay. You can make the batter up to about 2 hours before baking, but don’t fold in the egg whites until right before it goes in the oven. Mix everything else together, curdled mess and all, and keep it covered at room temperature. Whip your whites fresh when you’re ready to bake, fold them in, and proceed as normal. The whites lose their airiness if they sit around, so this step really needs to be done last minute.
You can also fully bake these lemon desserts and reheat them later the same day. Let the pudding cool completely, cover it loosely, and leave it at room temperature for up to 4 hours. When you’re ready to serve, pop it in a 150°C oven for about 10 minutes to warm through. It won’t be quite the same as fresh, but it’ll still be good. The sauce layer tends to get absorbed into the sponge more as it sits, so you lose some of that surprise element. Still tasty though, just different.
The one thing I really don’t recommend is making the whole thing the day before. I tried this once for a dinner party, thinking I’d be so smart and organized. The pudding was fine going into the fridge, but reheating it the next day turned the texture all weird. The sponge got kind of dense and the sauce separated in a not great way. Everyone still ate it, but it definitely wasn’t at its best. These British recipes traditional desserts really shine when they’re fresh, and trying to stretch that timeline too far just doesn’t work well.
What does work well is measuring out all your ingredients ahead. Get your eggs separated, butter softened, lemon zested and juiced, flour measured, sugar weighed out. Put everything in separate little bowls or containers and keep them at room temperature if you’re baking within a few hours. That way when you’re ready to make the pudding, you can zip through the actual mixing and have it in the oven in 10 minutes. All the prep is done, but you’re still baking it fresh. Best of both worlds, really.
7) Storing Leftover Nigella Lemon Surprise Pudding
Okay, so you’ve got leftover pudding. First of all, lucky you, that rarely happens at my house. But when it does, here’s what works. Let the pudding cool down to room temperature first. Don’t cover it while it’s still warm or you’ll get condensation, and that makes everything soggy. Once it’s cooled off, cover the dish tightly with plastic wrap or transfer portions to an airtight container. Pop it in the fridge where it’ll keep for about 3 days, maybe 4 if you’re pushing it.
The texture changes as these table pudding recipes sit in the fridge. That sauce layer gets absorbed into the sponge more, so instead of two distinct layers, you end up with one moist, lemony cake situation. It’s still delicious, just different from when it’s fresh. Some people actually prefer it this way because the lemon flavor gets more evenly distributed throughout. My brother in law always asks for leftovers specifically because he likes the texture better the next day. To each their own, I guess.
Reheating refrigerated pudding takes a gentle hand. I usually microwave individual portions for about 30 to 45 seconds, checking halfway through. You want it warm, not hot, and definitely not overcooked. If you nuke it too hard, the texture gets rubbery and weird. You can also reheat the whole dish in a low oven, around 150°C, covered with foil, for about 15 minutes. This is better for the texture but takes longer, so pick whichever method fits your schedule.
Can you freeze this surprise pudding? Technically yes, but I wouldn’t recommend it. I tried freezing a portion once just to see what would happen, and while it was edible after thawing and reheating, the texture was off. The sauce separated and got grainy, and the sponge top became kind of dense. If you’re gonna have leftovers, better to just keep them in the fridge and eat them within a few days than try to freeze and resurrect them later. Some pudding recipes freeze well, but this isn’t one of them.
If you know you’ll have leftovers, I sometimes intentionally underbake the pudding by about 5 minutes. That way when you reheat it, it finishes cooking and doesn’t get overdone. This works better if you’re planning to serve it the next day. Just take it out when the top is light golden instead of deep golden, let it cool, refrigerate, and finish it in the oven the next day. Not quite as good as fresh, but closer than fully baking and then reheating. These kinds of tricks help when you’re trying to make things work for your schedule instead of the other way around.
8) Try these Desserts next!


9) Nigella Lemon Surprise Pudding

Lemon Surprise Pudding Recipes with Hidden Sauce Layer
Ingredients
- 2 medium eggs, separated
- 1 oz butter, plus extra for greasing
- 1 rounded tablespoon all purpose flour
- 6 oz superfine sugar
- 1 large unwaxed lemon (zest and juice)
- 8 fl oz whole milk
- 1 pint boiling water
Instructions
- Get your oven going at 180°C (350°F). You know it’s ready when it beeps or when you’ve forgotten about it for 10 minutes.
- Grab a 2 pint ovenproof dish and butter it up generously. Set this dish inside a deeper roasting pan because we’re doing a water bath situation here.
- Crack those eggs and separate the yolks from the whites. Keep them in different bowls and be super careful not to get any yolk in with the whites, or they won’t fluff up properly later.
- Beat the egg yolks together with butter, flour, and sugar until it looks pale and creamy. Your arm might get tired if you’re doing this by hand, but it’s worth it.
- Grate in all that lemon zest and squeeze in the juice. The smell alone is worth making this pudding for.
- Pour in the milk and give it a good stir. Now here’s where it looks like you’ve ruined everything because the mixture will curdle and look awful. Don’t panic! This is supposed to happen. Just keep mixing.
- Whip those egg whites until they form stiff peaks. When you lift the whisk, they should stand up proud and not flop over.
- Fold the whites into your lemon mixture gently, doing it in three batches. Use a spatula and try not to knock all the air out. It’ll look lumpy and weird, but that’s totally fine.
- Pour everything into your buttered dish, then carefully fill the roasting pan with boiling water until it comes halfway up the sides of your pudding dish.
- Slide it into the oven and bake for 40 minutes. You’ll know it’s done when the top is golden brown with little cracks and your kitchen smells like a lemon grove. Let it cool for just 5 minutes before serving because we’re eating this warm.
10) Nutrition
Serving Size: 1/6 of the pudding | Calories: 300 | Sugar: 25 g | Sodium: 95 mg | Fat: 9 g | Saturated Fat: 5 g | Carbohydrates: 48 g | Fiber: 0.5 g | Protein: 6 g | Cholesterol: 85 mg


Leave a Comment