
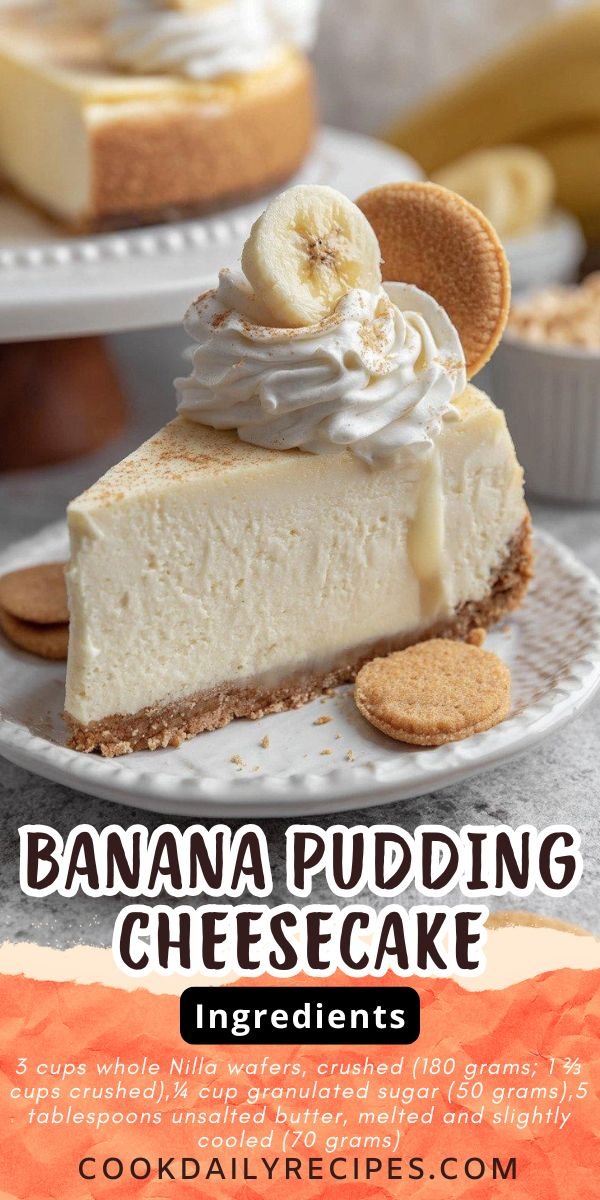
You know what? I’ve been making cheesecakes for years, and this banana pudding version might just be my absolute favorite. There’s something magical about turning that classic Southern dessert into a creamy, dreamy cheese cake recipe that makes everyone go back for seconds. What I love most about this cheesecake is how it balances rich creaminess with that nostalgic banana flavor we all crave. Instead of your typical graham cracker base, we’re using crushed Nilla wafers which adds an extra layer of authenticity. The filling gets its incredible banana taste from both fresh mashed bananas and instant pudding mix. Trust me, this combo creates a flavor that’s way more intense than using just one or the other. Whether you’re planning your next family gathering or just want to treat yourself to something special, this banana bread recipe inspired dessert delivers every single time. It’s easier than you’d think to master this banana pudding recipe turned into a showstopping cheesecake. And here’s the best part: you can make it a few days ahead, which means less stress when guests arrive. I’ve included tons of tips throughout to help you nail this one on your first try, from selecting the ripest bananas to getting that perfect creamy texture.

Table of Contents
- 1) Key Takeaways
- 2) Easy Banana Pudding Cheesecake Recipe
- 3) Ingredients for Banana Pudding Cheesecake
- 4) How to Make Banana Pudding Cheesecake
- 5) Tips for Making Banana Pudding Cheesecake
- 6) Making Banana Pudding Cheesecake Ahead of Time
- 7) Storing Leftover Banana Pudding Cheesecake
- 8) Try these Desserts next!
- 9) Banana Pudding Cheesecake
- 10) Nutrition
1) Key Takeaways
- What makes banana pudding cheesecake different from regular cheesecake?
- Can you use regular vanilla pudding instead of banana pudding mix?
- Why does my cheesecake crack and how can I prevent it?
- Do I really need a water bath for baking cheesecake?
- How ripe should the bananas be for this recipe?

2) Easy Banana Pudding Cheesecake Recipe
Listen, I’ve made dozens of cheesecakes over the years, and this banana pudding version is hands down one of the most requested at my house. When I first created this cheese cake recipe, I wasn’t sure if combining two classic desserts would work. Boy, was I wrong! This thing disappeared faster than any dessert I’ve ever made.
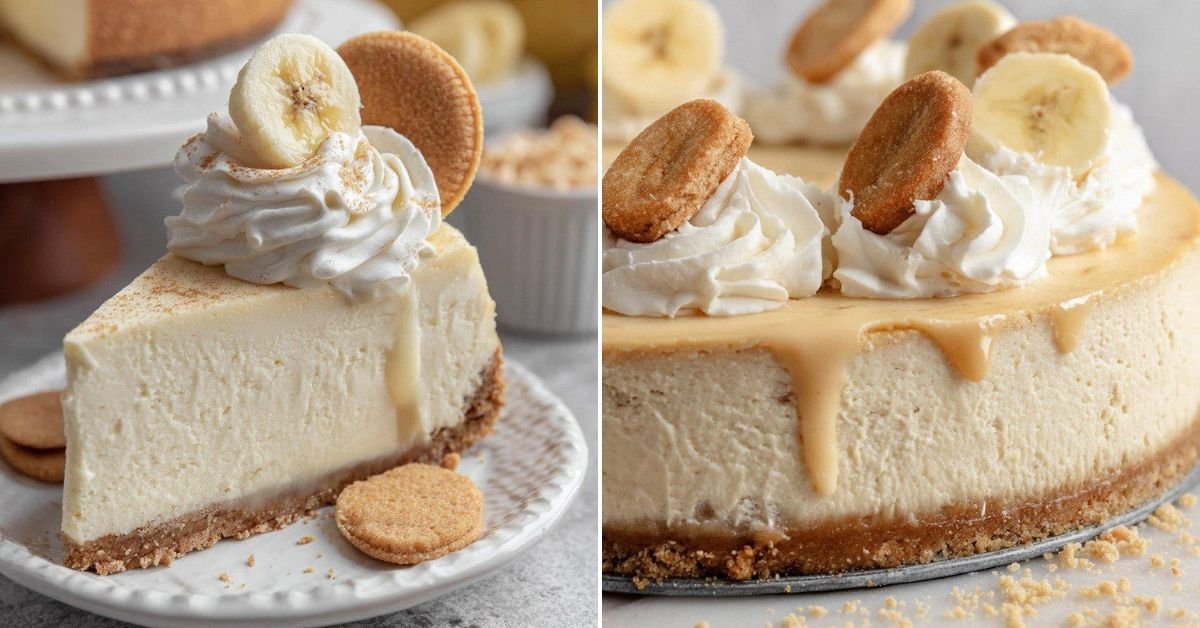
What makes this cheesecake special? Well, instead of that standard graham cracker crust everyone uses, we’re going with crushed Nilla wafers. I know it sounds simple, but trust me, it makes all the difference. That vanilla cookie flavor paired with the creamy banana filling? Pure magic. The first time I served this at a family dinner, my uncle asked for the recipe before he even finished his first slice.
Here’s what I love about this cheese cake recipe. You get all those nostalgic flavors of Southern banana pudding, but in an elegant, slice and serve format. No more worrying about layers sliding around or cookies getting soggy. This dessert stays perfect from the first slice to the last. Plus, you can make it days ahead, which takes so much stress off when you’re hosting.
The filling itself is where this recipe really shines. We’re using both fresh mashed bananas and instant banana pudding mix. I tried making it with just bananas once, and it was good, but not great. The pudding mix adds this depth of flavor that you just can’t get from bananas alone. It’s like the difference between regular vanilla and the good stuff. You know what I mean?
And can we talk about how forgiving this recipe is? I’ve had students who’ve never baked anything more complicated than slice and bake cookies nail this on their first try. The water bath method I use might seem fussy at first, but it’s actually foolproof once you get the hang of it. No more cracked tops or dense, overbaked centers. Just smooth, creamy perfection every single time.

3) Ingredients for Banana Pudding Cheesecake
Nilla Wafers
You’ll need about 3 cups of whole Nilla wafers for the crust. I always buy an extra box just in case, and let’s be honest, snacking happens! When you crush them up, they should look like fine sand. My food processor makes quick work of this, but a sealed plastic bag and a rolling pin work just as well. Some folks ask if they can substitute vanilla wafers from other brands. Sure, but Nilla wafers have this specific texture that really makes the crust hold together perfectly.
Cream Cheese
We need 32 ounces of full fat brick style cream cheese for this cheese cake recipe. That’s four 8 ounce blocks. Don’t even think about using the spreadable kind or reduced fat versions. They have too much moisture and will mess up your texture. Room temperature is key here. I set mine out on the counter about two hours before I start baking. Cold cream cheese will give you lumps, and nobody wants lumpy cheesecake.
Fresh Bananas
Here’s where people usually mess up. You need super ripe bananas for this banana pudding recipe. I’m talking brown spots all over, maybe even a little black. Those green tipped bananas at the store? Put them in a paper bag for a few days first. The riper they are, the sweeter and more flavorful your cheesecake will be. You’ll need about two large bananas to get one cup of mashed banana.
Instant Banana Pudding Mix
One 3.4 ounce box of instant banana cream pudding mix goes right into the filling as a dry ingredient. Don’t prepare it according to the package directions! Just dump it in dry. This is what gives the cheesecake that unmistakable banana pudding flavor. If you can’t find banana cream flavor, regular banana pudding mix works fine. Some grocery stores keep this near the baking aisle, others near the Jell-O. Check both spots.
Sour Cream
Half a cup of full fat sour cream cuts through the richness of all that cream cheese. It adds this subtle tang that balances everything out. I’ve tried making this banana bread recipe inspired dessert with Greek yogurt instead, and it works in a pinch, but sour cream gives you better results. Make sure it’s room temperature too, just like the cream cheese.
Granulated Sugar
We use sugar in both the crust and the filling. The crust gets a quarter cup, and the filling takes a full cup. Some people think that sounds like a lot, but cheesecake needs that sweetness to balance the tangy cream cheese. I’ve tried cutting back, and the dessert just tastes flat. Trust the measurements on this one.
Eggs
Four large eggs bind everything together. Room temperature eggs are a must for this cake baking recipe. If you forget to take them out ahead of time, just plop them in a bowl of warm tap water for about five minutes. They’ll warm right up. I always crack my eggs into a separate bowl first. Nothing worse than getting shell bits in your perfectly smooth batter.
Unsalted Butter
Five tablespoons of melted unsalted butter holds the Nilla wafer crust together. Let it cool slightly after melting so it doesn’t make the crust mixture too hot. I use unsalted so I can control the salt level myself, but if salted is all you have, just skip the extra salt in the crust.
Vanilla Extract
Just one teaspoon of pure vanilla extract goes into the filling. I always use the real stuff, never imitation. It costs more, but the flavor difference is worth every penny. Pure vanilla has these subtle notes that artificial vanilla just can’t match. Plus, a little bottle lasts forever since you only use small amounts.
4) How to Make Banana Pudding Cheesecake
Step 1 Prepare Your Pan and Preheat
Get your oven going at 325°F. Cut a circle of parchment paper to fit the bottom of your 9 inch springform pan. This paper makes removing the finished cheesecake so much easier. I learned this trick the hard way after ruining a beautiful cheesecake trying to pry it off the pan bottom. Now I never skip this step.
Step 2 Make and Bake the Crust
Crush those Nilla wafers until they’re fine crumbs. Mix them with the sugar, then pour in your melted butter. Stir until everything looks like wet sand. Press this mixture firmly into the bottom of your prepared pan. I use the bottom of a measuring cup to really pack it down. Pop it in the oven for 10 minutes, then set it aside to cool. This pre baking step makes the crust stay crisp instead of getting soggy.
Step 3 Start Your Water Bath
Put a big pot of water on the stove to boil. You’ll need this later for the water bath. Starting it now means it’ll be ready when you need it. This is one of those cheese cake recipe steps that people skip, then wonder why their dessert cracked. Don’t be that person. The water bath is your secret weapon.
Step 4 Beat the Cream Cheese
Add your room temperature cream cheese to your mixer bowl. Beat it on medium speed for about two minutes until it’s completely smooth. No lumps allowed here. If you see any lumps, keep beating. Scrape down the sides of the bowl with a rubber spatula. Cream cheese loves to hide up there.
Step 5 Add Banana and Sour Cream
Mash your super ripe bananas really well. You don’t want big chunks. Add them to the cream cheese along with the sour cream. Mix until everything blends together smoothly. Stop and scrape down the bowl again. I probably scrape my bowl five or six times during this whole process. It seems excessive, but it prevents unmixed pockets.
Step 6 Mix in Dry Ingredients
Add the sugar, dry pudding mix, and vanilla extract. Mix on low speed for about 30 to 60 seconds. The mixture should look smooth and creamy. This is where that classic banana pudding flavor really comes together. Take a little taste if you want. Just remember there are raw eggs coming next, so this is your last chance for quality control.
Step 7 Gently Add Eggs
Crack your eggs into a separate bowl and beat them lightly with a fork. Pour them into your cheesecake batter. Mix on the lowest speed just until combined. Overmixing eggs creates too much air, which leads to cracks. Give the batter a few gentle folds with a spatula to make sure everything’s mixed. The batter should look thick and smooth.
Step 8 Wrap the Pan
Here’s where we get serious about keeping water out. Wrap the outside of your cooled springform pan with two or three layers of aluminum foil. Really wrap it well, bringing the foil up the sides. Then I put the whole wrapped pan inside an oven bag and roll down the sides. This double protection system has never failed me. Water in your cheesecake ruins everything.
Step 9 Pour and Place in Water Bath
Pour your cheesecake batter over the cooled crust. Smooth out the top with a spatula. Put your boiling water in a large roasting pan, about an inch deep. Carefully lower your wrapped cheesecake pan into the water. Transfer the whole setup to your preheated oven. Take your time with this step. Sloshing hot water everywhere is not fun.
Step 10 Bake and Cool Properly
Bake for 70 to 80 minutes. The edges should be set, but the center will still jiggle slightly when you gently shake the pan. That’s exactly what you want. Turn off the oven, crack the door about an inch, and let the cheesecake sit in there for a full hour. This gradual cooling prevents cracks. After an hour, take it out and let it cool completely on your counter. Then refrigerate for at least five to six hours, but overnight is better.
Step 11 Release and Decorate
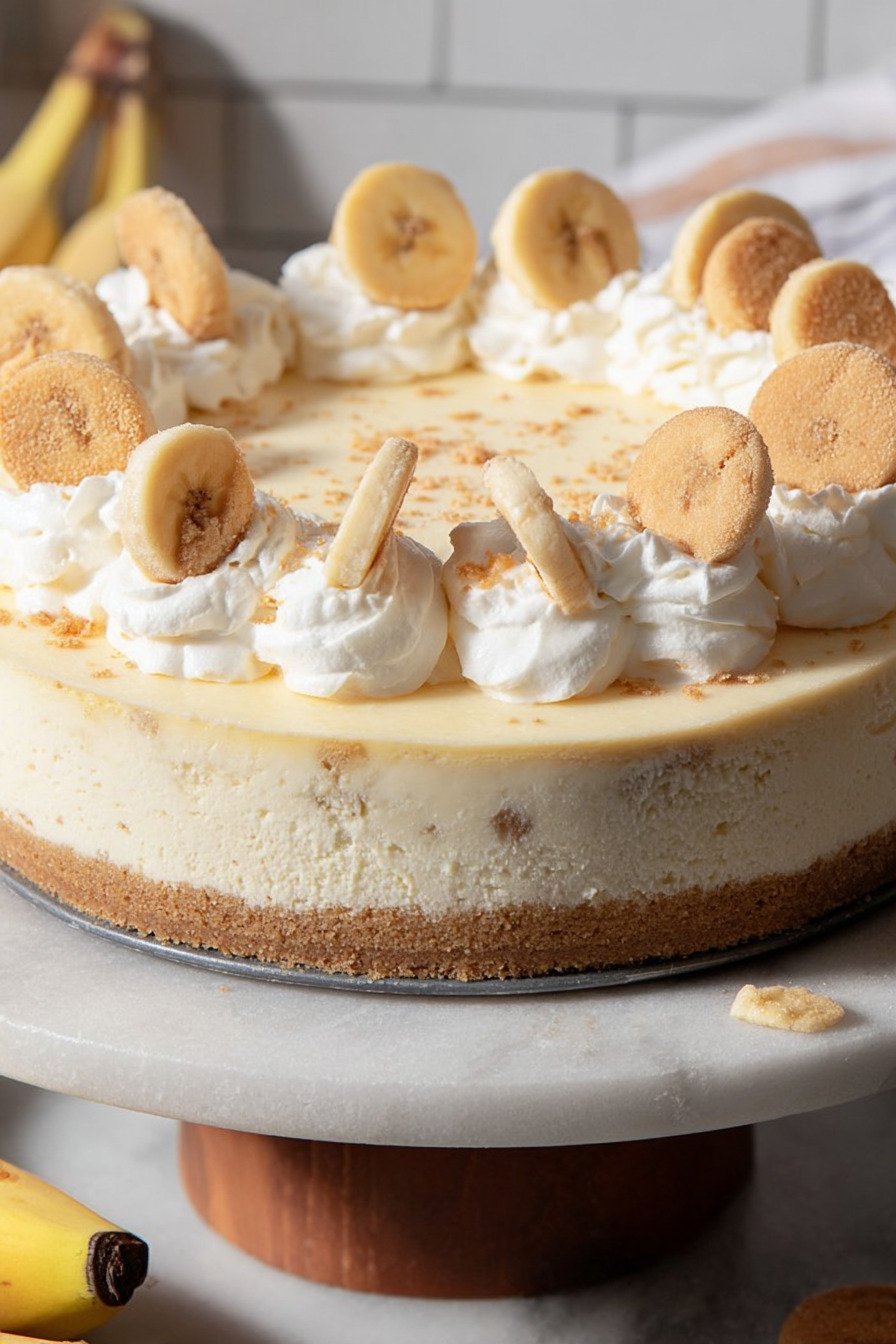
Run a thin knife around the edge of the pan to loosen your cheesecake. Release the springform pan sides. Now comes the fun part! Top with homemade whipped cream, fresh banana slices, and extra Nilla wafers. I like to pipe the whipped cream in swirls, but spreading it works great too. Add the banana slices right before serving so they don’t turn brown.
5) Tips for Making Banana Pudding Cheesecake
Room Temperature Everything
I can’t stress this enough. Cold ingredients don’t mix smoothly. They create lumps and pockets of unmixed stuff. Set out your cream cheese, sour cream, and eggs at least two hours before you start. I usually do this first thing in the morning if I’m baking that afternoon. Your 6 inch cheesecake recipe or full size version will thank you for this patience.
Don’t Skip the Water Bath
Look, I know wrapping the pan seems like a pain. I get it. But that water bath creates gentle, even heat that bakes your cheesecake perfectly. Without it, the edges overcook while the center stays raw. Or worse, your beautiful dessert cracks right down the middle. The water bath is what separates okay cheesecake from amazing cheesecake.
Use Ripe Bananas
Those perfectly yellow bananas? Put them back. You need bananas covered in brown spots for this banana bread with coconut flour style flavor. If your bananas aren’t ripe enough, stick them in a paper bag with an apple for a day or two. The apple releases ethylene gas that speeds up ripening. Science is cool, right?
Check Your Pudding Mix
Make absolutely sure you’re using instant pudding mix, not cook and serve. Cook and serve pudding needs heat to activate, and adding it dry to your cheesecake won’t work. The instant kind thickens on contact with liquid, which is exactly what happens when it hits your batter. Double check that label before you buy.
Test for Doneness Carefully
The center should jiggle like Jello when you gently shake the pan. If it sloshes like water, it needs more time. If it doesn’t move at all, you’ve overbaked it. This is one of those things you learn with practice. My first few cheesecakes were either underbaked or overdone until I learned what that perfect jiggle looks like.
Be Patient with Cooling
Rushing the cooling process causes cracks and a gummy texture. Let it cool in the turned off oven with the door cracked. Then let it cool completely on the counter. Then refrigerate it for hours. I know waiting is hard when something smells so good, but patience pays off here. A properly cooled cheesecake slices clean and tastes better too.
Clean Your Knife Between Slices
Want those perfect Instagram worthy slices? Dip your knife in hot water, wipe it dry, then make your cut. Repeat for each slice. The hot knife glides through the dense filling without dragging or making a mess. This little trick makes your presentation look professional even if you’re just serving family.
6) Making Banana Pudding Cheesecake Ahead of Time
This is honestly one of my favorite make ahead desserts. Cheesecake needs time to set properly anyway, so you might as well use that to your advantage. I usually make mine three or four days before I need it. The flavors actually get better as it sits. Something about all those ingredients hanging out together in the fridge just works.
After your cheesecake is completely cooled and chilled, leave it in the springform pan. Cover the top tightly with plastic wrap, making sure the wrap doesn’t touch the surface. Then wrap the whole thing in aluminum foil. This double wrapping prevents your cheesecake from absorbing any weird fridge smells. Nobody wants their dessert tasting like last night’s garlic chicken.
Here’s my strategy when I’m making this for a party. I bake the cheesecake on Monday or Tuesday for a Saturday gathering. It sits in the fridge until Saturday morning, when I remove it from the pan and add the toppings. This way I’m not stressed on party day, and the cheesecake has plenty of time to set properly. Works like a charm every time.
One word of caution about the toppings. Don’t add the whipped cream, banana slices, or Nilla wafers until right before serving. Bananas turn brown when exposed to air. Whipped cream can weep and get watery. And those crispy cookies? They’ll turn soggy if they sit on the moist cheesecake too long. Do all your decorating within an hour or two of serving.
If you’re bringing this dessert somewhere, transport it in the springform pan. Keep it cold in a cooler with ice packs. Once you arrive, take off the pan sides and do your decorating. I learned this after trying to transport a decorated cheesecake once. Let’s just say it didn’t end well. Keep things simple and decorate on site.
7) Storing Leftover Banana Pudding Cheesecake
Leftover cheesecake? That’s a rare occurrence at my house, but it does happen sometimes. Good news is, this dessert stores beautifully. Once you’ve cut slices, cover the cut edges with plastic wrap. Press it right against the exposed cheesecake so air can’t get to it. Then cover the whole thing loosely with foil or put it back in the springform pan with the sides attached.
Your cheesecake will stay fresh in the refrigerator for up to four days. The texture stays creamy and the flavor holds up great. If anything, I think it tastes even better on day three than day one. All those flavors have really melded together by then. Just remove any toppings that look tired and add fresh ones before serving leftovers.
Want to keep it even longer? Freeze it! I do this all the time. Cut the cheesecake into individual slices. Wrap each slice tightly in plastic wrap, then again in aluminum foil. Put the wrapped slices in a freezer bag and squeeze out as much air as possible. They’ll keep frozen for up to three months. This is perfect for those nights when you want dessert but don’t want to make something from scratch.
Thawing frozen cheesecake is easy. Move a slice from the freezer to the fridge the night before you want to eat it. Let it thaw slowly overnight. Don’t try to speed things up in the microwave or on the counter. Slow thawing in the fridge keeps the texture perfect. Add fresh toppings after thawing and nobody will know it was frozen.
Pro tip for storage. If you know you’re going to freeze some, cut and wrap those portions before adding any toppings. Plain cheesecake freezes better than decorated cheesecake. You can always add whipped cream and banana slices after thawing. This gives you way more flexibility and better results overall.
8) Try these Desserts next!

9) Banana Pudding Cheesecake

Cheese Cake Recipe: Banana Pudding Cheesecake
Ingredients
Nilla Wafer Crust
- 3 cups whole Nilla wafers, crushed (180 grams; 1 ⅔ cups crushed)
- ¼ cup granulated sugar (50 grams)
- 5 tablespoons unsalted butter, melted and slightly cooled (70 grams)
Banana Pudding Cheesecake Filling
- 32 ounces brick style cream cheese, softened to room temperature (4 blocks; 905 grams)
- 1 cup mashed ripe banana (2 large ripe fresh bananas; 250 grams)
- ½ cup full fat sour cream, room temperature (115 grams)
- 1 cup granulated sugar (200 grams)
- 1 (3.4 oz) box dry instant banana cream pudding mix (NOT cook & serve)
- 1 teaspoon pure vanilla extract
- 4 large eggs, at room temperature
Optional Toppings
- 2 cups whipped cream or whipped topping (homemade or store bought)
- 1 to 2 bananas, sliced
- 10 to 20 Nilla wafers
Instructions
To Make the Crust
- Preheat your oven to 325°F (163°C).
- Line the bottom of a 9 inch springform pan with parchment paper and set it aside.
- Crush the Nilla wafers in a food processor or blender until they become fine crumbs. You can use a sealed ziplock bag and rolling pin if you prefer.
- Mix the crushed Nilla wafer crumbs with granulated sugar in a medium bowl and stir well.
- Pour in the melted butter and mix until all crumbs are nicely moistened.
- Scoop the mixture into your prepared 9 inch springform pan and press it down firmly into one even layer. I like using the bottom of a measuring cup to really pack it in.
- Bake for 10 minutes, then remove from oven and set aside to cool while you make the filling. Keep the oven at 325°F (163°C).
To Make the Cheesecake Filling
- Get a large pot of water boiling on the stove for the water bath before starting the filling.
- In your stand mixer bowl with the paddle attachment, or using a large mixing bowl with a handheld mixer, beat the cream cheese on low to medium speed until smooth (about 1 to 2 minutes). Don’t overbeat.
- Add the mashed banana and sour cream, mixing until fully combined. Stop and scrape down the sides of the bowl as needed.
- Add the granulated sugar, banana cream pudding mix, and vanilla extract. Mix until well combined (about 30 to 60 seconds). Remember, do NOT prepare the pudding according to package directions. Just add it dry.
- In a separate small bowl, lightly beat the eggs first.
- Add the beaten eggs to the cheesecake mixture and mix on low speed until just combined. Use a rubber spatula to fold everything together, making sure it’s fully mixed.
To Assemble and Bake
- Wrap the outside of your cooled springform pan with 2 to 3 layers of aluminum foil to prevent water from getting in.
- Place the wrapped pan inside an oven bag and roll the sides down. This double protection really helps keep your cheesecake dry.
- Pour the cheesecake filling into the springform pan and smooth the top into an even layer.
- Add your boiling water to a large roasting pan until it’s about 1 inch deep.
- Carefully place the wrapped springform pan into the water bath.
- Transfer the roasting pan with the cheesecake to the oven and bake for 70 to 80 minutes. The edges should be set but the center will still jiggle slightly.
- Turn off the oven, crack the door open slightly, and let the cheesecake cool in the warm oven for 1 hour. This prevents cracking.
- After an hour in the oven, remove the cheesecake and transfer to a wire rack to cool completely.
- Once cooled to room temperature, cover tightly and refrigerate for 5 to 6 hours or overnight before serving.
To Serve
- Once the cheesecake is completely chilled, run a thin knife around the outside edge to loosen it from the pan.
- Carefully release the springform pan.
- Top with generous swirls of homemade whipped cream, fresh sliced bananas, and Nilla wafers right before serving.
10) Nutrition
Serving Size: 1/12 of cheesecake | Calories: 485 | Sugar: 32 g | Sodium: 420 mg | Fat: 28 g | Saturated Fat: 16 g | Carbohydrates: 48 g | Fiber: 1 g | Protein: 9 g | Cholesterol: 145 mg


Leave a Comment