

You know what I love about chicken thighs? They’re basically impossible to mess up. Unlike their boring cousin (chicken breast, I’m looking at you), thighs stay juicy and tender no matter what. I stumbled onto this recipe on one of those crazy weeknights when everyone was hungry and I had about zero motivation to cook. Tossed some Italian herbs on these bad boys, threw them in the oven, and boom! Dinner was served. Now it’s become my go-to recipe for chicken thighs whenever I need something that tastes like I spent hours in the kitchen but really only took about 10 minutes of actual work. What makes this one of my favorite recipes with chicken thighs is how the lemon juice and herbs create this amazing flavor that reminds me of Sunday dinners at my nonna’s house. The skin gets all crispy and golden while the meat stays fork-tender. Pair it with some roasted veggies or a simple salad and you’ve got yourself a meal that’ll make everyone think you’re some kind of kitchen wizard. Trust me on this one!

Table of Contents
- 1) Key Takeaways
- 2) Easy Baked Italian Chicken Thighs Recipe
- 3) Ingredients for Baked Italian Chicken Thighs
- 4) How to Make Baked Italian Chicken Thighs
- 5) Tips for Making Baked Italian Chicken Thighs
- 6) Making Baked Italian Chicken Thighs Ahead of Time
- 7) Storing Leftover Baked Italian Chicken Thighs
- 8) Try these Main Course next!
- 9) Baked Italian Chicken Thighs
- 10) Nutrition
1) Key Takeaways
- What makes Italian chicken thighs so flavorful?
- Can you bake chicken thighs from frozen?
- What temperature should chicken thighs reach when cooked?
- How do you keep chicken thighs moist when baking?
2) Easy Baked Italian Chicken Thighs Recipe
Listen, I’m gonna level with you about these comfort chicken recipes. I’ve tried probably a hundred different recipes for chicken thighs over the years, and this one? This one’s a keeper. When I first started cooking, I was scared of chicken thighs. I thought they were complicated or something only fancy cooks could handle. Boy, was I wrong.
These comfort chicken recipes are about as foolproof as they come. You literally throw some herbs on chicken, pop it in the oven, and walk away. That’s it. No babysitting, no constant checking, no stress. The bone-in, skin-on thighs do all the heavy lifting for you. The skin crisps up like magic while the bone keeps everything juicy and tender. It’s pretty much impossible to screw up.
What I love most about these recipes with chicken thighs is how forgiving they are. Forgot to take them out at exactly 40 minutes? No big deal. They’ll still be delicious. Didn’t marinate them overnight? Thirty minutes works just fine. Got picky eaters? Leave off the herbs on a couple pieces. See what I mean? Super flexible.
The Italian herbs bring this whole recipe together. That combo of oregano, basil, and garlic powder creates this aroma that fills your whole house. My neighbor actually knocked on my door once asking what I was cooking. She thought I’d been slaving away all day when really I’d spent maybe 10 minutes prepping. That’s the beauty of good recipe for chicken thighs like this one. They taste like you tried way harder than you did.
I make this at least twice a month now. Sometimes I’ll serve it with roasted potatoes and green beans for a full dinner. Other times I’ll shred the leftovers and toss them in a salad or wrap. My kids love it over pasta with a little extra marinara sauce. The versatility of these chicken thighs recipes is unmatched. One recipe, endless possibilities.
Here’s something cool I discovered. If you’re meal prepping for the week, this recipe with chicken thighs is perfect. Make a big batch on Sunday, portion it out, and you’ve got protein sorted for days. It reheats beautifully and doesn’t get dry like some other chicken dishes do. I’ve even eaten it cold straight from the fridge and it was still good.
The lemon juice in this recipe is sneaky brilliant. It brightens everything up and cuts through the richness of the chicken fat. Plus it helps tenderize the meat during marinating. Some folks skip the lemon, but I’m telling you, don’t. That little bit of acid makes such a difference. Trust me on this one.
Now, I know some people swear by their crockpot chicken thighs, and look, I get it. Slow cookers are great. But sometimes you want that crispy skin and caramelized edges you only get from the oven. This recipe gives you the best of both worlds. Tender, falling-off-the-bone meat with a golden, crispy exterior. Can’t beat that combo.
3) Ingredients for Baked Italian Chicken Thighs
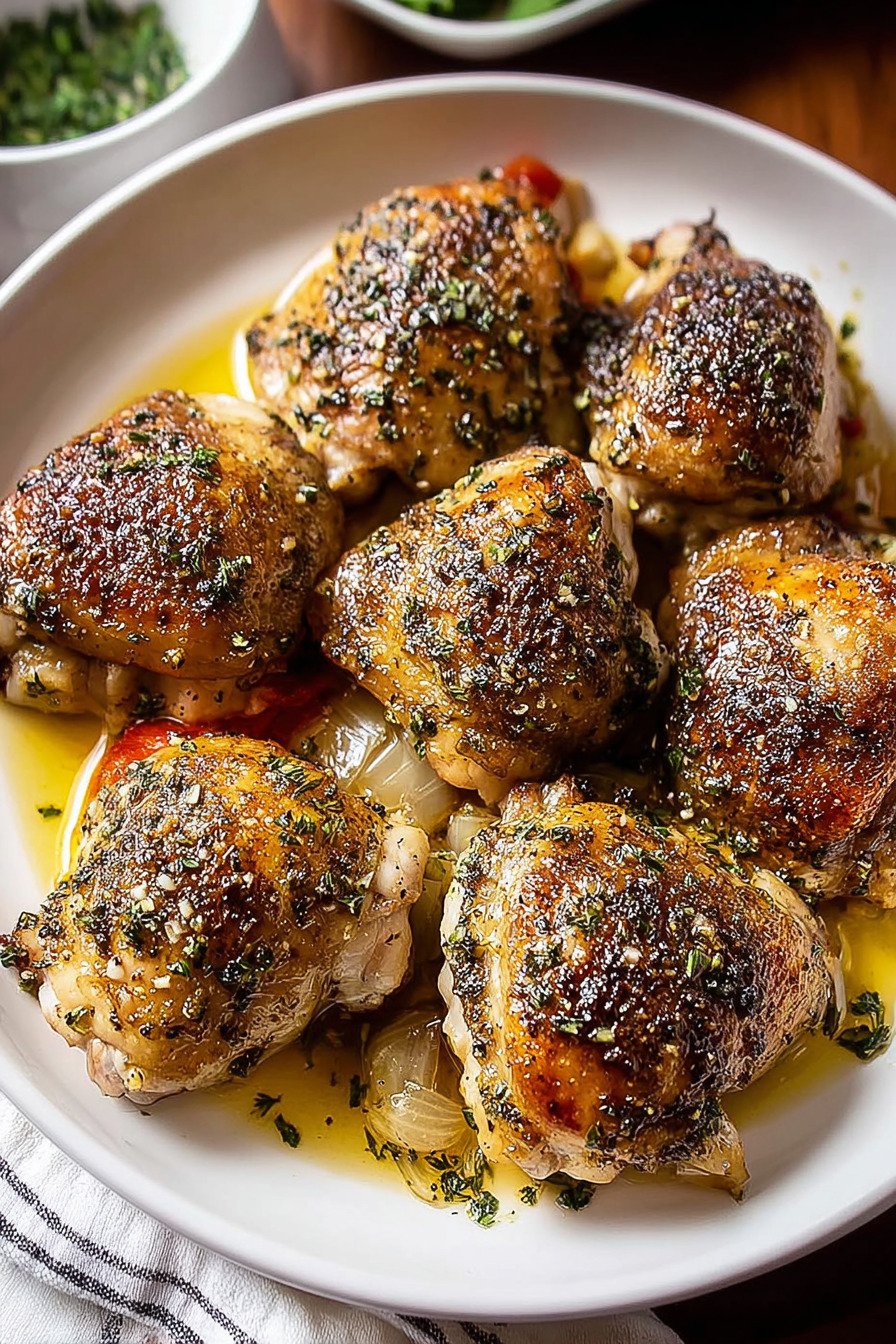
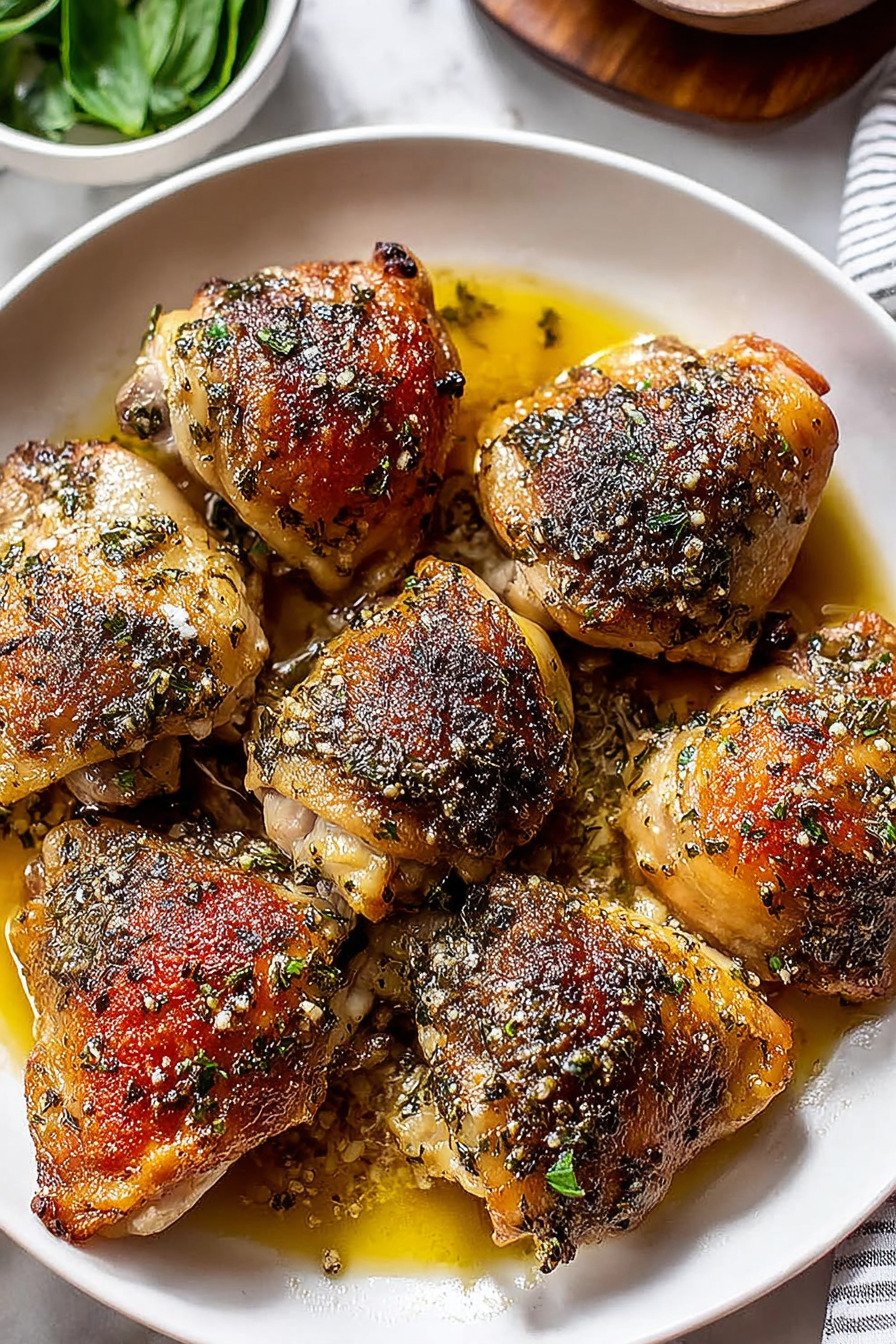
Bone-in Chicken Thighs with Skin: Okay, here’s the deal with bone-in, skin-on thighs. They’re cheaper than boneless, they have way more flavor, and they stay juicy no matter what. The bone acts like a little heat conductor that cooks the meat from the inside while keeping it moist. The skin? That’s where all the crispy, golden magic happens. Don’t even think about removing it before cooking. You can always take it off after if you’re watching calories, but cook it on there. It protects the meat and adds so much flavor.
Extra Virgin Olive Oil: I always keep a good bottle of olive oil on hand. For this recipe, you don’t need the fancy $30 bottle, but don’t use the cheapest stuff either. Mid-range works great. The oil helps the herbs stick to the chicken and promotes that beautiful browning. It also keeps everything from drying out. I usually eyeball it, but 2 tablespoons is about right for 4 to 6 thighs. You want enough to coat everything but not so much that it’s swimming in oil.
Dried Oregano: Oregano is like the backbone of Italian cooking. It’s earthy, slightly bitter in a good way, and smells incredible when it hits the heat. I use dried because it’s more concentrated than fresh, and it doesn’t burn as easily in the oven. Keep your dried herbs in a cool, dark place and replace them every year or so. Old oregano loses its punch and just tastes like dusty leaves. Fresh stuff makes all the difference. If you only have fresh oregano, triple the amount listed.
Dried Basil: Basil brings a sweeter, almost minty note that balances out the oregano’s earthiness. Together, these two herbs create that classic Italian flavor profile we all know and love. Like the oregano, dried basil works better here than fresh would. It distributes more evenly and won’t wilt or burn. I’ve got a little herb garden on my windowsill, but even I reach for dried basil when making this dish. Save your fresh basil for garnishing pasta or making pesto.
Garlic Powder: Some people are purists and insist on fresh garlic for everything. I love fresh garlic too, but garlic powder has its place. It distributes evenly, doesn’t burn, and gives you that mellow garlic flavor without the sharpness of raw garlic. For this recipe, it’s perfect. You get garlic in every bite without any harsh notes. If you want to add fresh minced garlic too, go ahead. Just be aware it might brown more quickly in the oven.
Salt and Pepper: I can’t stress this enough. Season your food properly. Underseasoned chicken is sad chicken. I like using kosher salt for this recipe because the larger crystals are easier to control. For pepper, freshly ground black pepper tastes so much better than the pre-ground stuff. Get yourself a pepper grinder. Your taste buds will thank you. Don’t be shy with the seasoning. Chicken thighs can handle it, and the skin will absorb a lot of it anyway.
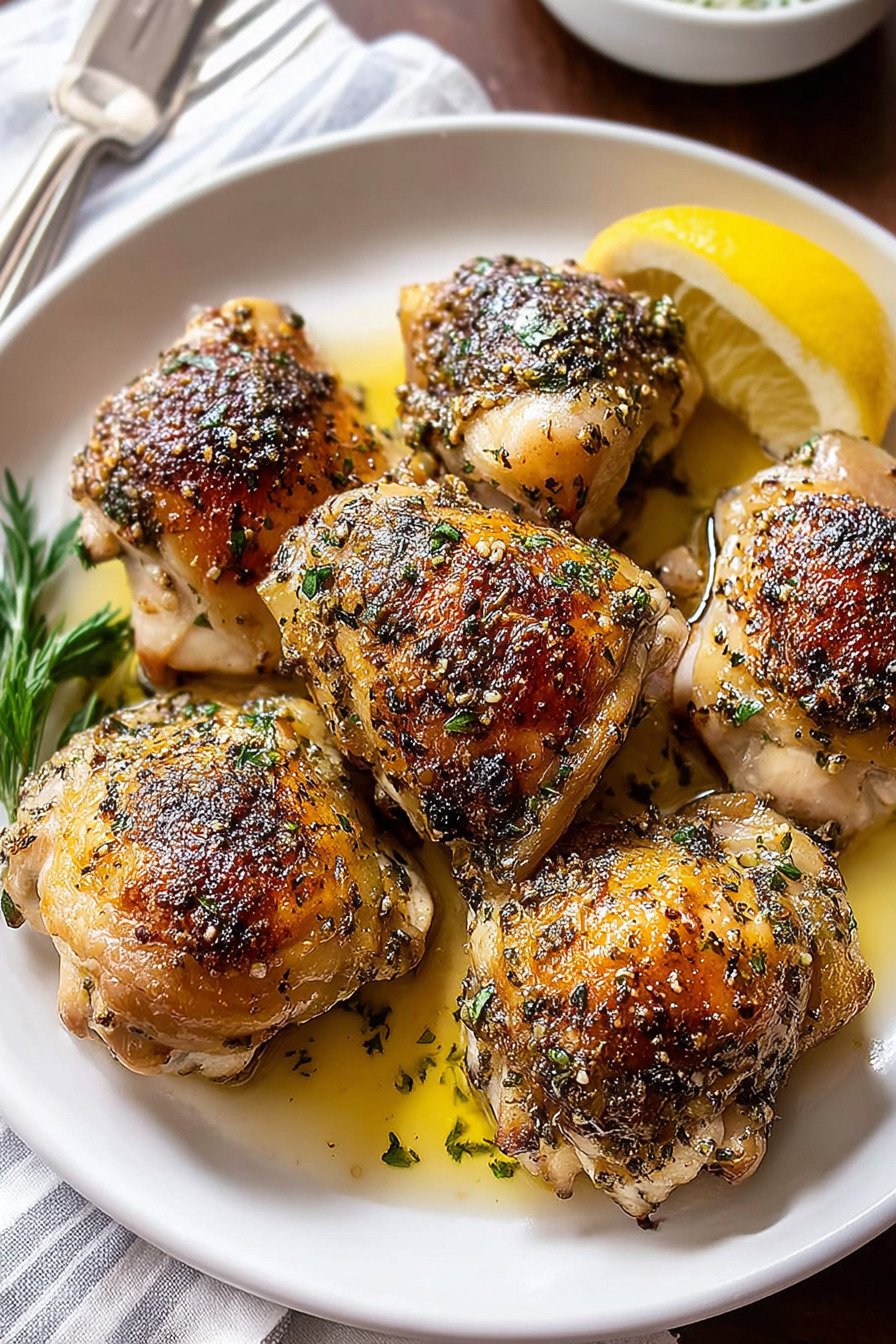
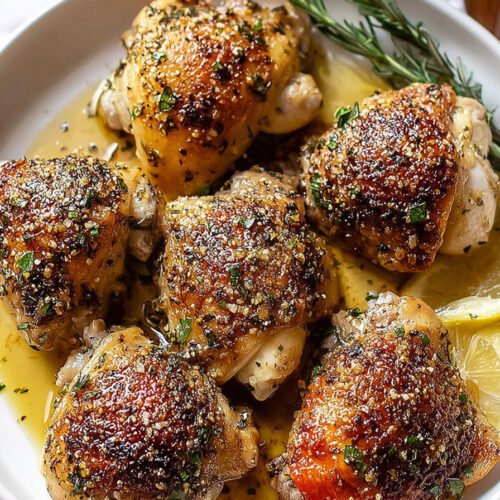
Fresh Lemon Juice: Please, for the love of good food, use a real lemon. That bottled lemon juice from the grocery store tastes like plastic. A fresh lemon costs like 50 cents and makes such a huge difference. The juice adds brightness and helps break down the proteins a bit during marinating, making the meat even more tender. Plus, when that lemon juice hits the hot pan at the end, it creates this amazing tangy sauce. You can even throw the squeezed lemon halves in the baking dish for extra flavor.
4) How to Make Baked Italian Chicken Thighs
Step 1. Crank that oven up to 425°F. I know it seems hot, but trust the process. That high heat is what’s gonna give you crispy skin and juicy meat. Don’t skip preheating either. Putting chicken in a cold oven messes with the cooking time and you won’t get the same results. Let it heat up fully. My oven takes about 15 minutes to reach temp, so I usually start it first thing.
Step 2. Mix up your marinade. Grab a bowl and throw in the olive oil, lemon juice, garlic powder, oregano, basil, salt, and pepper. Give it a good whisk. You want everything combined so every piece of chicken gets an equal coating of flavor. I sometimes use a fork instead of a whisk. Works just as well and there’s one less thing to wash. The marinade should look greenish and smell amazing. If it doesn’t smell good now, it won’t taste good later.
Step 3. Get those chicken thighs coated. I like using a big resealable bag for this part. Dump the chicken in, pour the marinade over it, seal the bag, and squish everything around until each piece is covered. It’s kinda fun actually, like a stress ball. If you don’t have bags, a bowl works fine. Just use your hands to massage the marinade into the chicken. Make sure you get under the skin too. That’s where a lot of flavor happens. Then stick it in the fridge for at least 30 minutes. Longer is better if you’ve got time.
Step 4. Arrange the chicken in your baking dish. Take the chicken out of the fridge about 10 minutes before you’re ready to cook. Taking the chill off helps it cook more evenly. Grease your baking dish or line it with parchment paper. I’m lazy and use parchment because cleanup is easier. Put the chicken pieces skin side up and don’t crowd them. They need space for air to circulate. If they’re touching too much, the skin won’t crisp up properly. Leave at least an inch between each piece.
Step 5. Bake it up. Slide that dish into your preheated oven and set a timer for 35 minutes. At that point, check it. The skin should be golden and crispy, and when you poke the thickest part with a thermometer, it should read 165°F. If it’s not there yet, give it another 5 minutes. Every oven is different, so don’t stress if yours takes a bit longer. The chicken will tell you when it’s done. The juices should run clear, not pink.
Step 6. Let it rest and serve. This is the hardest part because it smells so good and you just want to eat it right now. But wait. Let the chicken rest for about 5 minutes after it comes out of the oven. This lets the juices redistribute so they don’t all run out when you cut into it. While it’s resting, you can make a quick pan sauce with the drippings if you want. Just scrape up all those brown bits and drizzle them over the chicken. So good.
5) Tips for Making Baked Italian Chicken Thighs
Room temperature chicken cooks better. I know I said to marinate it in the fridge, and you should. But take it out 10 to 15 minutes before cooking. Cold chicken hitting a hot oven can cause uneven cooking. The outside might be done while the inside is still raw. Room temp chicken cooks more evenly throughout. This is one of those little things that separates okay chicken from great chicken.
Pat your chicken dry before adding the marinade. I learned this trick from a chef friend. Even if you’re gonna marinate it, you want to start with dry skin. Wet skin won’t crisp up nearly as well. Use paper towels and really pat it down. Get under the skin if you can too. The drier you can get it, the crispier your final result will be. It seems counterintuitive when you’re about to add wet marinade, but the marinade will absorb better on dry chicken anyway.
Don’t flip the chicken. Just don’t. Put it in skin side up and leave it alone. Flipping it halfway through seems like a good idea, but all you’re doing is making the skin soggy. The bottom will get cooked from the heat of the pan. The top will get that beautiful golden crisp from the direct oven heat. If you flip it, you lose that crispy skin. And crispy skin is the whole point of using bone-in, skin-on thighs.
Use a meat thermometer. I can’t believe how long I cooked chicken without one. They’re like $10 and they take all the guesswork out. Stick it in the thickest part of the thigh without touching the bone. When it reads 165°F, you’re done. No cutting into it to check, no wondering if it’s cooked enough. Just perfect chicken every time. Game changer.
Want extra crispy skin? Pop it under the broiler for the last minute or two. Keep a close eye on it though because broilers are aggressive. It can go from perfect to burnt in seconds. I usually crouch down and watch through the oven window. When the skin looks bubbly and deep golden brown, it’s time to pull it out. This step is totally optional, but if you’re a crispy skin fanatic like me, it’s worth it.
Save those pan drippings. After you take the chicken out, look at what’s left in the pan. That’s liquid gold right there. All those herbs, the chicken fat, the caramelized bits. Pour it into a small container and keep it in the fridge. You can use it to baste vegetables, mix it into rice, or drizzle it over the chicken when you reheat leftovers. It’s packed with flavor and it seems wasteful to just toss it out.
6) Making Baked Italian Chicken Thighs Ahead of Time
Meal prep Sunday just got easier. You can totally marinate these chicken thighs up to 24 hours in advance. In fact, the longer they marinate, the better they taste. The lemon juice and herbs have more time to penetrate the meat. I usually prep mine Saturday night for Sunday dinner. Just mix the marinade, coat the chicken, seal it up, and forget about it until you’re ready to cook.
If you’re prepping for the week, go ahead and cook the chicken. Let it cool completely, then portion it out into containers. It’ll keep in the fridge for 4 to 5 days easily. I like to pair mine with different sides throughout the week so it doesn’t get boring. Monday it’s with roasted veggies. Wednesday it’s shredded over a salad. Friday it’s chopped up in a wrap. Same chicken, different meals.
You can even freeze these bad boys. Cook them, let them cool, wrap each piece individually in plastic wrap, then put them all in a freezer bag. They’ll keep for up to 3 months. When you’re ready to eat, thaw overnight in the fridge and reheat in a 350°F oven until warmed through. The skin won’t be quite as crispy as fresh, but it’s still pretty darn good.
Want to prep the marinade ahead but not commit to cooking? Mix all your marinade ingredients and store them in a jar in the fridge. They’ll keep for about a week. When you’re ready to make chicken, just shake up the jar, pour it over your thighs, and marinate as usual. This is great if you meal plan but like to stay flexible with actual cooking days.
Pro tip for advance prep. If you know you’re making this for a party or dinner guests, cook the chicken that morning or even the day before. Let it cool and keep it in the fridge. About 20 minutes before serving, reheat it in a 350°F oven. The meat will warm through and the skin will crisp back up. Nobody will know you didn’t just cook it. This takes so much stress out of entertaining. You can actually talk to your guests instead of being stuck in the kitchen.
7) Storing Leftover Baked Italian Chicken Thighs
Leftovers are honestly one of the best parts of this recipe. Let the chicken cool down to room temperature first. Don’t put hot chicken straight in the fridge. It’ll raise the temperature of your whole fridge and can cause other food to spoil faster. Just leave it on the counter for about 30 minutes. It’ll cool down plenty in that time.
Transfer the cooled chicken to an airtight container. Glass containers with snap lids work best in my experience. They don’t hold onto smells like plastic does. Stack the pieces if you need to, but try to keep them in a single layer if possible. Pour any leftover pan juices over the top. That’ll help keep them moist during storage. Pop the lid on and stick it in the fridge.
These will keep for 4 to 5 days in the fridge. Maybe push it to 6 if you’re feeling brave, but I usually try to eat them within 5. The skin will get soft in the fridge. That’s just physics. But you can crisp it back up when reheating. More on that in a sec. Just know that day-old chicken thighs are still delicious, just different.
When you’re ready to reheat, you’ve got options. Microwave is fastest but the skin stays soggy. Oven is slower but gives you crispy skin again. I usually go with the oven. Heat it to 350°F, put the chicken on a baking sheet, and warm it for about 15 minutes. If you want that skin really crispy, hit it with the broiler for a minute at the end. Watch it close though.
Freezing works great too. Wrap each piece individually in plastic wrap or aluminum foil. Then put all the wrapped pieces in a freezer bag. Press out as much air as you can before sealing. Label it with the date. Trust me, you think you’ll remember when you froze it, but you won’t. Frozen chicken thighs keep for about 3 months. After that they’re still safe to eat, but the quality starts to go downhill.
To thaw frozen chicken, move it to the fridge the night before you want to eat it. Slow thawing in the fridge is safest and keeps the best texture. In a hurry? You can thaw it in cold water. Just keep it in the sealed bag and change the water every 30 minutes. Don’t thaw it on the counter. I know grandma did it that way, but it’s not safe. Bacteria multiply like crazy at room temp.
8) Try these Main Course next!


9) Baked Italian Chicken Thighs
Comfort Chicken Recipes: Baked Italian Chicken Thighs
Ingredients
- 4 to 6 bone-in chicken thighs with skin on
- 2 tablespoons extra virgin olive oil
- 1 tablespoon dried oregano
- 1 tablespoon dried basil
- 1 teaspoon garlic powder
- Salt and pepper to your liking
- Juice of 1 fresh lemon
Instructions
- Get your oven heating up to 425°F. I know it seems hot, but trust the process here.
- Grab a mixing bowl and throw in the olive oil, lemon juice, garlic powder, oregano, basil, plus some salt and pepper. Give it a good whisk until everything’s playing nice together.
- Drop your chicken thighs into a big resealable bag or bowl. Pour that marinade all over them and make sure every piece gets coated. Pop it in the fridge for at least 30 minutes. If you’ve got time, let it hang out overnight. The longer, the better.
- When you’re ready to cook, take the chicken out and arrange the pieces skin side up in a greased baking dish. Don’t crowd them or they won’t get crispy.
- Slide that dish into your hot oven and let it bake for about 35 to 40 minutes. You’re looking for an internal temp of 165°F and juices that run clear when you poke it.
- Pull it out, let it rest for a few minutes (I know it smells amazing but be patient!), then serve it up with any leftover marinade from the pan drizzled on top.
10) Nutrition
Serving Size: 1 chicken thigh (150g), Calories: 320, Sugar: 0 g, Sodium: 150 mg, Fat: 20 g, Saturated Fat: 5 g, Carbohydrates: 2 g, Fiber: 0 g, Protein: 30 g, Cholesterol: 90 mg


Leave a Comment