
You know those nights when you walk through the door completely wiped out and the last thing you want to do is cook? Yeah, we’ve all been there. That’s when I pull out this gem of a recipe. Think tender chicken pieces nestled into fluffy rice with bright green broccoli, all smothered in the creamiest cheese sauce you can imagine. My mom used to make something similar when I was growing up, but I’ve tweaked it over the years to make it even easier. The best part? You can toss it together on a Sunday and have comfort food recipes ready for those hectic weeknights. And if you’re anything like me and love a good ina garten stuffing recipe, you’ll appreciate how this captures that same warm, homey feeling. This is one of those comfort food recipes dinners that makes everyone at the table happy. The kids love the gooey cheese, my husband appreciates the protein, and I’m just glad it’s not another boring chicken casserole recipes situation. Trust me, once you try these healthy comfort food recipes, you’ll understand why they’ve become such a staple in my kitchen. It’s got that japanese comfort food vibe where everything just feels right. So grab your casserole dish and let’s get cooking!
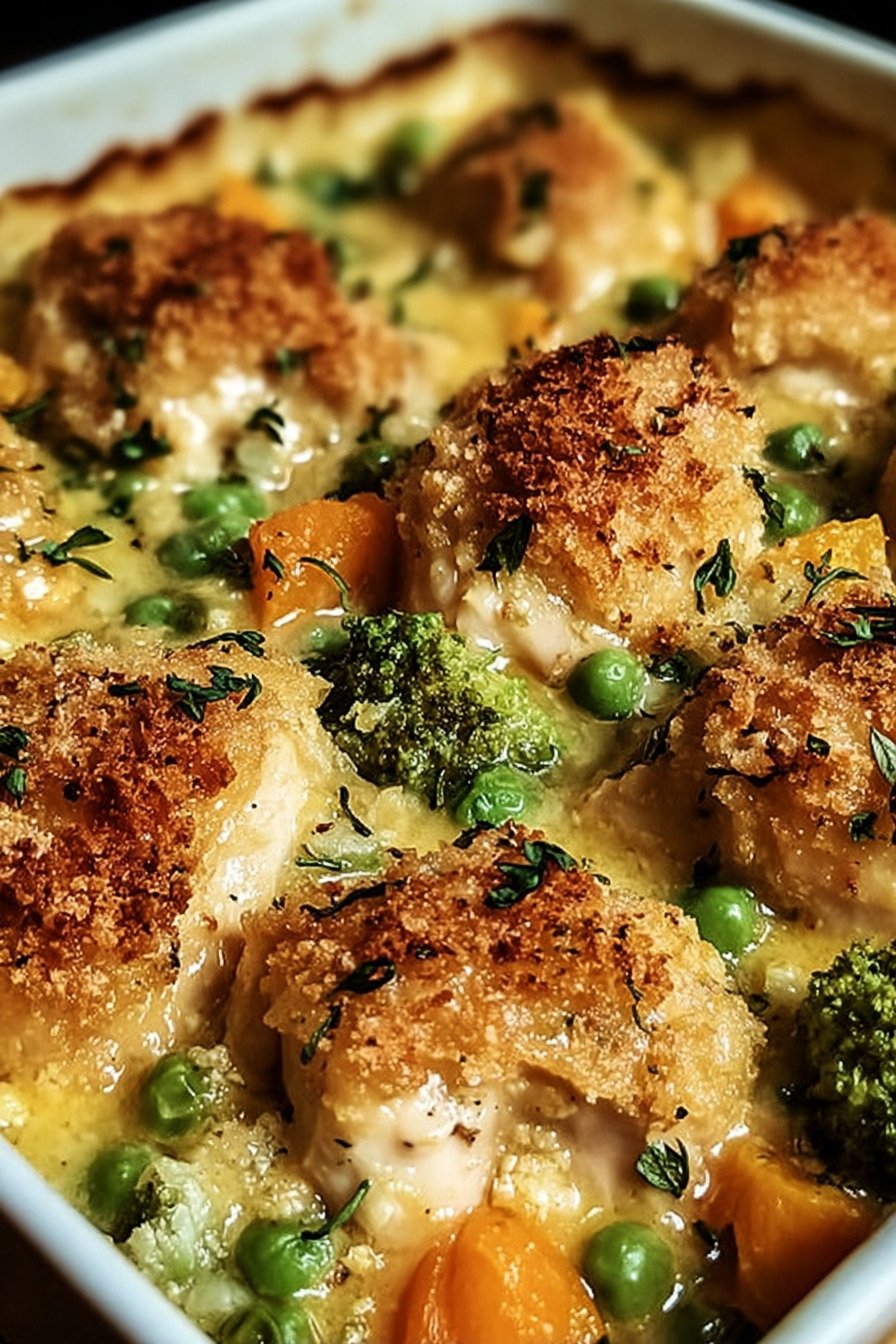
Table of Contents
- 1) Key Takeaways
- 2) Easy Ina Garten’s Comfort Chicken Casserole Recipe
- 3) Ingredients for Ina Garten’s Comfort Chicken Casserole
- 4) How to Make Ina Garten’s Comfort Chicken Casserole
- 5) Tips for Making Ina Garten’s Comfort Chicken Casserole
- 6) Making Ina Garten’s Comfort Chicken Casserole Ahead of Time
- 7) Storing Leftover Ina Garten’s Comfort Chicken Casserole
- 8) Try these Main Course next!
- 9) Ina Garten’s Comfort Chicken Casserole
- 10) Nutrition
1) Key Takeaways
- Can I use leftover rotisserie chicken for this casserole?
- What vegetables work best in chicken casserole recipes?
- How do you keep rice from getting mushy in a casserole?
- Can this comfort chicken recipe be made dairy free?
2) Easy Ina Garten’s Comfort Chicken Casserole Recipe
Listen, I’m gonna level with you right off the bat. When I first heard about comfort chicken recipes from a friend who couldn’t stop raving about them, I was skeptical. I mean, how good could a simple casserole really be? But then I tried making one myself on a random Tuesday night when I had absolutely zero energy left after work, and wow. Just wow. The whole house smelled like my grandmother’s kitchen, and suddenly I understood what all the fuss was about.
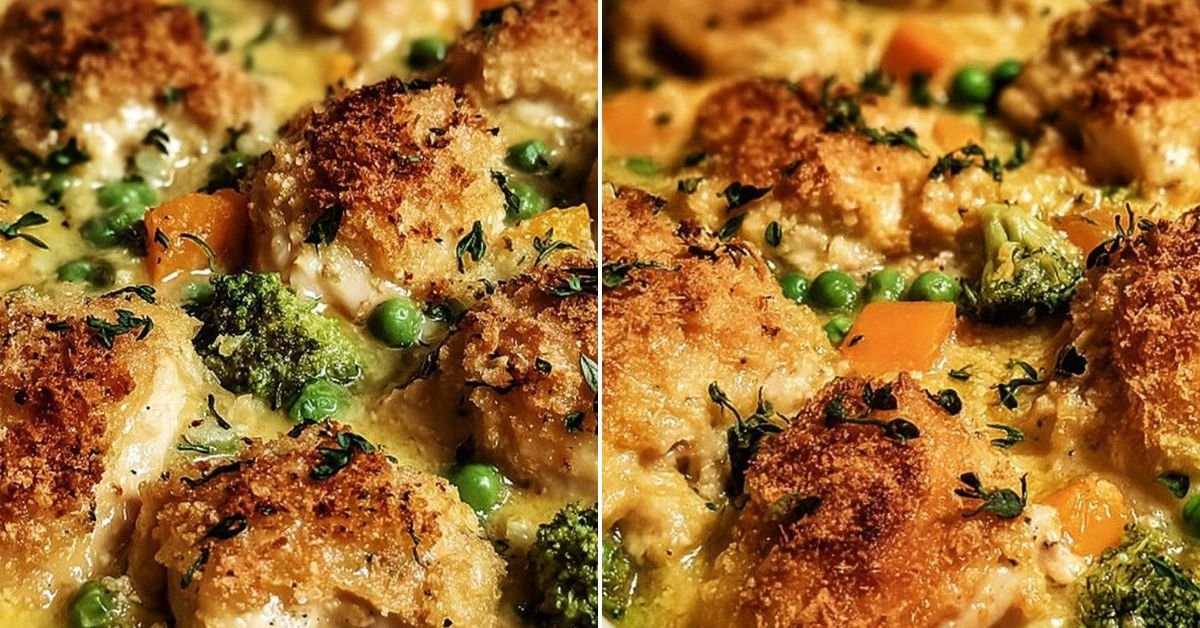
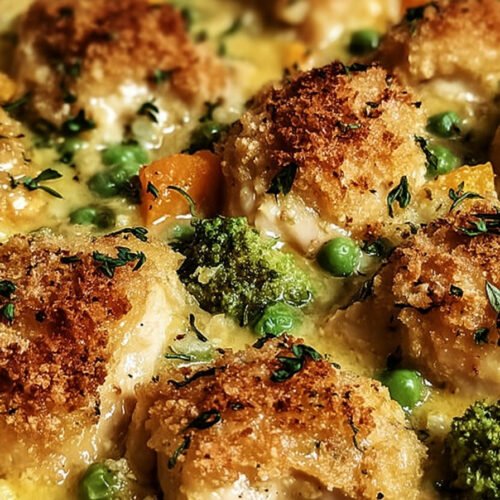
What makes these comfort chicken recipes so special is how they manage to feel both fancy and homey at the same time. You’ve got tender chicken pieces swimming in this ridiculously creamy cheese sauce, all mixed up with fluffy rice and bright green veggies that somehow stay crisp even after baking. It’s like someone took all the best parts of Sunday dinner and crammed them into one dish. And the best part? You can have this beauty ready to pop in the oven in about 15 minutes flat.
I’ve made this casserole at least two dozen times now, and I’m still not tired of it. Sometimes I’ll swap in different veggies depending on what’s hanging out in my crisper drawer. Other times I’ll get creative with the cheese blend. But no matter how I tweak it, this recipe always comes through. It’s become my go to when I need something that feels like a warm hug but doesn’t require me to stand over the stove for hours. Plus, my picky eaters actually clean their plates without complaining, which is basically a miracle in my house.
The genius of this dish is in its simplicity. You’re not dealing with a million steps or fancy techniques. Just layer, pour, bake, and boom. Dinner’s done. And if you’ve ever spent an hour making dinner only to have everyone pick at it like it’s some kind of punishment, you’ll appreciate how this casserole gets devoured every single time. No leftovers means no guilt about wasting food, and that alone makes it worth adding to your regular rotation.

3) Ingredients for Ina Garten’s Comfort Chicken Casserole
Brown Minute Rice: Okay, so here’s where I might lose some of you fancy rice snobs, but hear me out. Minute rice gets a bad rap, but in casseroles? It’s actually perfect. The texture holds up during baking without turning into mush, and it soaks up all that cheesy goodness like a dream. I’ve tried using regular long grain rice before and ended up with a soupy mess, so trust me on this one. If you need to go gluten free, this rice already checks that box, or you can swap in quinoa if you’re feeling adventurous.
Chopped Broccoli Florets: Fresh broccoli is where it’s at for this recipe. I know frozen is tempting because it’s already chopped and ready to go, but fresh broccoli has that crisp bite that really makes the casserole pop. Plus it doesn’t release a ton of extra water during baking, which keeps everything from getting soggy. Cut your florets into bite sized pieces so they cook evenly. And hey, if your kids are broccoli haters, try sneaking in some cauliflower instead. They might not even notice the switcheroo.
Yellow Onion: I dice mine up really fine so it melts into the sauce and adds that sweet, savory depth without being chunky. Yellow onions are my favorite here because they’re not too sharp and they caramelize beautifully as the casserole bakes. If you’re out of yellow onions, shallots work great too and add a slightly milder flavor. Just don’t skip the onion entirely or you’ll miss that flavor foundation that makes everything else taste better.
Carrots: Finely diced carrots add a subtle sweetness and a gorgeous pop of orange color throughout the casserole. I like to dice them about the same size as the onions so everything cooks evenly. Baby carrots work in a pinch, just chop them up small. The carrots also add some nutritional value without being obvious about it, which is perfect if you’re trying to sneak more veggies into your family’s diet. Bell peppers make a solid substitute if you’re not a carrot person.
Frozen Green Peas: These little gems are one of my favorite shortcuts in cooking. They’re already blanched and frozen at peak freshness, so you’re actually getting better quality than most fresh peas at the grocery store. Just toss them in straight from the freezer. No need to thaw. They’ll cook perfectly in the oven and add bright green pops of color and sweetness. If peas aren’t your thing, corn works just as well and adds a nice crunch.
Chicken Broth: The base of our sauce starts here. I usually go with low sodium broth so I can control the salt level myself, but use whatever you’ve got. Homemade broth is fantastic if you’re that organized, but let’s be real, most of us are grabbing a box from the pantry. The broth adds so much depth of flavor and helps cook the rice while everything bakes. Vegetable broth works too if you want to keep it lighter.
2% Milk: This is what gives the sauce its creamy, dreamy texture without being too heavy. I’ve used whole milk before and it was almost too rich, and skim milk just doesn’t cut it. The 2% hits that sweet spot perfectly. If you’re dairy free, almond milk or oat milk both work surprisingly well here. Just make sure you’re using the unsweetened kind or your casserole might taste a little weird.
Shredded Cheddar Cheese: This is the star of the show, people. I divide it up so some goes into the sauce and the rest gets sprinkled on top for that gorgeous golden brown crust. Sharp cheddar gives you the most flavor, but mild works if that’s what you prefer. I’ve experimented with mixing in some Monterey Jack or even a bit of Gruyere, and let me tell you, it takes this casserole to a whole new level. Just use whatever melts well and makes you happy.
Garlic Powder: Fresh garlic is great and all, but garlic powder is actually better for this recipe because it distributes more evenly throughout the sauce. You get that garlicky flavor in every bite without any harsh raw garlic taste. A little goes a long way though, so don’t go overboard unless you really love garlic. If you only have fresh garlic on hand, one minced clove will do the trick. Just sauté it with the onions first if you go that route.
Salt and Pepper: Basic but necessary. I use fine sea salt and freshly ground black pepper because they dissolve and distribute better. Don’t be shy with the seasoning, especially if you’re using low sodium broth. Taste your sauce before pouring it over everything and adjust as needed. You can always add more, but you can’t take it away. If you want a little kick, throw in some cayenne pepper or a dash of hot sauce.
Boneless Skinless Chicken Breast: The protein that makes this a complete meal. I cut mine into one inch chunks so they cook quickly and evenly. Raw chicken works perfectly here, but here’s a pro tip that’ll save you time. Use a rotisserie chicken from the store and just shred it up. You’ll cut your prep time in half and the flavor is already there. Leftover turkey works great too, especially after Thanksgiving when you’re drowning in leftovers.
Parmesan Cheese: This adds a salty, nutty finish that really makes the whole dish sing. I like to shred it fresh because pre shredded parmesan can be kind of grainy and doesn’t melt as smoothly. But if you’re short on time, the stuff in the green can works in a pinch. Sprinkle it on top during the last few minutes of baking so it gets all golden and crispy. If you’re avoiding dairy, just skip this part. The casserole will still be delicious without it.
4) How to Make Ina Garten’s Comfort Chicken Casserole
Step 1: Get your oven cranking up to 375°F. While it’s heating, grab your biggest casserole dish and give it a really good coating of nonstick spray. Don’t be stingy here because nothing’s worse than trying to serve a casserole that’s stuck to the dish like cement. I learned this the hard way when I tried to use just a light spritz and ended up with half the casserole glued to the bottom. Make sure you get the corners and sides too, not just the bottom.
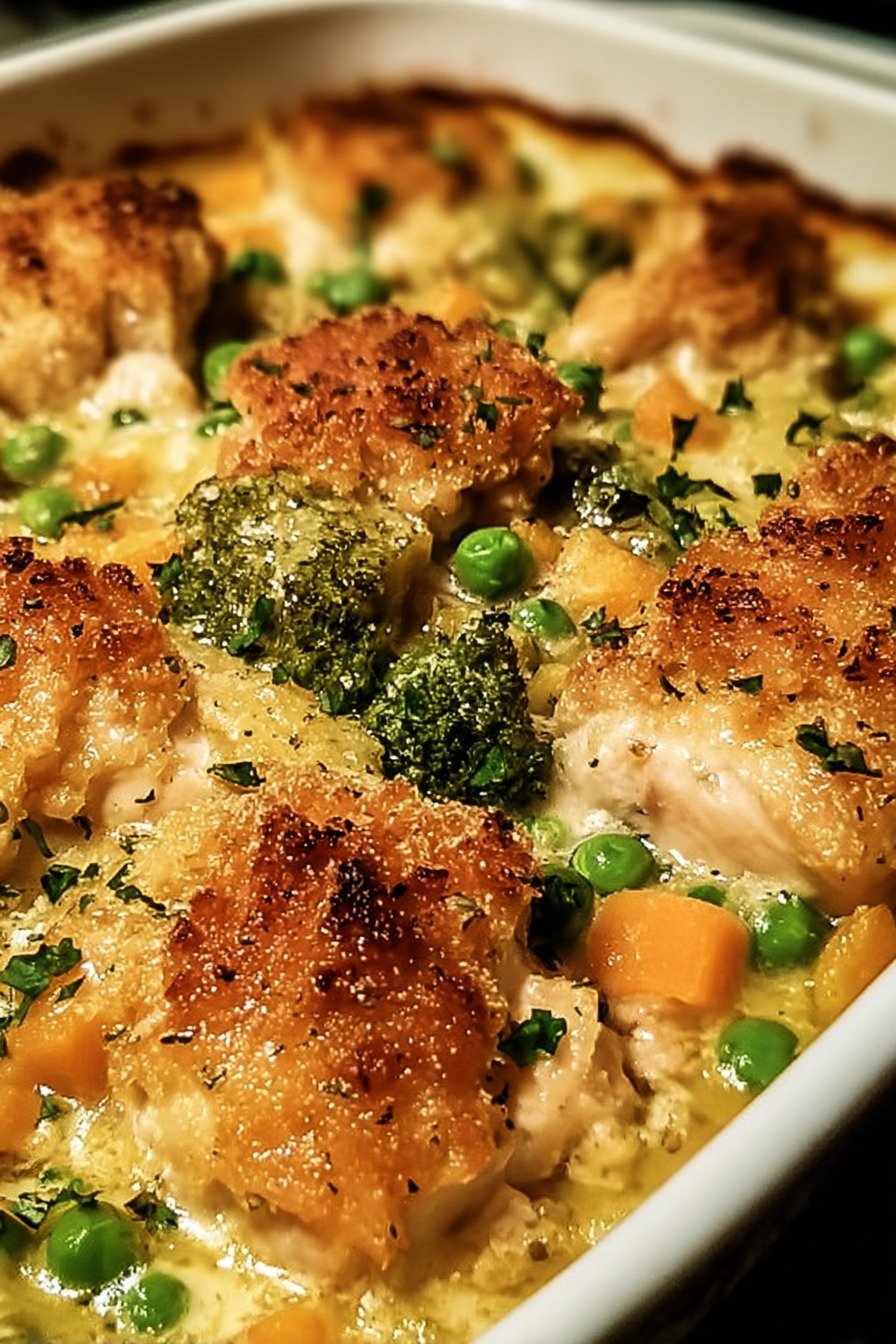
Step 2: Time to build the base. Spread your brown rice across the bottom of the dish like you’re tucking it in for bed. Then start piling on the veggies. First the broccoli florets, scattered evenly so every serving gets some. Next comes your diced onion and carrots, spreading them around so they’re mixed throughout. Finish with those frozen peas sprinkled over the top. This layering might seem random, but it actually helps everything cook evenly and ensures you get a little bit of each ingredient in every scoop.
Step 3: Now for the sauce, which is honestly the best part. Pour your chicken broth and milk into a small saucepan and set it over medium heat. You want to warm it up until you see steam rising and tiny bubbles forming around the edges, but don’t let it come to a full boil. Once it’s hot, start whisking in about six ounces of your cheddar cheese along with the garlic powder, salt, and pepper. Keep whisking until everything melts together into this smooth, silky sauce that smells absolutely incredible.
Step 4: Here comes the fun part. Pour that gorgeous cheese sauce right over your layered veggies and rice. Use a spatula or big spoon to gently toss everything together, making sure the rice and veggies get completely coated in the sauce. This is where the magic happens because the rice starts absorbing all those flavors right away. Don’t worry if it looks a little soupy at this point. The rice will soak up most of the liquid as it bakes, leaving you with a perfectly creamy consistency.
Step 5: Cut your chicken breast into bite sized chunks, about an inch or so. You want them big enough to stay juicy but small enough to cook through quickly. Arrange the chicken pieces on top of the casserole mixture, nestling them down into the sauce a bit. This way they’ll stay moist while cooking instead of drying out on top. If you’re using pre cooked chicken instead, just shred it up and mix it right into the casserole before baking.
Step 6: Slide that dish into your preheated oven and let it bake uncovered for about 30 minutes. You’ll know it’s ready for the next step when you see the edges bubbling and pulling away slightly from the sides. The sauce should be thickening up nicely and the chicken should be mostly cooked through. Don’t worry if the cheese on top isn’t golden yet. We’re getting there. Just resist the urge to keep opening the oven door and letting all the heat escape.
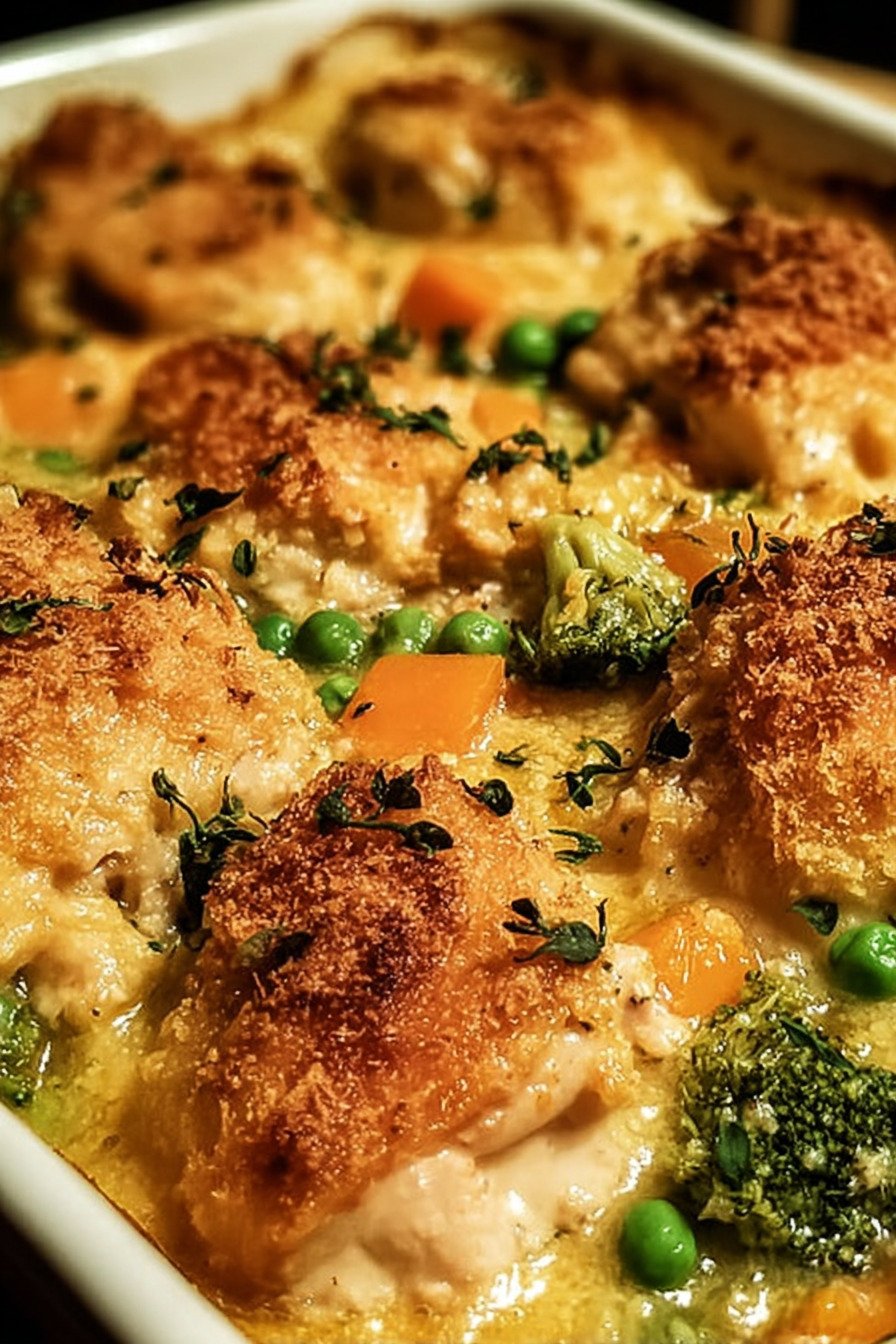
Step 7: Pull the casserole out of the oven and get ready for the grand finale. Sprinkle the rest of your cheddar cheese evenly over the top, then add that parmesan cheese for extra flavor. Pop it back in the oven for another 15 to 20 minutes. This is when the cheese on top gets all melty and golden brown, forming that crispy crust everyone fights over. You want it bubbly and gorgeous, with maybe a few darker brown spots around the edges.
Step 8: Once it comes out of the oven, and I know this is the hardest part, you need to let it sit for about 10 minutes before diving in. I get it, the smell is driving you crazy and you just want to eat it right now. But this resting time lets everything set up properly so it doesn’t fall apart when you try to serve it. The rice finishes absorbing the sauce, the cheese firms up just enough, and the whole thing comes together perfectly. Use this time to set the table or make a quick salad to go with it.
5) Tips for Making Ina Garten’s Comfort Chicken Casserole
Get your ingredients ready before you start cooking. I’m talking about chopping all your veggies, measuring your liquids, and having everything lined up on the counter like a cooking show. This makes the whole process so much smoother and you won’t be frantically searching for the garlic powder while your sauce is burning on the stove. Plus it helps you catch if you’re missing something before you’re halfway through the recipe.
Don’t rush the cheese sauce. When you’re melting that cheddar into the hot milk and broth mixture, take your time and whisk constantly. If you dump all the cheese in at once or try to melt it over high heat, you’ll end up with a grainy, separated mess instead of the smooth, creamy sauce you want. Low and slow wins the race here. And make sure your liquid is hot before adding the cheese or it won’t melt properly.
The layer order actually matters more than you’d think. Starting with the rice on the bottom means it gets maximum contact with the liquid and cooks properly. If you put the chicken on the bottom, it’ll just steam instead of getting that nice baked texture. And keeping the chicken on top means it browns a little, which adds flavor. So stick to the order I gave you and you’ll get the best results every time.
Watch your chicken piece sizes carefully. If you cut them too big, they won’t cook through in time and you’ll end up with raw chicken in the middle. Too small and they’ll dry out and get tough. Aim for one inch cubes and you’ll hit that sweet spot where they stay juicy and tender. If your chicken breasts are really thick, slice them in half horizontally first to make cutting easier.
Temperature is everything with casseroles. Your oven needs to be fully preheated before the dish goes in, or your cooking times will be all wrong. And every oven is a little different, so start checking your casserole a few minutes before the timer goes off. Mine tends to run hot so I usually pull things out about five minutes early. Get to know your oven’s quirks and adjust accordingly.
The resting time at the end isn’t optional, no matter how hungry you are. When you pull the casserole straight from the oven and try to serve it immediately, it’ll be a soupy, sloshy mess that falls apart. Those 10 minutes let everything firm up and settle so you can actually get clean slices that hold together. Cover it loosely with foil if you’re worried about it cooling off too much.
6) Making Ina Garten’s Comfort Chicken Casserole Ahead of Time
This casserole is a meal prep champion, and I’m not even exaggerating. You can do pretty much all the work the night before and then just pop it in the oven when you’re ready to eat. I do this all the time on Sunday nights so I have an easy dinner ready for Monday when I’m too tired to think straight. Just prep all your veggies and get them into the casserole dish. Chop your chicken and keep it in a separate container in the fridge. Then when it’s go time, just assemble and bake.
If you want to take it one step further, you can actually assemble the entire casserole and keep it covered in the fridge for up to 24 hours before baking. Just don’t pour the cheese sauce over everything until right before it goes in the oven. The sauce can be made ahead and stored separately. This way the rice doesn’t get too soggy from sitting in liquid for hours. When you’re ready to bake, let the casserole sit at room temperature for about 20 minutes first so it’s not going into the oven ice cold.
Another trick I love is to double the recipe and make two casseroles at once. Bake one for dinner tonight and freeze the other one unbaked for later. Wrap the unbaked casserole tightly with plastic wrap and then a layer of foil to prevent freezer burn. It’ll keep for up to three months. When you want to use it, let it thaw in the fridge overnight, then bake as directed. You might need to add an extra 10 minutes to the baking time since it’ll still be cold from the fridge.
The sauce can also be made up to three days ahead and stored in the fridge in an airtight container. Just give it a good stir and maybe warm it up a little before pouring it over your casserole. If it’s too thick after sitting in the fridge, whisk in a splash of milk to thin it out. This is great if you want to break up the cooking process into smaller, more manageable chunks instead of doing everything at once.
7) Storing Leftover Ina Garten’s Comfort Chicken Casserole
Let’s talk leftovers, because honestly, sometimes they’re even better than the original meal. Once your casserole has cooled down completely, transfer any leftovers to an airtight container. Glass containers with snap on lids work best because they don’t absorb smells or stain like plastic sometimes does. This will keep in your fridge for up to four days, though in my house it rarely lasts that long because everyone keeps sneaking bites straight from the container.
When you’re ready to reheat, you’ve got options. The microwave is obviously the fastest route. Just scoop out a portion onto a microwave safe plate, cover it with a damp paper towel to keep it from drying out, and heat it in 90 second intervals until it’s hot all the way through. Give it a stir halfway through to make sure it heats evenly. If the rice seems a little dry, add a splash of milk or broth before reheating.
For bigger portions or if you want that fresh from the oven taste, the regular oven works great too. Put your leftover casserole in an oven safe dish, cover it with foil, and heat it at 350°F for about 20 minutes or until it’s heated through. Remove the foil for the last five minutes if you want to crisp up the top again. This method takes longer but the texture stays way better than microwaving, especially for the cheese on top.
Now here’s something cool I discovered by accident. This casserole actually freezes really well if you’ve got more leftovers than you can eat in a few days. Portion it out into individual serving sizes in freezer safe containers and freeze for up to three months. Then you’ve got ready made lunches just waiting for you. Thaw overnight in the fridge and reheat as usual. It’s basically like having your own personal frozen dinner section, except way better tasting and healthier.
8) Try these Main Course next!
9) Ina Garten’s Comfort Chicken Casserole
Comfort Chicken Recipes: Ina Garten’s Cozy Casserole
Ingredients
For the Casserole Base
- 1 1/2 cups brown Minute Rice
- 5 cups chopped broccoli florets
- 1/2 medium yellow onion, finely diced
- 2 medium carrots, finely diced
- 1 1/2 cups frozen green peas
- Nonstick cooking spray
For the Creamy Sauce
- 2 cups chicken broth
- 1 1/2 cups 2% milk
- 8 ounces shredded cheddar cheese, divided
- 1/4 teaspoon garlic powder
- 1/8 teaspoon salt
- 1/8 teaspoon ground pepper
For the Protein
- 1 1/2 pounds boneless, skinless chicken breast
- 1 ounce shredded parmesan cheese
Instructions
- Start by cranking your oven up to 375°F. Grab a big casserole dish and give it a good spray with that nonstick stuff so nothing sticks later.
- Spread the brown rice across the bottom of your dish like you’re making a little bed for everything else. Now pile on the broccoli, then scatter the diced onion and carrots around. Finish with those frozen peas on top.
- Time for the sauce! Pour your chicken broth and milk into a small pot over medium heat. Let it warm up until you see steam rising, but don’t let it boil over. Now whisk in about 6 ounces of that cheddar cheese along with the garlic powder, salt, and pepper. Keep whisking until it’s all smooth and creamy.
- Pour that gorgeous cheese sauce right over your veggie layers. Use a spatula to gently mix everything around so the rice and veggies get nice and coated.
- Cut your chicken breast into bite sized chunks, maybe about an inch or so. Nestle those pieces right into the top of the casserole, pushing them down a bit into the sauce.
- Pop it in the oven uncovered and let it bake for 30 minutes. You’ll start to see the edges bubbling away, which is exactly what you want.
- Pull it out and sprinkle the rest of your cheddar cheese on top, along with that parmesan. Slide it back into the oven for another 15 to 20 minutes until the cheese gets all melty and golden brown.
- Let the whole thing cool for about 10 minutes before you dive in. This gives everything a chance to settle down and makes it way easier to serve without it falling apart on you.
10) Nutrition
Serving Size: 1/6 of the casserole | Calories: 450 | Sugar: 3 g | Sodium: 600 mg | Fat: 15 g | Saturated Fat: 6 g | Carbohydrates: 50 g | Fiber: 5 g | Protein: 30 g | Cholesterol: 80 mg


Leave a Comment