
You know what I love about summer cookouts? The smell of grilled chicken wings recipe wafting through the backyard while everyone’s laughing and having a good time. We’ve been making these wings for years, and let me tell you, they’re ridiculously simple but pack so much flavor. This best chicken wings recipe takes maybe 20 minutes from start to finish, which means more time hanging out and less time stuck at the grill. What makes these stand out from your typical buffalo chicken wings recipe or chicken wings recipe oven style? The dry rub. It creates this incredible crispy exterior that everyone goes crazy for. My neighbor tried these last weekend and asked if I deep fried them. Nope, just the grill doing its magic. These easy chicken wings work perfectly whether you’re feeding a crowd on game day or just want something different for dinner. The beauty of recipes with grilled chicken like this is you can switch things up. Sometimes we keep it simple with just the rub. Other times we’ll toss them in buffalo sauce or BBQ. Whatever you’re craving, this recipe with grilled chicken gives you that perfect base. Trust me, once you nail the technique, you’ll be making these all the time.
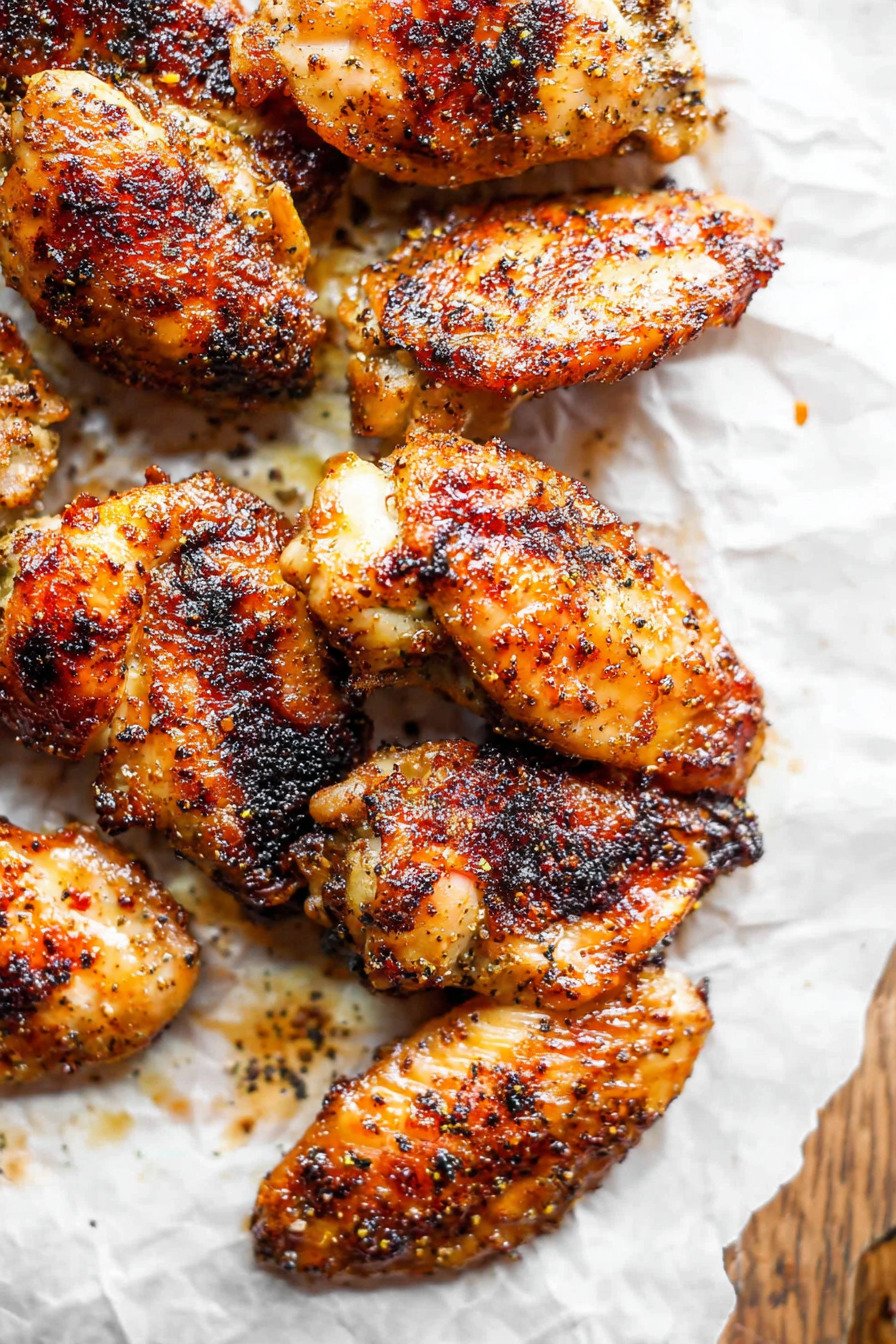
Table of Contents
- 1) Key Takeaways
- 2) Easy Grilled Chicken Wings Recipe
- 3) Ingredients for Grilled Chicken Wings
- 4) How to Make Grilled Chicken Wings
- 5) Tips for Making Grilled Chicken Wings
- 6) Making Grilled Chicken Wings Ahead of Time
- 7) Storing Leftover Grilled Chicken Wings
- 8) Try these Dinner/Appetizer next!
- 9) Grilled Chicken Wings
- 10) Nutrition
1) Key Takeaways
- What makes grilled chicken wings crispy on the outside?
- How long should you grill chicken wings?
- Should you sauce wings before or after grilling?
- What temperature should grilled chicken wings reach?

2) Easy Grilled Chicken Wings Recipe
Let me tell you something about this grilled chicken wings recipe that I’ve learned over years of making them. They’re ridiculously fast. I’m talking about 20 minutes from raw chicken to crispy, juicy perfection on your plate. When I first started grilling wings, I thought they’d be complicated or take forever. Turns out, I was totally wrong. This is one of those recipes where you look like a grilling genius, but the secret is it’s almost impossible to mess up.
What makes this grilled chicken wings recipe so easy? You don’t need fancy equipment or a culinary degree. Just a grill, some wings, and about 10 minutes of your time. I’ve made these on gas grills, charcoal grills, and even those tiny portable grills at the beach. They work every single time. The dry rub we use is simple stuff you probably already have sitting in your spice cabinet. No weird ingredients you’ll never use again.
The thing that surprised me most was how much better these taste than any restaurant wings. There’s something about that charred, smoky flavor from the grill that you just can’t replicate in an oven or deep fryer. My kids actually request these for dinner now, which is saying something considering they used to only want chicken nuggets. We make them for Sunday football, backyard cookouts, or just random Tuesday nights when nobody wants to spend an hour cooking.
And can we talk about how versatile these are? You can keep them simple with just salt and pepper, go wild with a spicy dry rub, or toss them in your favorite sauce. Buffalo, BBQ, teriyaki, honey garlic – I’ve tried them all and they’re all fantastic. The base grilled chicken wings recipe stays the same. You’re just changing up the final flourish. That’s what I love about having this recipe in my back pocket. It’s like having ten different recipes in one.

3) Ingredients for Grilled Chicken Wings
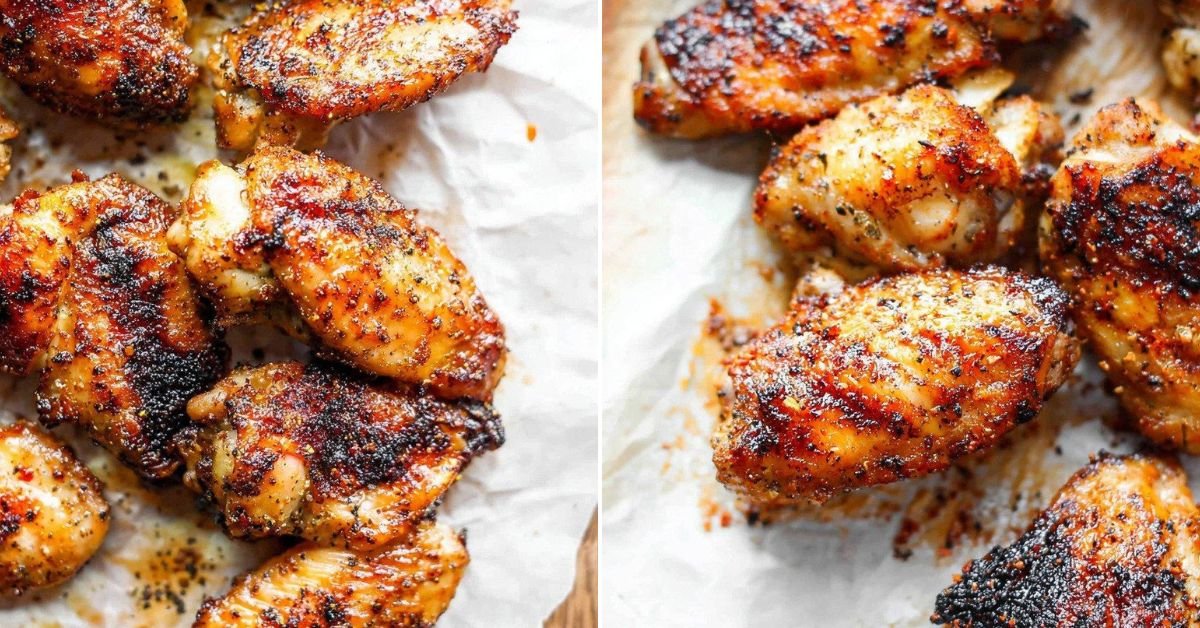
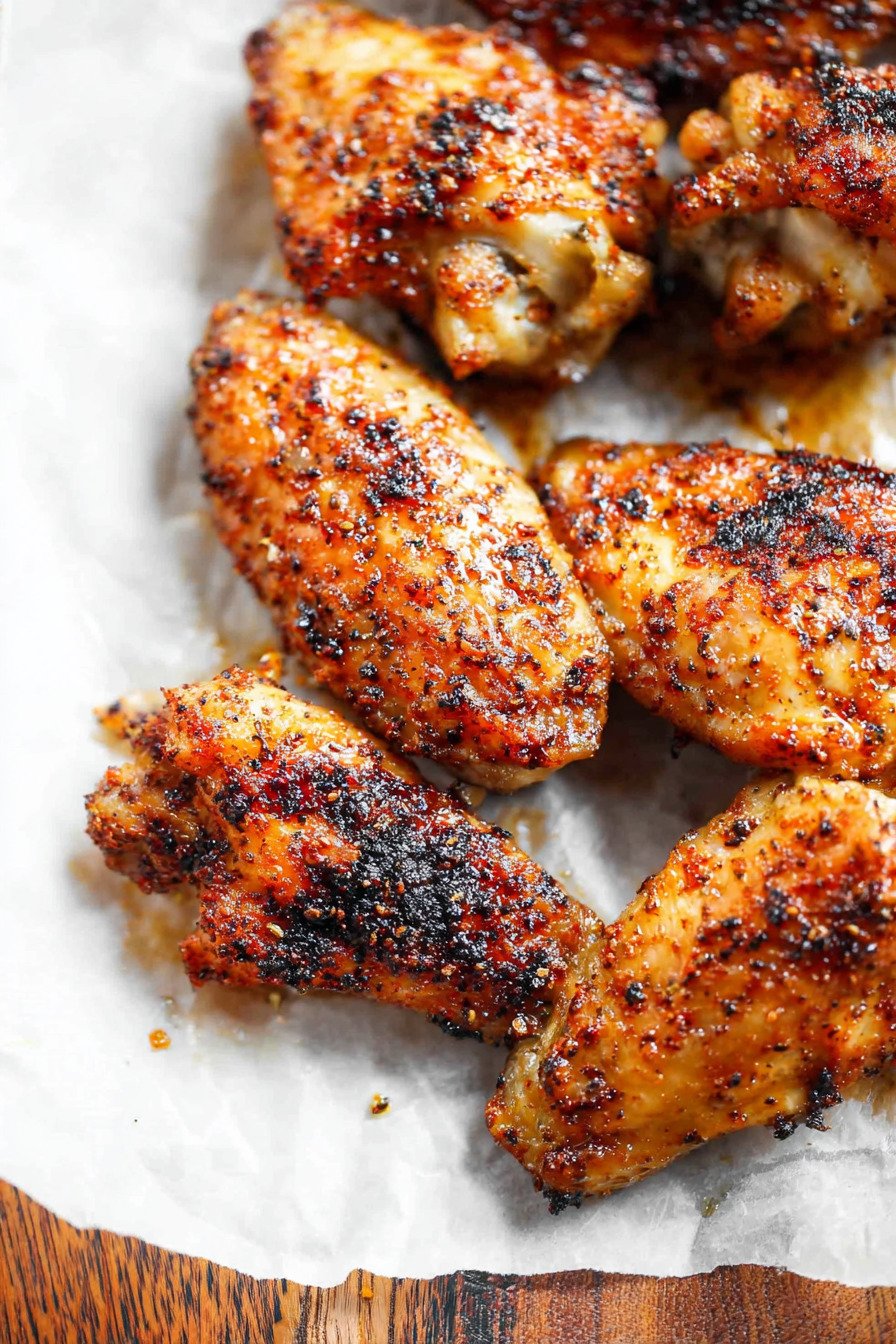
Chicken Wings and Drummies are what make this whole thing happen. You want about 15 to 20 pieces total, which feeds around 4 to 6 people depending on how hungry everyone is. I usually grab whatever looks fresh at the grocery store. Some come already separated into flats and drums, which saves you a step. Others come whole, which is fine too. Just separate them yourself with a sharp knife. The flats are those flat pieces with two bones, and the drums look like tiny chicken legs. Both cook up beautifully on the grill with that crispy skin everyone goes crazy for.
Kosher Salt is your foundation here. We’re talking about real kosher salt, not that fine table salt that’ll make everything taste like the ocean. Kosher salt has bigger crystals that stick to the chicken better and season more evenly. I keep a big container of it next to my grill because I use it on everything. For the dry rub, we use about half a tablespoon, but you can adjust based on your taste. Some folks like things saltier, some don’t. Start with less and add more if you need it. You can always add salt, but you can’t take it away once it’s on there.
Onion Powder brings that sweet, savory depth that makes you wonder what that amazing flavor is. We’re using 2 teaspoons here. Make sure it’s onion powder, not onion salt. They’re different things and will throw off your seasoning if you mix them up. I learned that the hard way once when I grabbed the wrong container and ended up with super salty wings. Onion powder dissolves into the chicken as it cooks, creating this incredible base layer of flavor that works with everything else in the rub.
Garlic Powder is non negotiable if you ask me. Another 2 teaspoons of this stuff and your kitchen will smell amazing even before you start cooking. Like the onion powder, make sure you’re using garlic powder and not garlic salt. Fresh garlic burns too easily on the grill and turns bitter, so powder is the way to go here. It gives you that garlicky punch without any of the hassle of peeling and mincing cloves. Plus it distributes evenly across every inch of chicken.
Paprika adds color and a subtle sweetness that rounds out the whole rub. We use 2 teaspoons of regular paprika, not the smoked kind unless you really love that smoky flavor. Regular paprika is mild and slightly sweet. It gives the wings that gorgeous reddish color that makes them look professional. When people see these coming off the grill, they always think you did something fancy. Nope, it’s just paprika doing its thing. It also helps create that crust on the outside that everyone fights over.
Dried Oregano might seem like an odd choice for chicken wings, but trust me on this one. A whole tablespoon of it. Oregano has this earthy, slightly peppery thing going on that balances all the other spices. I use the dried leaves, not the ground stuff. The leaves have more flavor and don’t turn into dust when you rub them on the chicken. If you’ve only ever had oregano on pizza, this will surprise you. It works beautifully with grilled chicken and adds a layer of complexity you wouldn’t expect.
Turmeric is just half a teaspoon, but it packs a punch. This bright yellow spice adds an earthy, slightly bitter note that keeps the rub from being one dimensional. It’s also great for your health if you care about that sort of thing. My mom swears by turmeric for everything. I just like the way it tastes and the golden color it gives the chicken. A little goes a long way, so stick with the half teaspoon. Too much and it can taste medicinal.
Black Pepper brings the heat, but not in a spicy way. We’re using half a teaspoon of freshly ground if you’ve got it. Pre ground works too. Black pepper has this sharp, piney flavor that cuts through all the other spices and wakes up your taste buds. I’ve made these wings without pepper before when I ran out, and they were good but definitely missing something. That little bit of heat and sharpness makes a bigger difference than you’d think.
Ground Ginger is another one of those secret weapons. Just a quarter teaspoon of this stuff adds a warm, slightly sweet spiciness that you can’t quite put your finger on when you’re eating. People always ask what that flavor is. Ginger plays really well with chicken and adds a subtle zing that makes the whole rub more interesting. You don’t taste ginger specifically, but you’d notice if it wasn’t there. That’s the mark of a good supporting ingredient.
Ground Cumin brings smokiness and earthiness to the party. Half a teaspoon is all you need. Cumin has this warming quality that makes everything taste richer and more complex. Some people find cumin polarizing, but in this amount it just blends into the background and adds depth. If you’ve ever had tacos or chili that tasted really good but you couldn’t figure out why, it was probably cumin doing the heavy lifting.
Coriander rounds out our dry rub with its bright, citrusy notes. Another half teaspoon. Coriander comes from cilantro seeds, but it tastes totally different from the fresh herb. It’s lemony and slightly floral, which balances all the heavier spices we’ve got going on. This is one of those spices most people don’t keep in their cabinet, but once you start using it, you’ll find yourself reaching for it all the time. It makes everything taste fresher and more vibrant.
4) How to Make Grilled Chicken Wings
Step 1. Get your grill nice and hot before you even think about putting chicken on it. You want those grates screaming hot, somewhere between 400 and 450 degrees. If you’re using a gas grill, crank all the burners to high and close the lid for about 10 minutes. Charcoal folks, get your coals white hot and spread them out evenly. While the grill is heating up, take a grill brush and scrub those grates clean. Nobody wants last week’s burger remnants on their chicken wings. This step matters more than people think. A clean, hot grill means less sticking and better sear marks.
Step 2. Pat those wings completely dry with paper towels. I mean really dry. This is probably the most overlooked step when grilling chicken, and it’s honestly one of the most important ones. Wet chicken steams instead of searing. It’ll never get that crispy skin we’re after. I use like three or four paper towels per batch of wings, pressing down firmly to soak up every bit of moisture. Sometimes I even let them sit uncovered in the fridge for an hour before cooking to dry out the skin even more. Dry skin equals crispy skin. That’s just science.
Step 3. Now for the fun part. Sprinkle that dry rub all over the wings. Get it on every surface. Top, bottom, sides, everywhere. I like to do this in a big bowl so I can toss them around and make sure they’re evenly coated. If you’re just using salt and pepper instead of the full rub, that’s cool too. Just be generous with it. The grill is hot and intense, so you need enough seasoning to stand up to that heat. Don’t be shy. I’ve never heard anyone complain that grilled chicken wings had too much flavor.
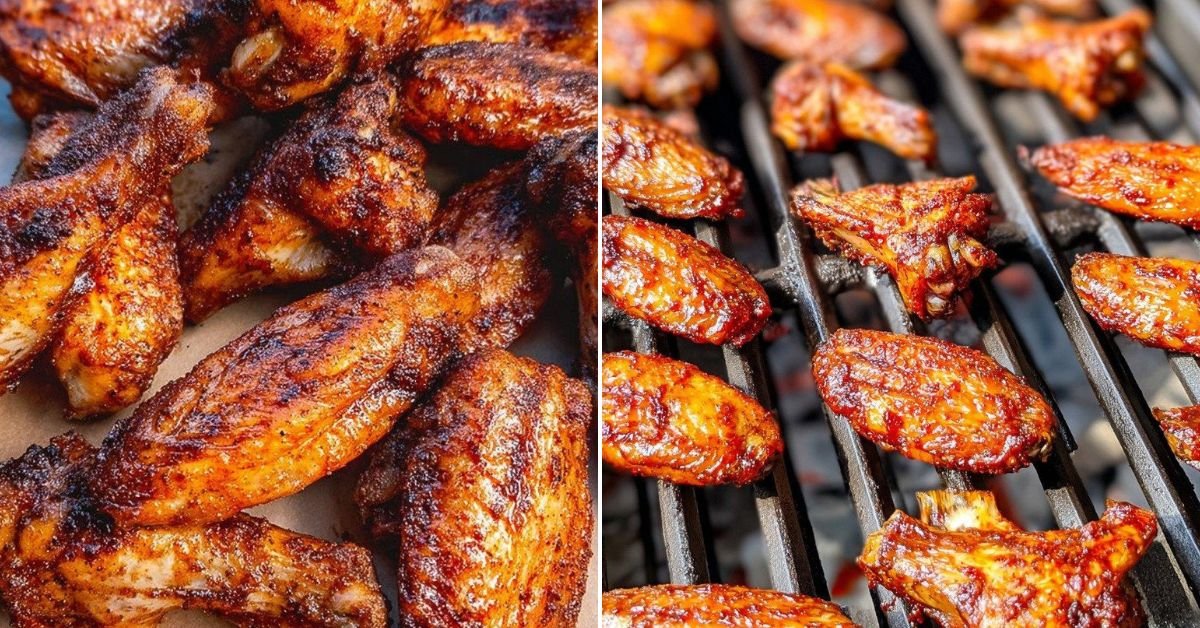
Step 4. Time to put those wings on the grill. Place them directly over the heat, not off to the side. We want direct contact with those hot grates. The flat wings need about 8 to 12 minutes total cooking time. The drums take a bit longer, more like 12 to 16 minutes. Set a timer on your phone so you don’t forget about them. I’ve definitely gotten distracted before and ended up with charcoal briquettes instead of chicken wings. Not my finest moment. You’re looking for an internal temperature of 163 degrees at the thickest part. Grab a meat thermometer and check. It’s the only way to know for sure.
Step 5. Flip those wings halfway through cooking. This is super important for getting crispy skin on both sides. I usually flip at the 6 minute mark for flats and 8 minutes for drums. Use tongs, not a fork. Poking holes in the chicken lets all those delicious juices run out. When you flip them, you should hear that satisfying sizzle and see some nice char marks forming. That’s what we want. If they’re sticking to the grill, let them cook another minute. They’ll release when they’re ready. Forcing them off just tears the skin.
Step 6. Pull the wings off the grill when they hit 163 degrees internal temperature. They might not look totally done yet, and that’s okay. They’re going to keep cooking off the heat. Transfer them to a clean plate or cutting board and just let them sit there for about 10 minutes. I know it’s tempting to dig in right away. The smell is incredible and you’re hungry. But trust me on this. During that rest time, the internal temp will climb up to 165 degrees, which is the safe eating temperature. More importantly, all the juices redistribute throughout the meat instead of running all over your plate when you bite in.
Step 7. Serve them up and watch them disappear. Seriously, these don’t last long. Set them out with your favorite dipping sauces. We’re big fans of ranch or blue cheese dressing at our house. Some people like hot sauce or extra BBQ sauce on the side. Carrot and celery sticks are classic accompaniments if you want to pretend you’re being healthy. The wings should have crispy, golden brown skin on the outside and juicy, tender meat on the inside. If you followed the steps, that’s exactly what you’ll get.
5) Tips for Making Grilled Chicken Wings
Temperature control is everything when you’re grilling chicken wings. You need consistent heat to get that perfect crispy exterior without burning them to a crisp. I learned this the hard way when I first started grilling. I’d crank the heat to high, throw the wings on, and walk away. Five minutes later I’d come back to flames shooting everywhere and charred chicken. Not good. Now I keep the grill at a steady medium high heat and actually pay attention. If you’re using a gas grill, this is easy. Just adjust the knobs. Charcoal grills take more practice. You need to learn how to control airflow with the vents. More air equals hotter fire. Close the vents slightly if things are getting too hot.
Space out your wings on the grill grates. Don’t crowd them all together like sardines in a can. They need air circulation to cook evenly and get crispy all over. I leave at least half an inch between each piece. If you’ve got more wings than grill space, cook them in batches. It’s worth the extra time. Crowded wings steam each other and end up soggy. Nobody wants soggy wings. That defeats the whole purpose of grilling them. Plus, when they’re spaced out properly, you can flip them easier without playing chicken Jenga with your tongs.
Got a meat thermometer? Use it. I can’t stress this enough. Guessing when chicken is done is risky business. Undercooked chicken can make people sick. Overcooked chicken is dry and sad. A good instant read thermometer takes the guesswork out completely. Stick it in the thickest part of the wing, usually near where the drum connects to the flat. You’re looking for 163 degrees on the grill, then 165 after resting. I keep my thermometer hanging right next to the grill so I never forget it. Best 15 bucks I ever spent on grilling equipment.
Sauce timing matters more than you might think. If you want sauced wings, don’t dump sauce on them at the beginning. It’ll burn and taste bitter. Wait until they’re almost done, about 5 degrees away from target temperature. Take them off the grill, toss them in a bowl with your sauce of choice, then put them back on the grill for 2 minutes per side. The heat caramelizes the sauce and makes it sticky and glossy. That’s how restaurants do it. That’s how you should do it too. If you sauce them too early, you end up with black, crusty wings that taste like burnt sugar.
6) Making Grilled Chicken Wings Ahead of Time
Meal prep is my jam, and these grilled chicken wings are perfect for it. You can prep them up to 24 hours before you plan to grill. Just pat the wings dry and toss them with the dry rub. Stick them in a zip top bag or covered container in the fridge. The rub will actually penetrate the meat better when it sits overnight. The salt draws out a tiny bit of moisture, then that moisture dissolves the spices and carries them back into the chicken. It’s like a mini brine situation. When you’re ready to cook, just pull them straight from the fridge and onto the grill. No extra steps needed.
If you want to go really crazy with the prep, you can mix up a big batch of the dry rub and store it in a jar. I do this all the time. Makes enough for several batches of wings. Just label it so you remember what it is six months from now when you find it in the back of your spice cabinet. The rub stays fresh for at least three months if you keep it in an airtight container away from heat and light. Having it ready to go means you can decide to make grilled chicken wings on a whim without having to measure out ten different spices.
You can even fully cook the wings ahead of time if you’re planning for a party or event. Grill them as directed, let them cool completely, then store them in the fridge for up to three days. When you’re ready to serve, just warm them back up on the grill for a few minutes. They won’t be quite as crispy as fresh, but they’re still delicious. I’ve done this for tailgates and picnics. It beats standing at the grill while everyone else is having fun. Just heat, eat, and enjoy. No stress.
The one thing you shouldn’t do ahead is apply wet sauce. If you sauce the wings and let them sit, the sauce makes the skin soggy. That crispy texture we worked so hard for just disappears. If you need to prep sauced wings in advance, keep the sauce separate and toss the wings in it right before reheating. Or serve the sauce on the side and let people dip their wings. That way everyone gets the texture and flavor they want without any sogginess.
7) Storing Leftover Grilled Chicken Wings
Leftover grilled chicken wings are basically a gift from the universe. I actually think they might taste better the next day when all those flavors have had time to really settle in. Let the wings cool down to room temperature after cooking, but don’t leave them sitting out for more than two hours. Food safety and all that. Once they’re cool, transfer them to an airtight container. I like those glass containers with the snap on lids. They don’t absorb odors like plastic sometimes does. Stack the wings in there, seal it up tight, and pop it in the fridge. They’ll stay good for up to five days.
Reheating is where people usually mess up leftover wings. Don’t use the microwave unless you enjoy sad, rubbery chicken. The microwave steams them and makes the skin all soggy and gross. The best way to reheat grilled chicken wings is in the oven or toaster oven. Spread them out on a baking sheet and warm them at 350 degrees for about 10 minutes. They’ll crisp back up nicely. You can also throw them back on the grill for a few minutes if you’ve got it fired up for something else. That brings back some of that smoky char flavor.
Air fryers work amazingly well for reheating wings too, if you’ve got one. Just 5 minutes at 375 degrees and they come out crispy and hot like they just came off the grill. I’ve been using my air fryer more and more for reheating all kinds of leftovers. It’s faster than the oven and gives you better results than the microwave. My teenager has figured out how to reheat his own leftover wings in it, which means I don’t have to do it for him anymore. Win win situation.
If you want to freeze grilled chicken wings for longer storage, you can do that too. Let them cool completely, then arrange them in a single layer on a baking sheet and freeze until solid. Once they’re frozen, transfer them to a freezer bag. This prevents them from sticking together in one giant wing blob. They’ll keep in the freezer for up to three months. Thaw them overnight in the fridge, then reheat using one of the methods above. The texture won’t be quite the same as fresh, but they’re still pretty darn good for future you to discover on a busy weeknight.
8) Try these Dinner/Appetizer next!

9) Grilled Chicken Wings

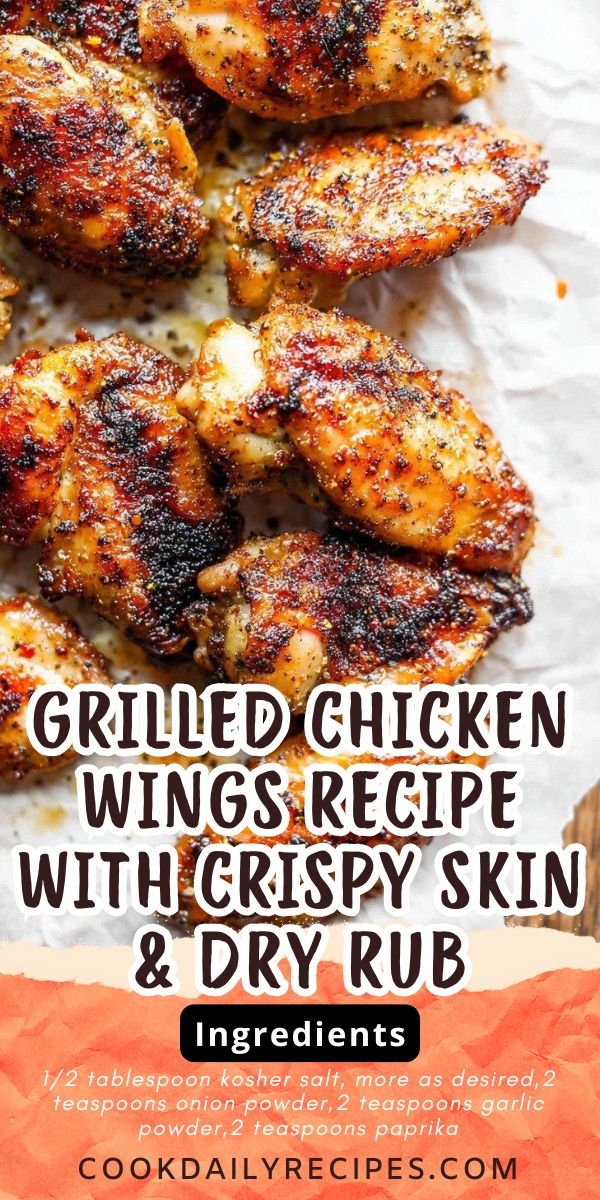
Grilled Chicken Wings Recipe with Crispy Skin & Dry Rub
Ingredients
For the Dry Rub (optional)
- 1/2 tablespoon kosher salt, more as desired
- 2 teaspoons onion powder
- 2 teaspoons garlic powder
- 2 teaspoons paprika
- 1 tablespoon dried oregano leaves
- 1/2 teaspoon turmeric
- 1/2 teaspoon ground black pepper
- 1/4 teaspoon ground ginger
- 1/2 teaspoon ground cumin
- 1/2 teaspoon coriander
For the Chicken Wings
- 15 to 20 chicken wings and drummies
- kosher salt and ground black pepper, if not using dry rub
Instructions
- Clean your grill grates and get the temperature up to medium high heat (about 400 to 450 degrees).
- Grab some clean paper towels and pat those wings completely dry. This step is super important for getting crispy skin.
- Season the wings all over with the dry rub or just go with kosher salt and black pepper if you prefer keeping things simple.
- Put the wings directly over the heat. The flat wings will need about 8 to 12 minutes total, and the drummies need more like 12 to 16 minutes. You’re shooting for an internal temperature of 163 degrees at the thickest part. Use a meat thermometer to check.
- Flip the wings halfway through cooking. This helps get that crispy skin on both sides.
- Take the wings off the grill when they hit 163 degrees and let them rest for about 10 minutes. They’ll continue cooking and reach a safe 165 degrees during this time.
- Serve them up with your favorite dipping sauce and enjoy.
10) Nutrition
Serving Size: 1 wing, Calories: 85, Sugar: 0 g, Sodium: 245 mg, Fat: 5.8 g, Saturated Fat: 1.6 g, Carbohydrates: 0.5 g, Fiber: 0.2 g, Protein: 7.5 g, Cholesterol: 29 mg


Leave a Comment