
You know what? I’ve been making this apple crisp recipe for years now, and people still can’t get enough of it. My mom passed this gem down to me (she got it from Grandma), and let me tell you, it’s hands down the best apple crisp recipe ever I’ve encountered. The topping gets so wonderfully crunchy that you’ll hear that satisfying crackle with every bite. What I love most about this recipe is how flexible it is. Looking for a healthy apple crisp recipe? You can easily swap in whole wheat flour or cut back on the sugar. Need a simple apple crisp recipe that won’t stress you out? This is it. Just mix, bake, and you’re golden. Some folks ask me about an apple crisp recipe without oats, but trust me, the oats are what make this special. They create that addictive texture that keeps everyone coming back. Want to know something funny? I’ve even tried making this as an air fryer apple crisp recipe (curiosity got the better of me), and while it worked, nothing beats the traditional oven method. This easy apple crisp recipe simple enough for weeknights but impressive enough for company. The smell alone will have your family hovering around the kitchen asking when it’ll be ready.

Table of Contents
- 1) Key Takeaways
- 2) Easy Apple Crisp Recipe
- 3) Ingredients for Apple Crisp Recipe
- 4) How to Make Apple Crisp Recipe
- 5) Tips for Making Apple Crisp Recipe
- 6) Making Apple Crisp Recipe Ahead of Time
- 7) Storing Leftover Apple Crisp Recipe
- 8) Try these Desserts next!
- 9) Apple Crisp Recipe
- 10) Nutrition
1) Key Takeaways
- What makes this apple crisp recipe different from others?
- Can you make apple crisp without oats?
- What’s the best type of apple to use for apple crisp?
- How do you keep the topping crunchy and not soggy?
2) Easy Apple Crisp Recipe
You know what I love about this apple crisp recipe? It’s the kind of dessert that makes you look like a baking genius when really, you just threw some stuff in a dish and called it a day. I mean that in the best way possible. When I first started making this, I was intimidated by all those fancy apple desserts out there. Turns out, the simple ones are usually the winners.
This recipe has been passed down through my family for three generations, and let me tell you, it’s survived this long for good reason. My grandma used to make it, my mom perfected it, and now I’m the one pulling it out of the oven for Sunday dinners. The apple crisp recipe relies on just a handful of ingredients that you probably already have sitting in your pantry right now. We’re talking flour, brown sugar, oats, butter, apples, and cinnamon. That’s it. No weird stuff, no complicated techniques, just straightforward baking that delivers every single time.
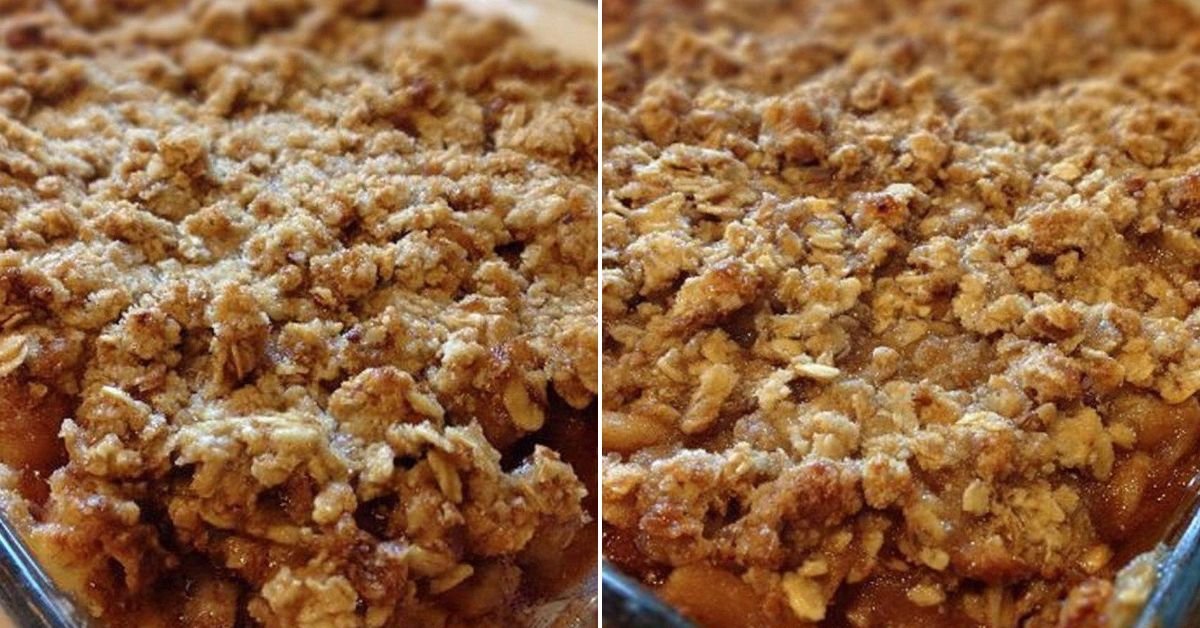
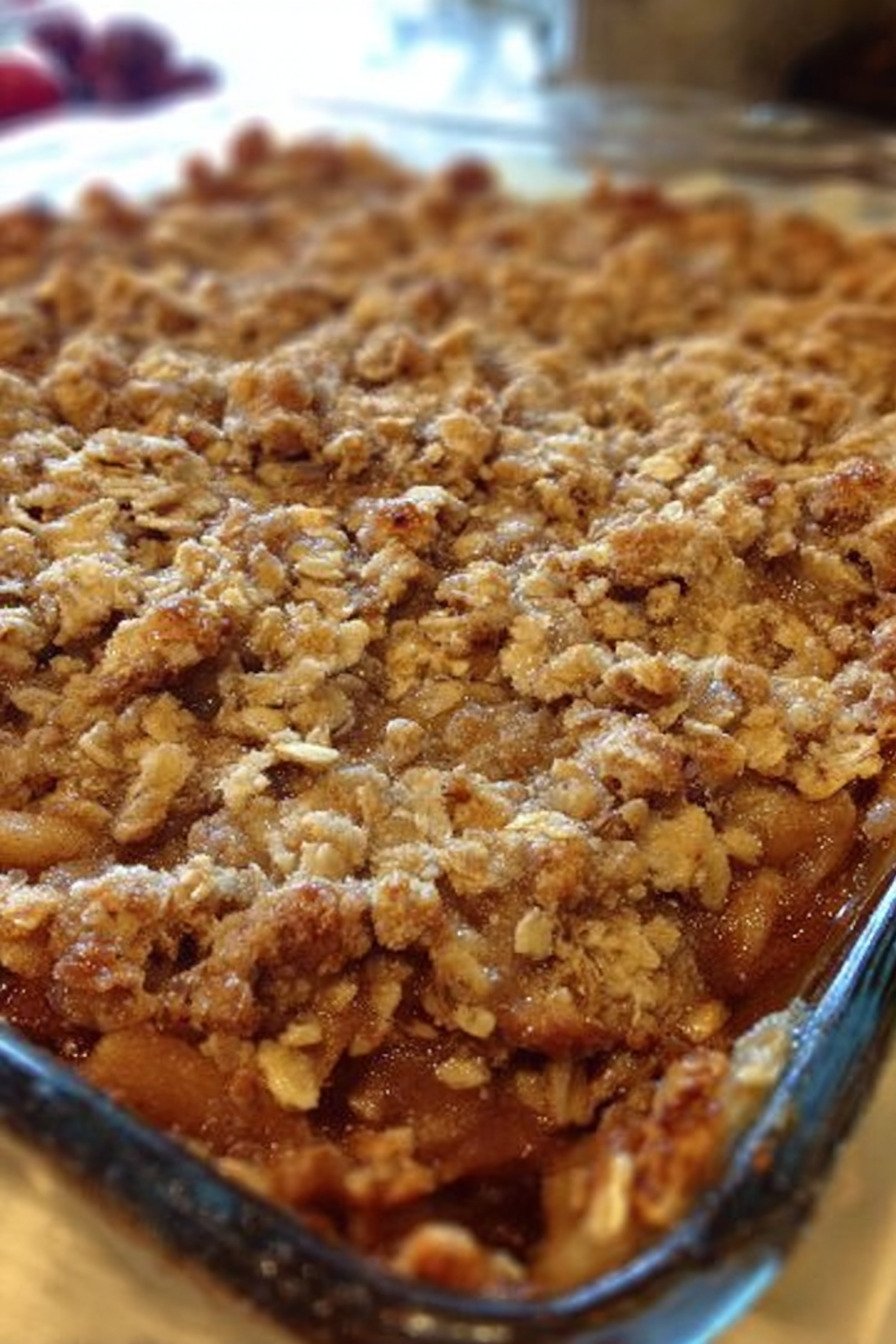
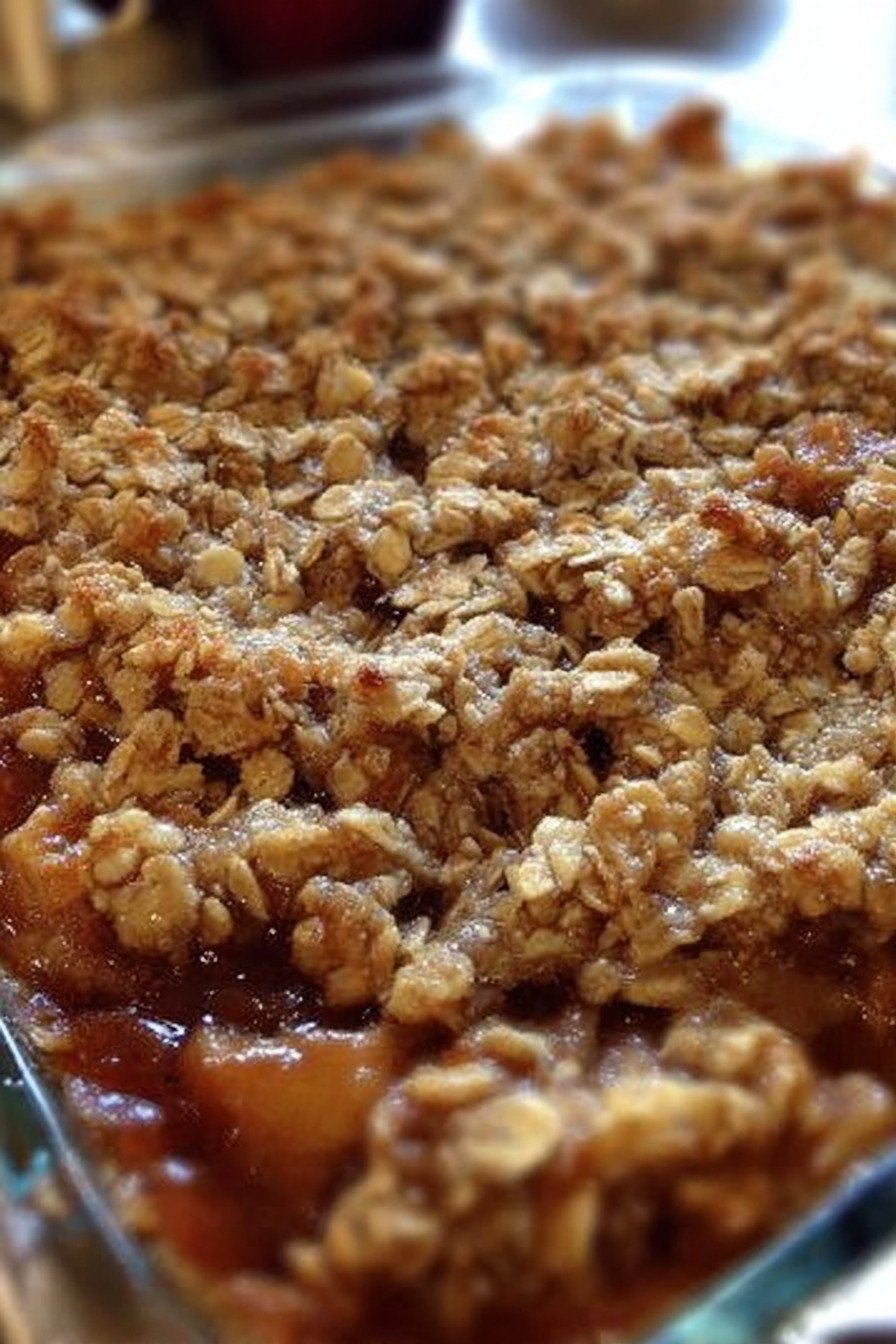
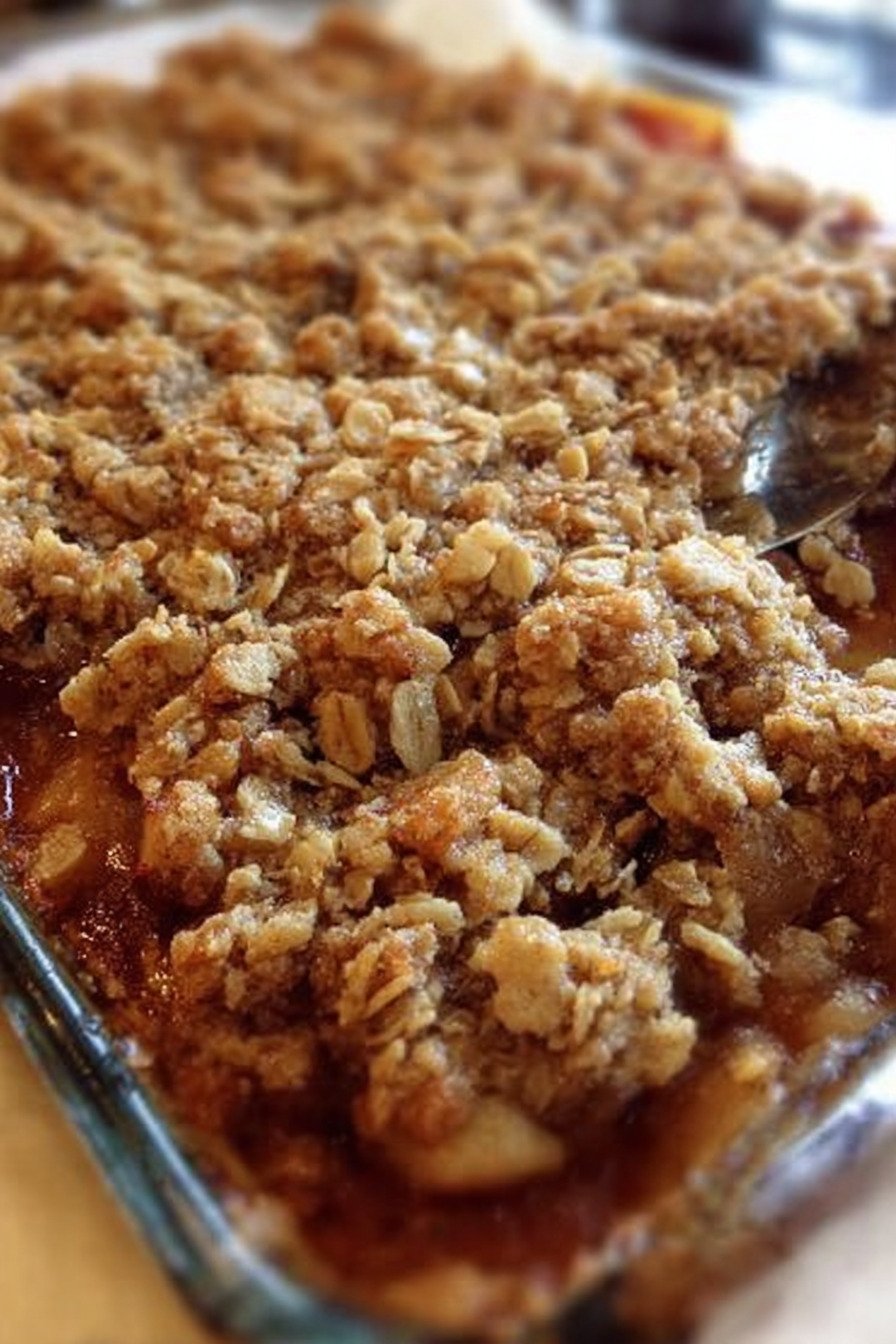
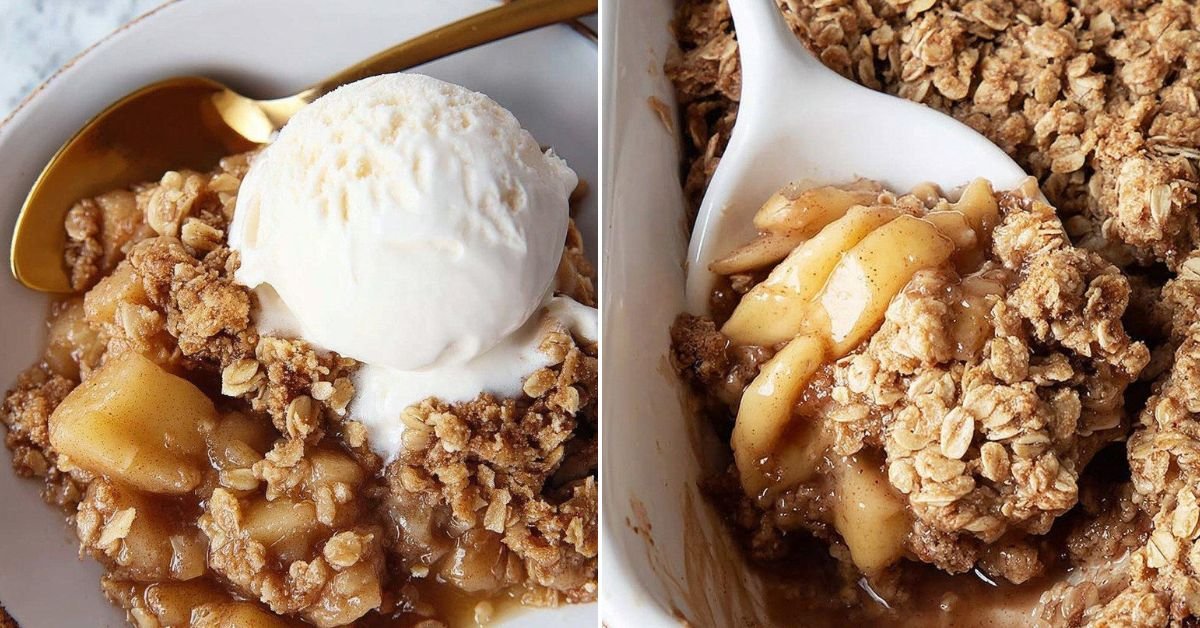
What really sets this apart is the topping. Some recipes give you a sad, soggy mess on top of your apples. Not this one. The ratio of butter to oats to sugar creates these amazing golden clusters that stay crunchy even after sitting in the fridge overnight. I’ve tested this thing more times than I can count, and trust me when I say the proportions here are spot on. The brown sugar caramelizes just right, creating little pockets of sweetness throughout the crispy oat layer.
The whole thing comes together in about 15 minutes of actual work. Peel some apples, toss them with cinnamon, mix up your topping, sprinkle it over, and bake. That’s your whole process right there. My kids can practically make this themselves at this point. It’s that straightforward. And here’s the best part: while it bakes, your entire house smells like a fall festival. Cinnamon, butter, caramelized sugar, all mixing together into this incredible aroma that has everyone asking when dessert will be ready.
I’ve made this apple crisp recipe for potlucks, holiday dinners, random Tuesday nights when I needed comfort food, and everything in between. It works for all of it. Fancy dinner party? Serve it in individual ramekins with a scoop of vanilla ice cream. Casual family meal? Bring the whole pan to the table and let everyone dig in. The beauty of this dessert is its versatility. It fits any occasion, any season, any mood. Though I’ll admit, it really shines in autumn when you can grab fresh apples from the farmers market or even better, from your own tree if you’re lucky enough to have one.
3) Ingredients for Apple Crisp Recipe
Golden Delicious or Granny Smith Apples
Here’s where people get all worked up about apple varieties, but I’m gonna keep it simple for you. Golden Delicious apples give you a sweeter, mellower flavor that basically melts into the cinnamon. They break down just enough to create this tender filling without turning to mush. Granny Smith apples, on the other hand, keep their shape better and add that tart punch that cuts through all the sweetness from the topping. Honestly? I usually use a mix of both. You get the best of everything that way. Just make sure your apples are firm and fresh, not those sad, mealy ones that have been sitting around forever.
Ground Cinnamon
Two tablespoons might sound like a lot, but trust me on this. Cinnamon is what transforms plain sliced apples into something magical. I use the regular stuff from the grocery store, nothing fancy needed here. Some folks like to add nutmeg or allspice too, and that’s fine if you’re into it. I keep things traditional with just cinnamon because that’s how my grandma did it, and I’m not about to mess with perfection. The warmth and spice level is just right. Not overwhelming, not too subtle. Just that perfect cozy flavor that screams comfort food.
All Purpose Flour
The flour in the topping is what gives you structure. Without it, you’d just have loose oats falling all over the place. With it, you get those beautiful clumps and clusters that make each bite interesting. I use regular all purpose flour, nothing special. Don’t stress about measuring it super precisely either. A little more or less won’t ruin anything. Baking is science, sure, but this recipe is forgiving enough that you don’t need to break out the food scale and get all technical about it.
Brown Sugar
Brown sugar is where the magic happens. It melts into the butter and creates this incredible caramel situation that coats the oats and makes everything taste rich and deep. I always use light brown sugar, but dark would work too if that’s what you’ve got. The molasses content in brown sugar adds complexity that white sugar just can’t match. When it bakes, it gets all bubbly and golden around the edges of the pan. That’s the good stuff right there. Make sure your brown sugar isn’t rock hard before you start. If it is, stick it in a bowl with a damp paper towel and microwave it for like 20 seconds to soften it up.
Quaker Oats
Old fashioned oats are non negotiable here. Don’t even think about using instant oats or steel cut oats. You need the regular old fashioned kind that comes in the big canister. These oats toast up beautifully in the oven and give you that satisfying crunch that makes apple crisp what it is. They soak up just enough butter to get crispy without becoming greasy. Two whole cups seems like a ton when you’re mixing it, but once it bakes down, it’s the perfect amount. This is what makes the difference between apple crisp and just baked apples with some sad sprinkles on top.
Melted Butter
Real butter, please. Not margarine, not some weird spread, just regular salted or unsalted butter. I usually use salted because I like the flavor it adds, but either works fine. You need to melt it completely so it coats every bit of the oat mixture. When I say this topping is buttery, I mean it. That’s the whole point. The butter is what crisps everything up and adds that rich, indulgent flavor that makes people go back for seconds. Don’t skimp on this. You need the full two thirds cup to get the right texture and taste.
4) How to Make Apple Crisp Recipe
Step 1
Get your oven heating up to 375°F right from the start. You want it nice and hot when your apple crisp is ready to go in. Grab an 8 inch square baking dish. I use pyrex because it distributes heat evenly and you can see the bubbling happening around the edges, which is super satisfying. But any similar sized dish works fine. Just make sure it’s actually 8 inches or close to it. If you use something way bigger, your topping will spread too thin and won’t get that perfect crispy to apple ratio we’re going for.
Step 2
Time to deal with the apples. Peel them all first. I know some people leave the peels on, and that’s fine if you like them, but I prefer the texture without them. Core each apple and slice them into either eighths or sixteenths, whichever feels right to you. Thinner slices cook faster and get softer, thicker slices hold their shape better and give you more bite. I usually go somewhere in the middle. Toss all those apple slices into a bowl with the 2 tablespoons of cinnamon. Use your hands or a big spoon to coat them evenly. Every piece should have that rusty brown cinnamon color on it. Then dump the whole thing into your prepared baking dish and spread them out so they’re relatively even.
Step 3
Now for the topping, which is honestly the star of the show here. In a large bowl, mix together your flour and brown sugar. Break up any lumps in the brown sugar as you go. Once that’s combined, add in all those oats. Give everything a good stir until the oats are distributed throughout. You want every scoop of topping to have all three components mixed together. This takes maybe a minute of stirring. Don’t overthink it. Just mix until you don’t see any dry flour pockets sitting at the bottom of the bowl.
Step 4
Pour your melted butter over the oat mixture. This is where it gets fun. Start mixing it all together, and you’ll see the mixture go from dry and crumbly to this amazing clumpy, almost wet looking texture. Keep mixing until everything is coated with butter. You should be able to squeeze some in your hand and have it hold together in a clump. That’s how you know you’ve mixed it enough. Some people use a fork for this, but I just use my hands. Way easier and you can really feel when everything is properly combined.
Step 5
Take your butter oat mixture and sprinkle it evenly over the apples. Don’t just dump it all in one spot. Spread it around so you get topping coverage over the entire surface. I like to use my fingers to break up any huge clumps as I go, but leave plenty of medium sized clumps intact. Those are what get extra crispy and golden. Press down on the topping very gently, just enough so it makes contact with the apples underneath. You want some of that apple juice to seep up into the topping as it bakes. That’s what creates the slightly softer layer right where the topping meets the fruit.
Step 6
Slide that pan into your preheated oven and set a timer for 30 minutes. You’ll know it’s done when the topping is golden brown and you can see the apple filling bubbling up around the edges. If the top is browning too fast but the apples aren’t quite tender yet, just tent some foil over the pan and give it another 5 or 10 minutes. Every oven is a little different, so use your judgment. The smell alone will tell you when it’s getting close. That incredible cinnamon butter aroma will fill your whole kitchen.
Step 7
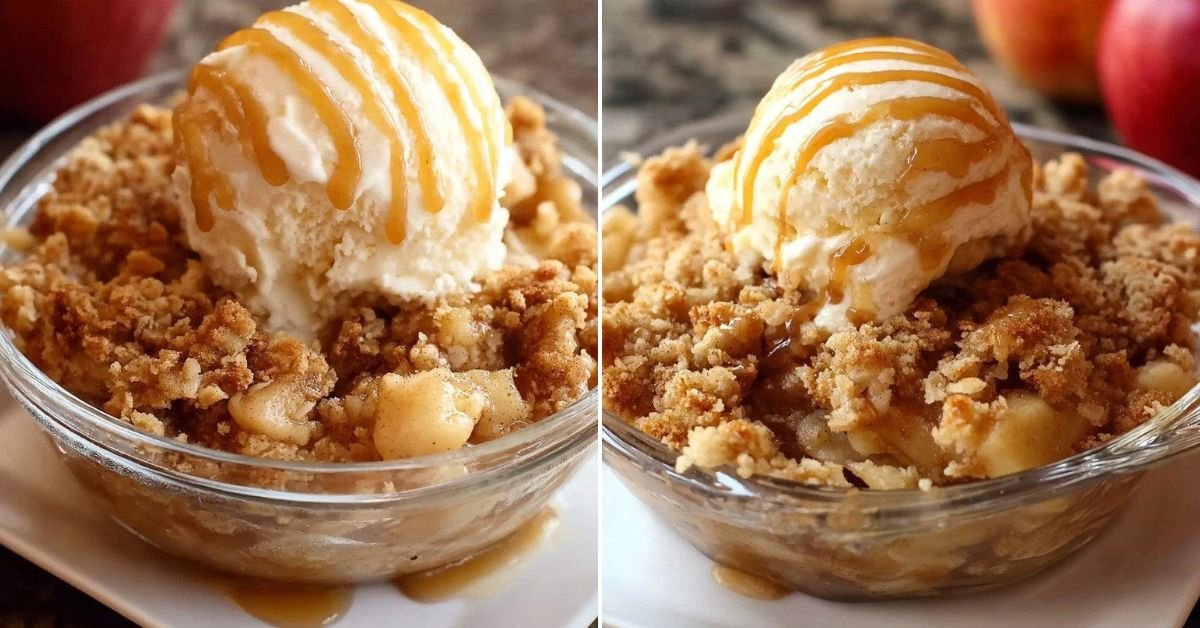
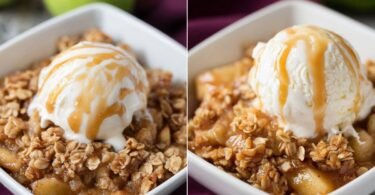
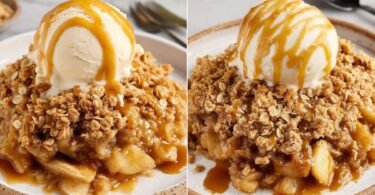
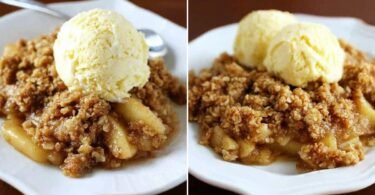
Let it cool for at least 10 or 15 minutes before serving. I know waiting is hard when it smells that good, but trust me, you need to let it set up a bit. The filling will be molten lava hot straight out of the oven. As it cools, everything thickens up slightly and becomes way easier to scoop and serve. Grab some vanilla ice cream from the freezer and plop a big scoop right on top of a warm serving. Watch that ice cream start to melt into all the nooks and crannies. That right there is dessert heaven. Some people like whipped cream instead, and that’s good too. But ice cream is where it’s at for me.
5) Tips for Making Apple Crisp Recipe
Don’t skimp on the cinnamon with your apples. That 2 tablespoons really coats them well and infuses every bite with flavor. If you’re feeling adventurous, you can add a pinch of nutmeg or a tiny bit of cloves, but honestly, I never do. The cinnamon alone is perfect. When you’re tossing the apples with the cinnamon, really get in there and make sure every slice is coated. You don’t want some pieces to be bland and others to be overpowering. Even distribution is key here.
Your butter needs to be completely melted before you add it to the oat mixture. Not softened, not partially melted, but fully liquid. I usually just pop mine in the microwave for about 45 seconds and call it done. If your butter is too cool or not fully melted, it won’t coat the oats properly and you’ll end up with a dry, crumbly topping that doesn’t clump together right. Room temperature melted butter is ideal. Let it cool for just a minute or two after melting if it seems super hot.
The type of baking dish you use can make a difference in cooking time. Glass or ceramic takes a little longer to heat up but holds heat really well. Metal pans heat up faster but can sometimes lead to a too brown bottom if you’re not careful. I stick with my trusty pyrex 8×8 because I know exactly how it performs in my oven. If you’re using something different, just keep an eye on it the first time and adjust as needed. You can always add more time, but you can’t un burn something.
Don’t pack down your apple slices too tightly in the pan. Let them sit loosely so steam can circulate and cook them evenly. If you jam them in there, the ones in the middle won’t cook through properly and you’ll end up with crunchy apples in spots. Just spread them out in a relatively even layer and call it good. They’ll settle and shrink as they bake anyway. The goal is tender apples all the way through, not some mushy and some still firm.
Check your apple crisp around the 25 minute mark to see how it’s progressing. If the topping is getting too dark but the apples still seem firm, cover it loosely with foil and keep baking. If everything looks perfect at 30 minutes, pull it out. Ovens vary so much that you really need to use your own judgment. The bubbling around the edges is your best indicator that the apples are cooked through and the filling is ready. That’s when all those juices have released and thickened up with the cinnamon.
6) Making Apple Crisp Recipe Ahead of Time
This apple crisp actually gets better when you make it ahead. I’m not even kidding. The flavors meld together, the topping soaks up some of those apple juices, and everything becomes more cohesive. I make this the day before Thanksgiving every single year. Just pop it in the fridge after it cools completely, then reheat it in a 350°F oven for about 15 or 20 minutes before serving. You can even make it two days ahead if you need to.
If you want to prep it but not bake it yet, you can assemble the whole thing in your baking dish, cover it tightly with plastic wrap, and stick it in the fridge for up to 24 hours. When you’re ready to bake, just pull off the plastic and put it straight in the oven. You might need to add 5 or 10 extra minutes to the baking time since it’s starting cold, but that’s no big deal. This is perfect for when you’re hosting and need to get stuff done ahead of time.
The topping can be made in advance too. Mix it all up, butter and everything, and keep it in an airtight container in the fridge for up to a week. When you’re ready to use it, just let it sit at room temperature for 10 minutes or so to soften up a bit, then sprinkle it over your prepared apples and bake as directed. I do this sometimes when I know I’ll want a quick dessert during the week. Having that topping ready to go makes the whole process even easier.
You can freeze this too. Both baked and unbaked versions freeze well. For unbaked, assemble it completely, wrap it really well in plastic and then foil, and freeze for up to 3 months. Bake from frozen, adding about 20 extra minutes to the cook time. For baked apple crisp, let it cool completely, wrap it up tight, and freeze. Reheat from frozen at 350°F for about 30 or 40 minutes. The topping might lose a tiny bit of its crunch, but it’s still delicious. Way better than not having apple crisp at all.
When reheating leftover apple crisp, the oven is your best bet. Microwave works in a pinch, but the topping gets soggy. Put it in a 350°F oven for 10 to 15 minutes, just until it’s heated through and the topping crisps back up. If you’re only reheating a single serving, you can get away with the microwave for like 30 seconds, then transfer it to a toaster oven for a couple minutes to crisp the top. Not perfect, but it’ll do when you’re desperate for a warm apple crisp fix at midnight.
7) Storing Leftover Apple Crisp Recipe
Leftover apple crisp keeps really well in the fridge. Let it cool to room temperature first, then cover the whole baking dish with plastic wrap or foil. Or you can portion it out into individual containers if that’s easier for you. It’ll stay good for about 5 days in the fridge. Maybe a week if you’re pushing it. The topping gets a little softer after a day or two, but it’s still tasty. Just reheat it in the oven to crisp everything back up.
I actually think apple crisp is one of those desserts that tastes great cold straight from the fridge too. My husband eats it for breakfast sometimes. Don’t judge. There’s fruit in it, oats on top, it’s basically breakfast food when you think about it. Cold apple crisp with your morning coffee is surprisingly good. The topping gets chewy and the apples are all tender and sweet. It’s different from when it’s warm, but still delicious in its own way.
If you want to crisp up the topping on your leftovers, skip the microwave. Seriously. It makes everything soggy and sad. Use your oven or toaster oven instead. Put a portion on an oven safe plate or in a small baking dish, and heat it at 350°F for about 10 minutes. The topping will crisp back up and the filling will get warm and bubbly again. Add a fresh scoop of ice cream and you’d never know it was leftovers. Tastes just as good as the first day.
For longer storage, freezing is your friend. Portion out individual servings into freezer safe containers or wrap them well in plastic and foil. They’ll keep frozen for 2 or 3 months easily. To reheat from frozen, let them thaw in the fridge overnight, then warm them up in the oven like I mentioned above. Or you can go straight from freezer to oven if you’re impatient like me. Just add extra time and maybe cover it with foil so the top doesn’t burn before the inside heats through.
One trick I learned is to store the topping and filling separately if you know you won’t eat it right away. Keep the baked apples in one container and scrape off the topping into another. When you want to eat it, reheat the apples and topping separately, then put them back together. The topping stays way crunchier this way. It’s extra work, sure, but if you’re really particular about texture, it’s worth it. Most of the time I don’t bother though. Life’s too short to fuss that much over leftover dessert.
8) Try these Desserts next!
9) Apple Crisp Recipe
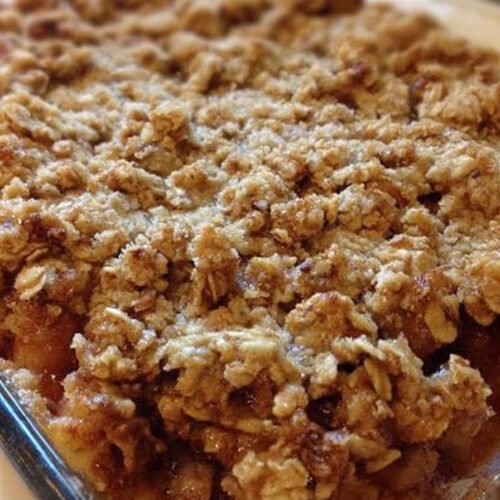
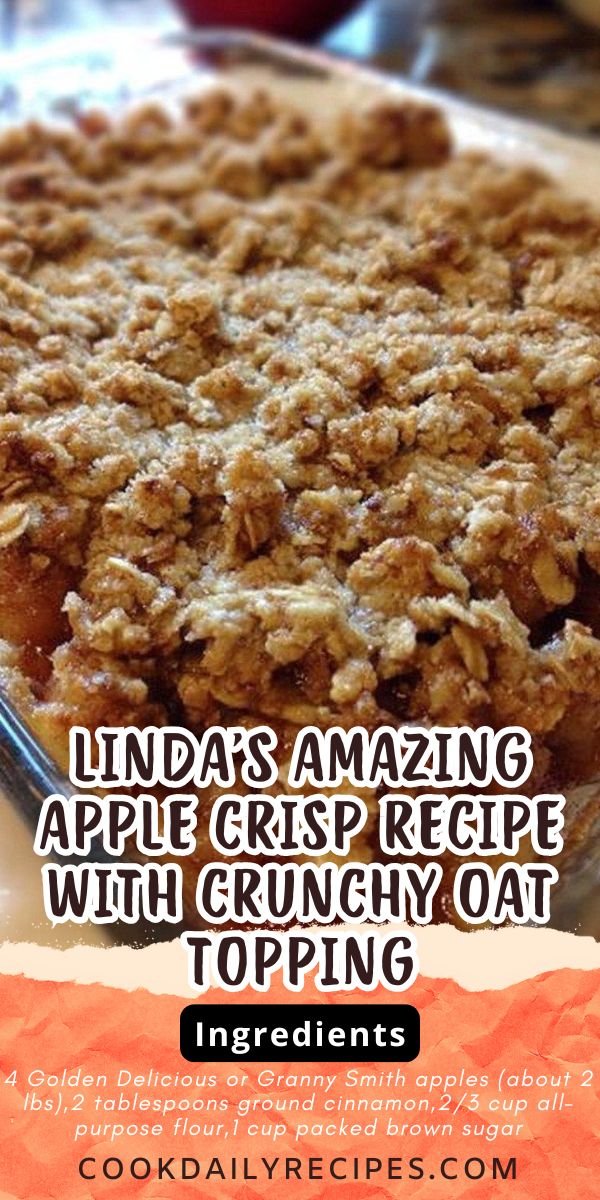
Linda’s Amazing Apple Crisp Recipe with Crunchy Oat Topping
Ingredients
For the Apple Filling
- 4 Golden Delicious or Granny Smith apples (about 2 lbs)
- 2 tablespoons ground cinnamon
For the Crunchy Oat Topping
- 2/3 cup all-purpose flour
- 1 cup packed brown sugar
- 2 cups old-fashioned rolled oats (Quaker Oats work great)
- 2/3 cup unsalted butter, melted
Instructions
- Preheat your oven to 375°F. Grab an 8-inch square baking dish and set it aside.
- Peel those apples (I know it’s tedious, but it’s worth it), then core them and slice into eighths or sixteenths, whatever feels right to you.
- Toss the apple slices into a big bowl, sprinkle that cinnamon all over, and give everything a gentle toss until the apples are nicely coated. Dump them into your baking dish.
- Now for the fun part! In another bowl, mix together the flour and brown sugar. Stir in the oats and mix well.
- Pour that melted butter over your oat mixture and stir until everything’s combined and looks crumbly. This is where the magic happens.
- Sprinkle the topping evenly over your cinnamon apples. Don’t be shy, make sure you get good coverage.
- Pop it in the oven and bake for about 30 minutes. You’ll know it’s done when the topping turns golden brown and crispy, and the apples are bubbling around the edges.
- Let it cool for just a few minutes (if you can wait that long), then serve it up warm with a big scoop of vanilla ice cream on top. Game changer!
10) Nutrition
Serving Size: 1/6 of the apple crisp, Calories: 385, Sugar: 38 g, Sodium: 145 mg, Fat: 18 g, Saturated Fat: 11 g, Carbohydrates: 54 g, Fiber: 4 g, Protein: 4 g, Cholesterol: 45 mg


Leave a Comment