
Let me tell you something: I’ve been absolutely obsessed with these rolls lately. You know that feeling when you can’t stop thinking about a certain food? That’s me with buttery garlic bread and cheese roll recipes. We’ve all been there when you need something quick but absolutely delicious. These quick snack recipes are my go-to solution. They’re packed with gooey mozzarella, roasted garlic butter that melts in your mouth, and the most amazing soft, pillowy texture. Trust me, once you try these homemade garlic rolls, you’ll be making them every single weekend. What I love most about these savory cheese snacks is how simple they really are. Sure, the dough needs time to proof, but the actual work? Super manageable. And the payoff? Oh my goodness, the payoff is incredible. These easy snack recipes have become my secret weapon at gatherings. People think I’ve slaved away for hours, but really, most of that time is just waiting around while the dough does its thing. The buttery aroma that fills your kitchen while these quick bread recipes bake is worth it alone. Can you already smell it?
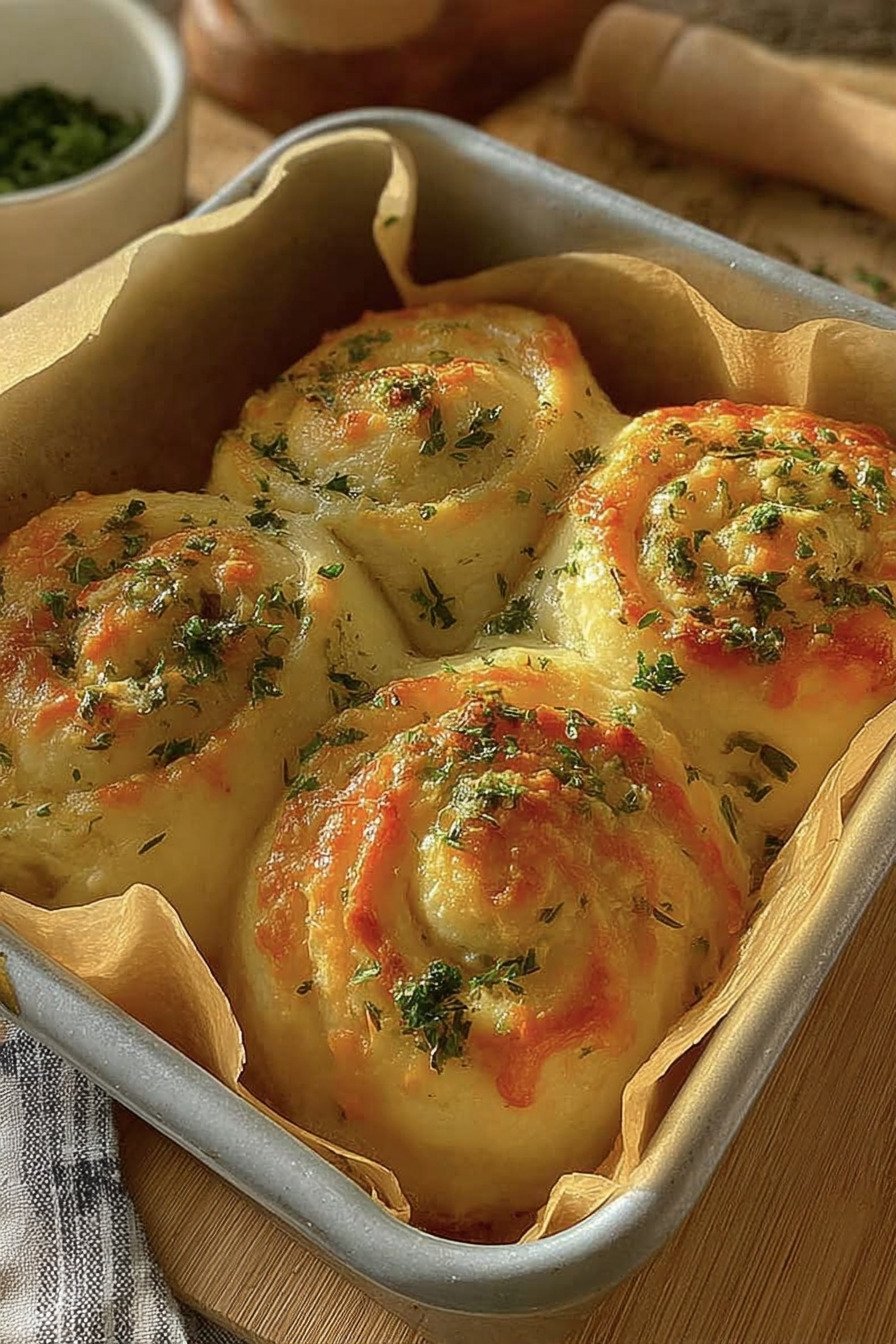
Table of Contents
- 1) Key Takeaways
- 2) Easy Buttery Cheese Garlic Rolls Recipe
- 3) Ingredients for Buttery Cheese Garlic Rolls
- 4) How to Make Buttery Cheese Garlic Rolls
- 5) Tips for Making Buttery Cheese Garlic Rolls
- 6) Making Buttery Cheese Garlic Rolls Ahead of Time
- 7) Storing Leftover Buttery Cheese Garlic Rolls
- 8) Try these Snacks next!
- 9) Buttery Cheese Garlic Rolls
- 10) Nutrition
1) Key Takeaways
- What makes these garlic rolls so buttery and flavorful?
- Can I make cheese garlic rolls without a stand mixer?
- How do I know when my dough has proofed enough?
- What’s the best way to roast garlic for this recipe?
- Can I freeze these rolls for later?
2) Easy Buttery Cheese Garlic Rolls Recipe
Listen, I need to be honest with you about these quick snack recipes. When I first saw buttery garlic bread recipes online, I thought they’d be way too complicated for a regular Tuesday night. Boy, was I wrong! These cheese roll recipes changed everything for me.
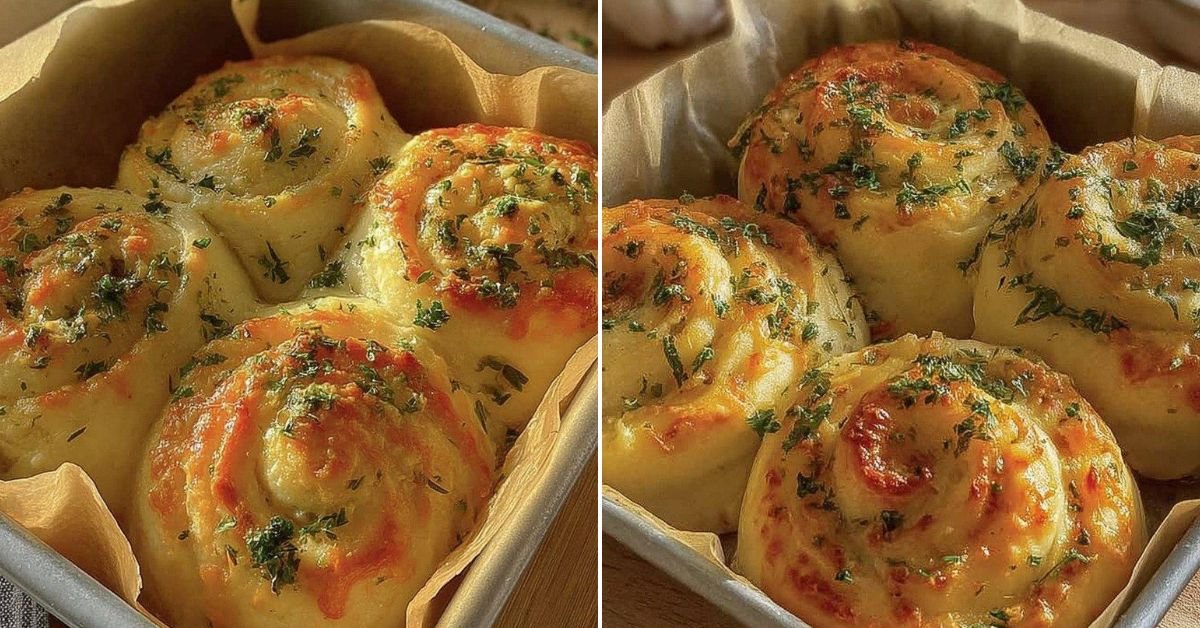
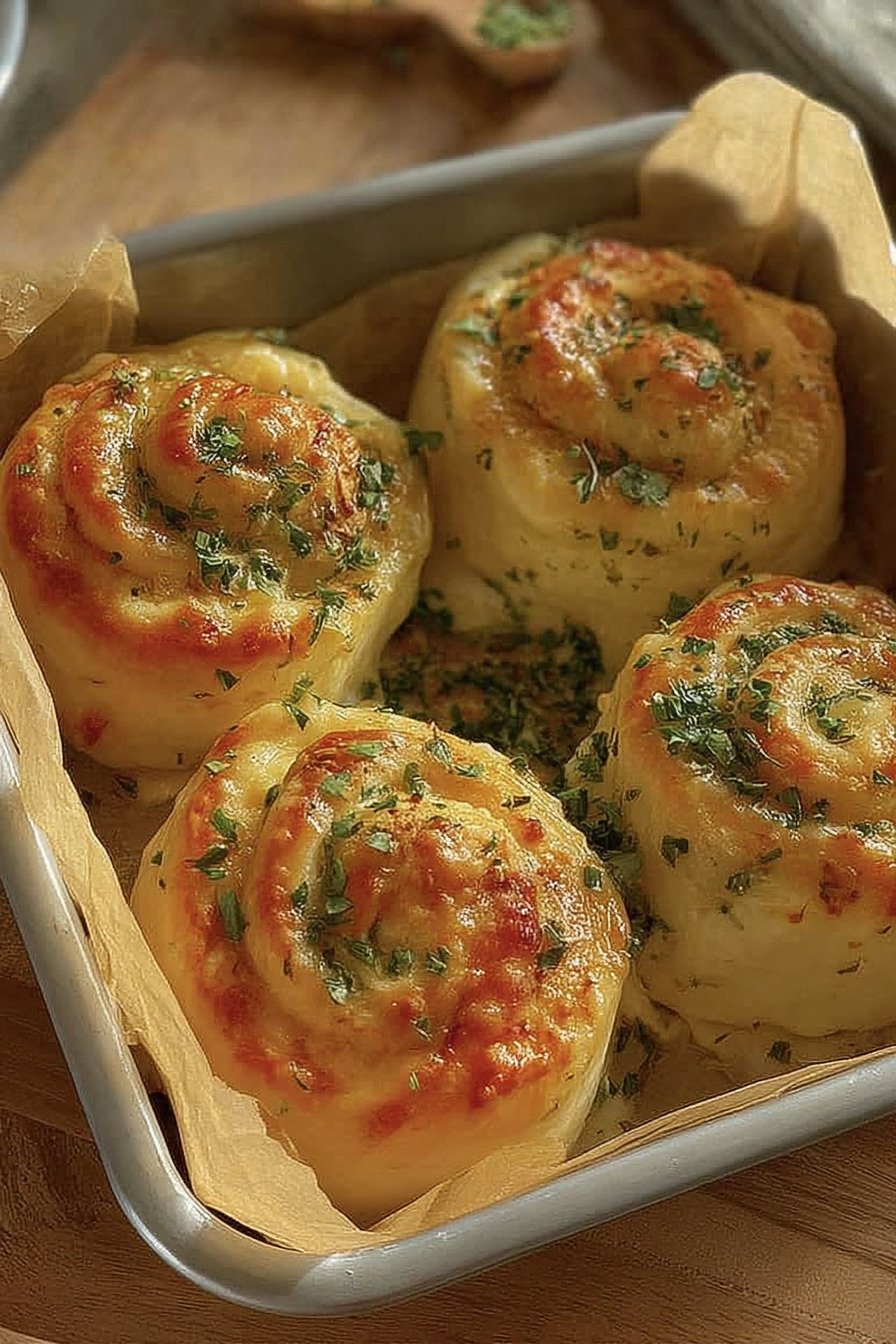
What makes these rolls so dang good? First off, we’re roasting a whole head of garlic until it’s practically spreadable. That roasted garlic gets mixed into butter with fresh parsley, creating this insanely good garlic butter that’ll make your taste buds sing. Then we roll it up with mountains of melted mozzarella inside soft, pillowy dough. I’m talking about the kind of quick snack recipes that make people ask for seconds and thirds.
The beauty of these homemade garlic rolls is that most of the time is hands off. You mix your dough, let it rise while you catch up on your favorite show, then roll it out and fill it with all that cheesy, garlicky goodness. We’re talking about easy snack recipes that look and taste like you’ve been in culinary school, but really you’ve just been patient enough to let the dough do its thing.
I’ve made these savory cheese snacks for game nights, family dinners, and random Saturday afternoons when I just needed something comforting. Every single time, they disappear faster than I can keep track of. My kitchen smells like an Italian restaurant for hours afterward, and honestly, I’m not mad about it. These are the quick bread recipes that actually deliver on their promises.
3) Ingredients for Buttery Cheese Garlic Rolls
Whole Garlic Head: We’re roasting an entire head of garlic here, not just a couple cloves. Trust me on this one. When you roast garlic low and slow, it transforms into this sweet, buttery, mellow version of itself. Cut off the top, drizzle it with olive oil, wrap it in foil, and forget about it for a couple hours. The smell alone is worth it. If you’ve never roasted garlic before, prepare to have your mind blown. It’s one of those simple techniques that makes you feel like a real chef.
Active Dry Yeast: This is what makes our dough rise and get all fluffy. Make sure your yeast is fresh and active by checking the expiration date. When you mix it with warm milk and honey, it should get foamy and bubbly within 10 minutes. If it doesn’t foam up, your yeast might be dead and you’ll need to start over with fresh yeast. I know it’s annoying, but it’s better to find out early than to waste all your other ingredients on dough that won’t rise.
All Purpose Flour and Bread Flour: We’re using a combo of both flours here. The bread flour gives us structure and chew, the all purpose flour keeps things tender. If you only have all purpose flour in your pantry, go ahead and use that for the whole amount. Your rolls will still be delicious, just maybe a tiny bit less chewy. I’ve done it both ways and honestly, both versions disappear just as fast.
Butter: We need butter in two places here. Some goes into the dough to make it rich and tender, and more gets mixed with our roasted garlic for the filling. Use unsalted or salted, whatever you’ve got. I usually just grab whatever’s in my fridge. If you’re using salted butter, you might want to go a little easier on the added salt in the recipe, but really, it’s hard to mess this up.
Egg Yolks: Just the yolks for this recipe, not the whole eggs. Yolks give us moisture and richness without making the dough tough. Egg whites can actually make baked goods a little drier when they cook, so we’re leaving them out. Save those whites for an omelet tomorrow morning or just scramble them up for a quick snack. If you don’t want to deal with separating eggs, one whole egg will work in a pinch.
Mozzarella Cheese: Get the good stuff if you can, but honestly, pre shredded mozzarella from the grocery store works just fine. I use about two cups and pile it generously over the garlic butter. The cheese melts into these gorgeous gooey pockets that stretch when you pull the rolls apart. You could totally swap in cheddar, Monterey Jack, or even a Mexican cheese blend. I’ve tried it with smoked gouda once and it was incredible.
Fresh Parsley: This adds a pop of color and a fresh herby flavor to our garlic butter. Chop it up nice and fine so it distributes evenly. If you don’t have parsley, you could use cilantro, chives, or even some fresh basil. Dried herbs work too, just use about a third of the amount since dried herbs are more concentrated. Or skip the herbs entirely if that’s your style. These rolls are forgiving like that.
Warm Milk: The milk needs to be warm but not hot, around body temperature. Too hot and you’ll kill your yeast, too cold and your yeast won’t activate properly. I usually just microwave my milk for about 20 seconds and check it with my finger. It should feel warm but comfortable, like bathwater. Whole milk makes the richest dough, but 2% or even skim will work if that’s what you have.
Honey: Just a tablespoon of honey feeds the yeast and gives our dough a subtle sweetness. You could use sugar instead if you don’t have honey, but honey gives a nicer flavor and helps the rolls brown beautifully in the oven. Plus, yeast just loves honey. It activates faster and more reliably when you give it a little honey to munch on.
4) How to Make Buttery Cheese Garlic Rolls
Step 1. Start with roasting your garlic because this takes the longest. Grab a whole head of garlic and slice off just the very top so you can see the cloves inside. Put it in a small oven safe dish or ramekin, drizzle it generously with olive oil, sprinkle with salt, and cover the whole thing tightly with aluminum foil. Pop it in your oven at 160°C (that’s 320°F) and let it roast for about 2 hours. You want those cloves to be super soft and golden brown. Set a timer and go do something else for a while.
Step 2. Once your garlic is done roasting and has cooled down enough to handle, squeeze out those soft garlic cloves into a bowl. Mix them with softened butter, your chopped parsley, and a couple tablespoons of that garlicky olive oil from the roasting dish. Mash it all together until it’s well combined. This garlic butter is liquid gold, and you’re gonna want to eat it with a spoon. Resist the urge and set it aside for the rolls.
Step 3. In a small bowl, combine your warm milk with the active dry yeast and honey. Give it a quick stir and then just leave it alone for about 10 minutes. You’ll know it’s ready when it gets foamy and bubbly on top. This is called proofing your yeast, and it’s your insurance policy that your dough will actually rise. If nothing happens after 10 minutes, your yeast might be dead and you’ll need to start this step over with fresh yeast.
Step 4. In your stand mixer bowl (or a large mixing bowl if you’re doing this by hand), dump in both your flours, the sugar, powdered milk if you’re using it, softened butter, salt, your two egg yolks, and that frothy yeast mixture. Use the dough hook attachment and mix on medium speed for 15 to 20 minutes. The dough will look shaggy at first but keep going. It’ll eventually come together into a smooth, elastic ball that pulls away from the sides of the bowl.
Step 5. Put your dough in a clean bowl, cover it with a damp kitchen towel or plastic wrap, and set it somewhere warm. I usually turn my oven on for just a minute to warm it up, then turn it off and put the bowl in there. The dough needs about 1.5 hours to double in size. Don’t rush this part. Good bread takes time, and this is where all the flavor develops. Check on it after an hour and a half. If it’s not quite doubled yet, give it more time.
Step 6. When your dough has doubled, turn it out onto a lightly floured surface and roll it into a rectangle about a quarter centimeter thick. Spread that amazing garlic butter all over the surface of the dough, getting it right to the edges. Then sprinkle your shredded mozzarella cheese evenly over the garlic butter. Don’t be shy with the cheese. More cheese is always better when it comes to these rolls.
Step 7. Starting from one long edge, roll the dough up into a tight log. Try to keep it as tight as possible so you get nice swirls in your finished rolls. Once it’s rolled, use a piece of unflavored dental floss or a very sharp knife to cut the log into 6 equal pieces. Dental floss works amazing for this because it cuts cleanly without squishing the rolls. Just slide it under the log, cross the ends over the top, and pull.
Step 8. Place your cut rolls on a baking sheet lined with parchment paper, spacing them a couple inches apart. Cover them again with that damp towel and let them proof for another 30 minutes. They should puff up and look pillowy. This second rise makes them extra fluffy and light. I know you’re getting impatient by now, but I promise it’s worth the wait.
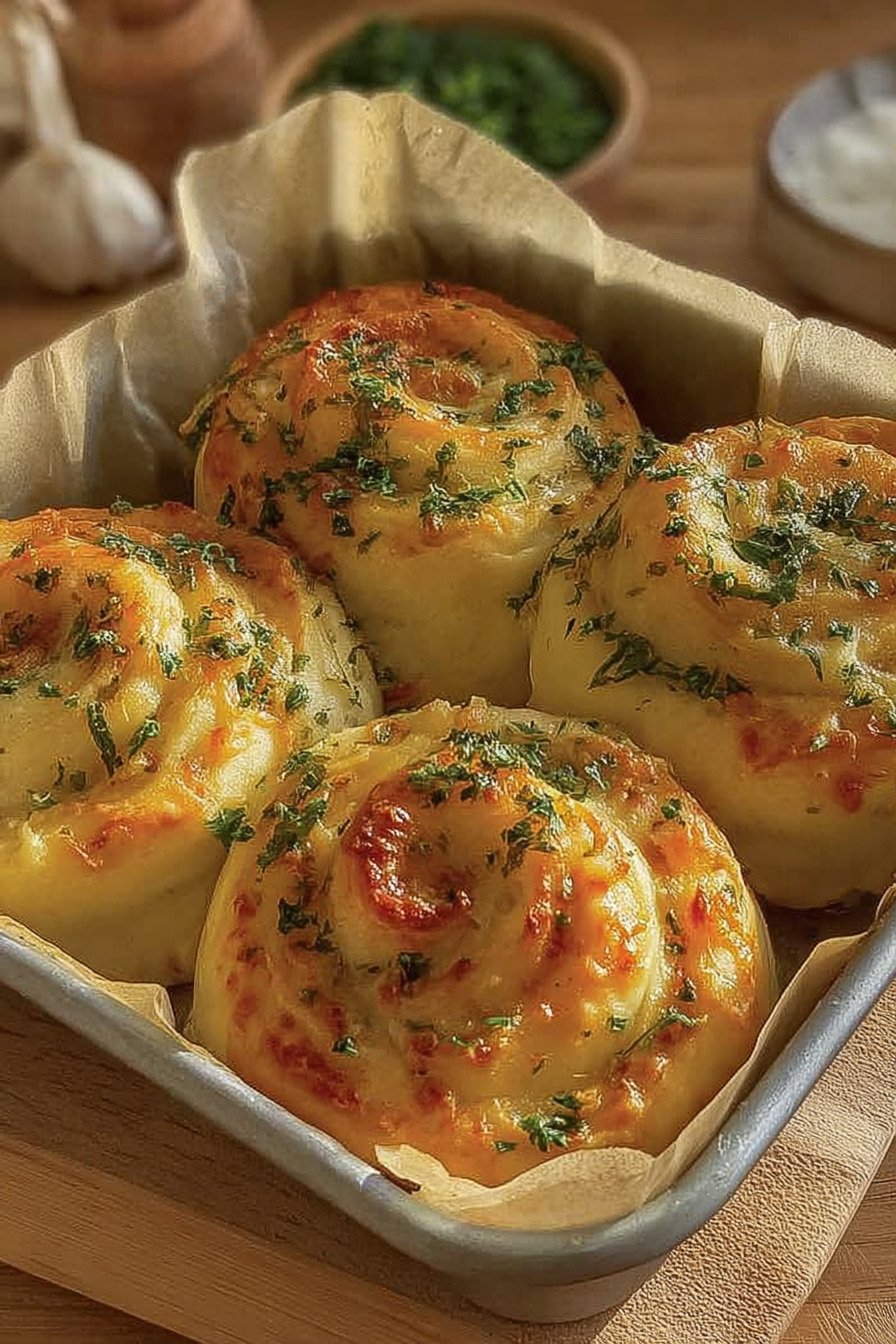
Step 9. Preheat your oven to 175°C (350°F). Beat an egg and brush it all over the tops of your rolls. This egg wash gives them that beautiful golden brown color you see in bakery bread. Then slide them into the oven and bake for 20 to 25 minutes. Start checking around the 20 minute mark. They’re done when they’re golden brown on top and smell absolutely incredible.
Step 10. As soon as those rolls come out of the oven, brush them with any leftover garlic butter. The heat will melt it right into the tops of the rolls. Sprinkle with some extra chopped parsley if you want to get fancy. Let them cool for just a few minutes before serving, if you can wait that long. They’re best eaten warm when the cheese is still melty and gooey.
5) Tips for Making Buttery Cheese Garlic Rolls
The number one mistake I see people make with yeast dough is not proofing it properly. Your kitchen needs to be warm for this to work. If your house is cold, your dough is gonna take forever to rise, or it might not rise at all. I’ve learned to create a warm environment by turning on my oven for just 60 seconds, then turning it off and putting my dough bowl inside. It’s like a little proofing box. You could put it near a sunny window or on top of your fridge too.
Another thing that makes a huge difference is kneading the dough long enough. I know 15 to 20 minutes seems like forever, but that’s what develops the gluten structure that makes these rolls soft and fluffy instead of dense and heavy. If you’re kneading by hand, you’ll probably need closer to 25 or 30 minutes. The dough should feel smooth and elastic, and when you poke it, it should bounce back. That’s how you know it’s ready.
Don’t stress too much about making the rolls perfectly uniform. Mine are always slightly different sizes and that’s totally fine. They still taste amazing. If your dough seems too dry and crumbly when you’re kneading it, add a tiny splash of milk. Different brands of flour absorb liquid differently, so sometimes you need to adjust. The dough should be soft but not sticky. You should be able to handle it without it sticking to your fingers too much.
Here’s a pro tip for you about roasting garlic ahead. I usually roast two or three heads at once and keep the extra in the fridge for up to a week. Then I can make these rolls on a whim without waiting two hours for garlic to roast. You can even freeze roasted garlic cloves in ice cube trays and pop them out whenever you need them. Game changer for quick weeknight cooking.
6) Making Buttery Cheese Garlic Rolls Ahead of Time
I love making the dough for these rolls a day ahead. After you’ve kneaded it, instead of letting it rise at room temperature, stick the whole bowl in the fridge overnight. This is called cold fermentation, and it actually makes the dough taste even better. The slow rise develops more complex flavors. The next day, take it out and let it come to room temperature for about an hour before rolling it out and filling it.
You can shape the rolls and do that second proof in the fridge too. Just cover them tightly and refrigerate for up to 24 hours. When you’re ready to bake, pull them out and let them sit at room temperature for about 30 minutes before they go in the oven. They might need an extra few minutes of baking time since they’ll be starting cold, but that’s no big deal.
The roasted garlic butter can be made up to a week in advance and kept in the fridge. Just let it come to room temperature before you try to spread it on the dough, or it’ll be too hard to work with. I actually like making a double batch of garlic butter because it’s amazing on regular toast, mixed into mashed potatoes, or tossed with pasta. You’ll find a million uses for it.
Want to get really ahead of the game? You can freeze the unbaked rolls after shaping them. Arrange them on a baking sheet and freeze until solid, then transfer to a freezer bag. They’ll keep for up to three months. When you want to bake them, let them thaw in the fridge overnight, then do that final 30 minute proof at room temperature before baking. Fresh baked rolls whenever you want them with minimal effort.
7) Storing Leftover Buttery Cheese Garlic Rolls
If you somehow manage to have leftovers (which honestly rarely happens at my house), these rolls keep really well. Put them in an airtight container or zip top bag and store them in the fridge for up to 4 days. The cheese and garlic butter mean they need to be refrigerated, not left out on the counter. I’ve tried both ways and they definitely get weird if you leave them at room temperature too long.
To reheat them, I wrap individual rolls in foil and pop them in a 175°C (350°F) oven for about 8 minutes. You could microwave them for like 30 seconds if you’re in a hurry, but the oven method is way better. The oven keeps them soft on the inside while crisping up the outside just a little bit. The microwave can make them kind of rubbery if you’re not careful.
For longer storage, these rolls freeze beautifully after baking. Let them cool completely, wrap them individually in plastic wrap, then put them all in a freezer bag. They’ll stay good for up to 2 months in the freezer. To reheat from frozen, unwrap them and put them in a 175°C (350°F) oven for about 15 minutes. You can also thaw them in the fridge overnight first, then reheat for just 8 to 10 minutes.
Sometimes I’ll brush the reheated rolls with a little extra melted butter and sprinkle some fresh parsley on top to freshen them up. They taste almost as good as fresh baked. My kids actually request these rolls so often that I usually have a batch in the freezer at all times. It’s nice to be able to pull out a couple for a quick snack or to round out a soup dinner without having to make dough from scratch.
8) Try these Snacks next!


9) Buttery Cheese Garlic Rolls

Quick Snack Recipes: Buttery Cheese Garlic Rolls Everyone Will Love
Ingredients
Garlic Butter
- 1 whole garlic head
- Sprinkle of salt
- 3 tablespoons olive oil
- 50 grams (1/4 cup) butter
- 1 tablespoon fresh parsley, chopped
Dough
- 90 grams (1/3 cup) warm milk
- 7 grams (2 1/4 teaspoons) active dry yeast
- 1 tablespoon honey
- 200 grams (1 1/2 cups) all-purpose flour
- 50 grams (1/2 cup) bread flour
- 20 grams (3 tablespoons) powdered milk (optional)
- 25 grams (2 tablespoons) butter, softened
- 2 egg yolks
- 1 1/2 teaspoons salt
- 1 tablespoon sugar
Filling
- 200 grams (2 cups) mozzarella cheese, shredded
- Garlic butter (from recipe above)
Egg Wash
- 1 egg, beaten
Instructions
- Start by roasting the garlic. Place one whole garlic head in a ramekin (trim the bottom first), drizzle generously with olive oil, sprinkle with salt, cover tightly with foil, and roast at 160°C (320°F) for about 2 hours until it’s super soft and golden. Let it cool completely before touching it.
- Make the garlic butter by mixing the roasted garlic cloves with softened butter, chopped parsley, and 2 tablespoons of that amazing garlic oil from roasting. Set this aside.
- In a small bowl, combine the warm milk, active dry yeast, and honey. Let it sit for about 10 minutes until it gets all frothy and bubbly. This tells you your yeast is alive and ready to work.
- In your mixing bowl (or stand mixer), combine both flours, sugar, powdered milk if using, softened butter, salt, egg yolks, and that frothy yeast mixture.
- Knead this dough using your stand mixer with the dough hook on medium speed for 15 to 20 minutes. You want it smooth and elastic. If kneading by hand, expect to work it for about 25 minutes.
- Place your dough in a covered bowl and let it proof somewhere warm (around 29°C or 85°F works great) for 1 hour and 30 minutes, or until it’s doubled in size. Be patient here, it’s worth the wait.
- Roll out your dough nice and thin, about 1/4 cm thick. Now spread that gorgeous garlic butter evenly across the surface.
- Sprinkle the mozzarella cheese all over the garlic butter layer. Don’t be shy with the cheese!
- Roll the dough up tightly into a log shape. Use dental floss or a sharp knife to cut it into 6 equal portions. Dental floss works like magic for clean cuts.
- Place your rolls on a baking sheet lined with parchment paper. Cover them up and let them proof for another 30 minutes until they’re puffy and beautiful.
- Preheat your oven to 175°C (350°F). Brush each roll with the beaten egg wash for that golden finish.
- Bake for 20 to 25 minutes, keeping an eye on them after the 20 minute mark. They should be golden brown and smell absolutely incredible.
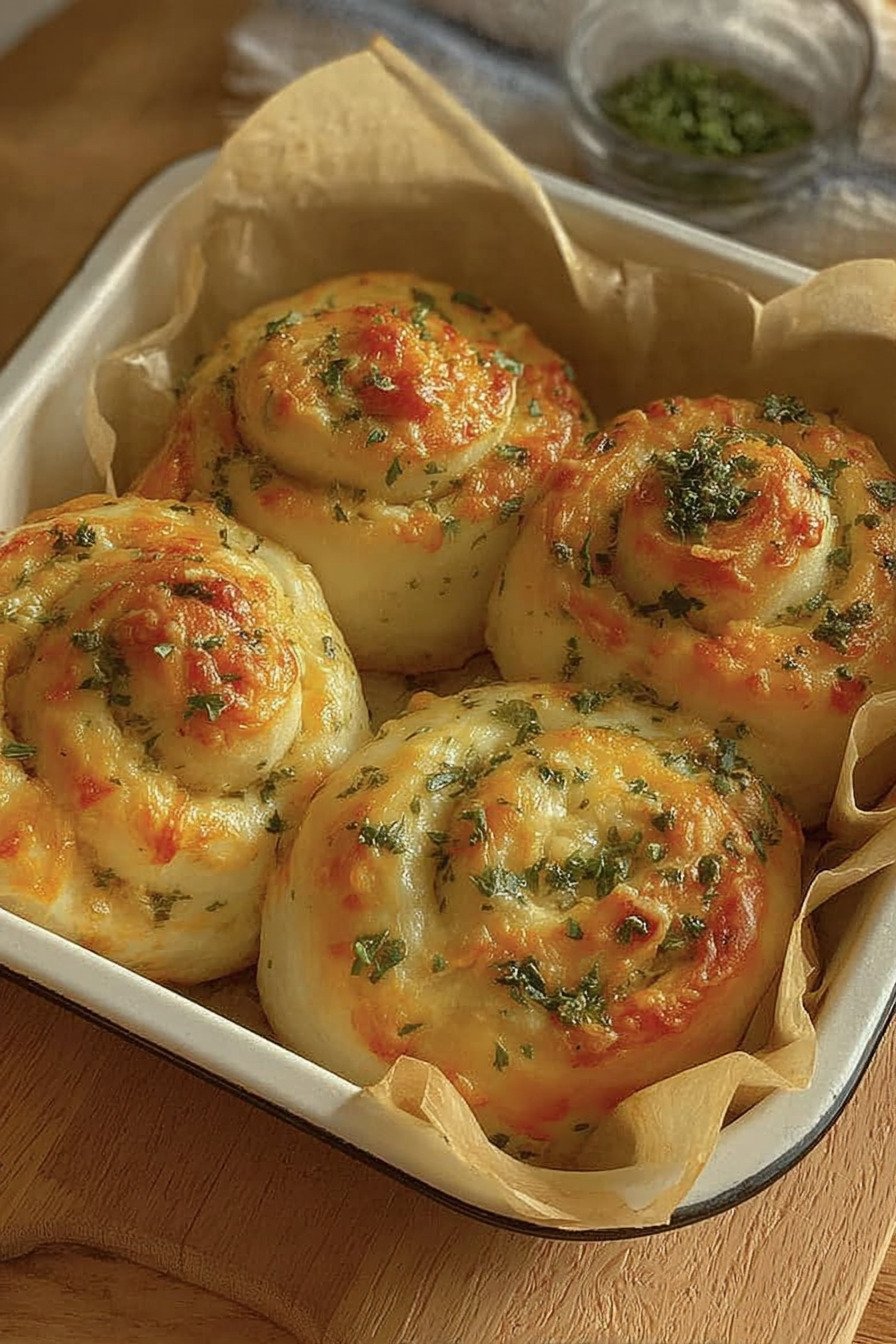
- Right when they come out, brush them with any leftover garlic butter and sprinkle with fresh chopped parsley. Serve warm and watch them disappear!
10) Nutrition
Serving Size: 1 roll | Calories: 425 | Sugar: 7 g | Sodium: 775 mg | Fat: 22 g | Saturated Fat: 11 g | Carbohydrates: 42 g | Fiber: 1.5 g | Protein: 15 g | Cholesterol: 115 mg


Leave a Comment