
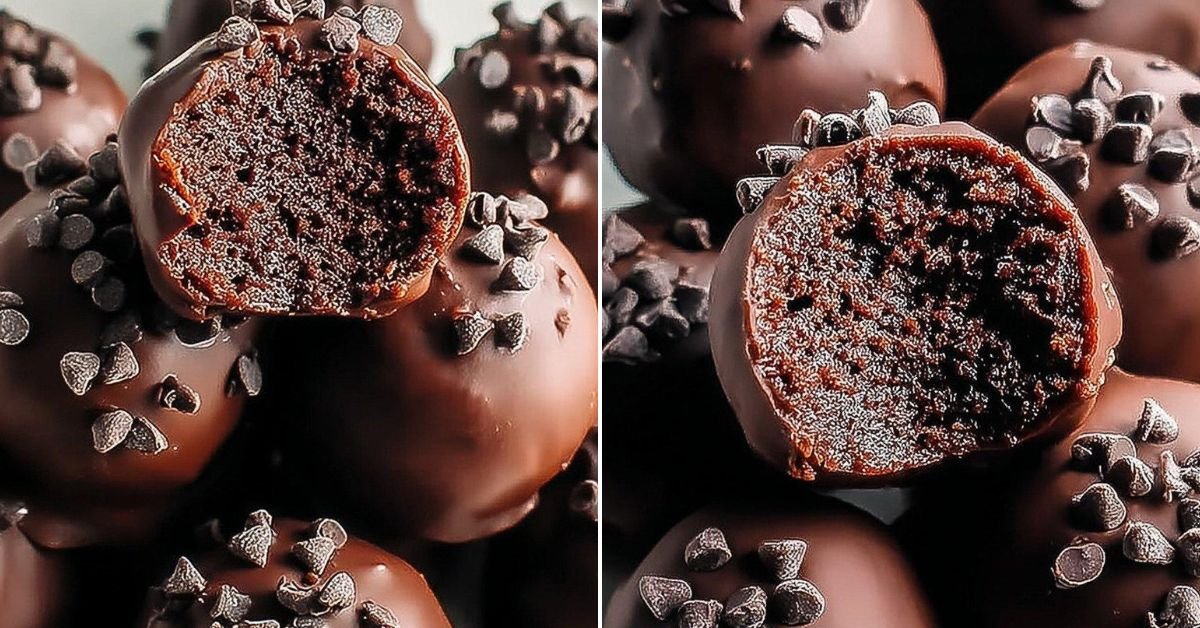
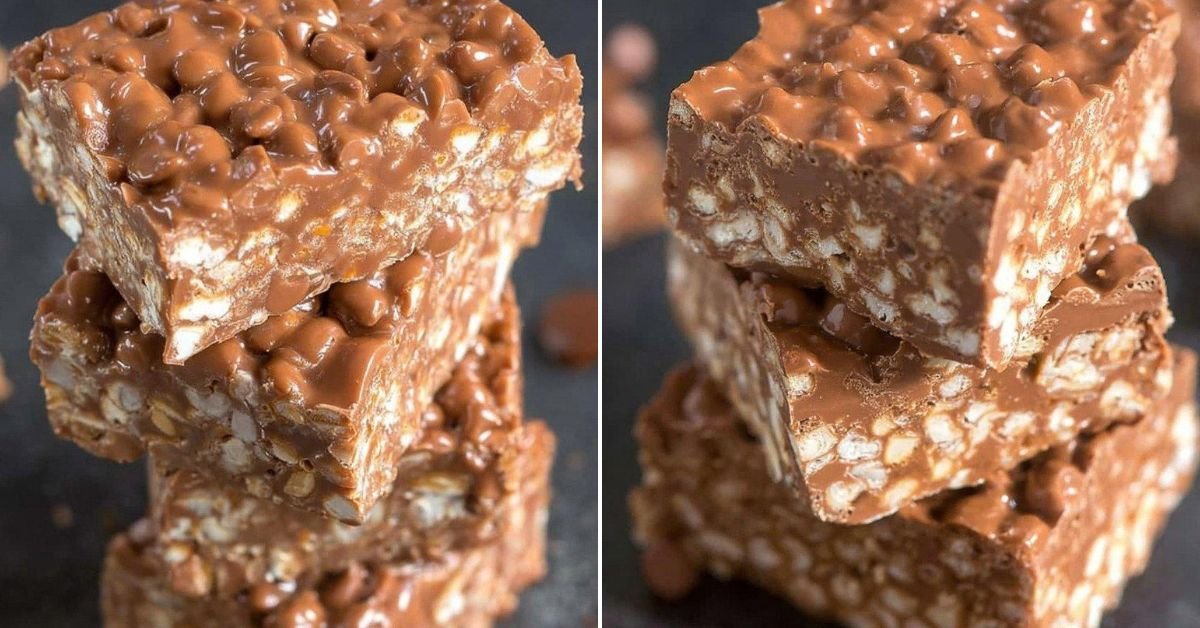
I’ve got a confession to make: sometimes I’m just too lazy to turn on the oven. Can you relate? That’s exactly how these no-bake brownie bites came into my life. Picture this: a random Tuesday evening, chocolate craving hitting hard, and me standing in my kitchen thinking there’s got to be an easier way. Turns out, there is. These little guys are my go-to quick snack recipes when I need something sweet without the wait. We’re talking about a 2 ingredient desserts approach here, mixed with just a few more pantry staples you probably already have. I know what you’re thinking, does it actually taste like a brownie? Yes! The texture is fudgy, rich, and honestly, nobody’s ever guessed they weren’t baked. It’s like a 3 ingredient fudge recipe had a baby with a brownie and decided to skip the oven entirely. What I love most about this recipe is how forgiving it is. You can make them while chatting on the phone, helping with homework, or binge-watching your favorite show. They’re one of those 5 ingredient or less recipes that feel fancy but require zero skills. The best part? They’re ready in about 20 minutes if you don’t count the chilling time. Talk about 5 minute recipes prep! Perfect for those moments when you need no bake desserts that actually deliver on taste. Plus, they make incredible quick snack ideas for parties, movie nights, or just because it’s Wednesday and you deserve chocolate.

Table of Contents
- 1) Key Takeaways
- 2) Easy No-Bake Brownie Bites Recipe
- 3) Ingredients for No-Bake Brownie Bites
- 4) How to Make No-Bake Brownie Bites
- 5) Tips for Making No-Bake Brownie Bites
- 6) Making No-Bake Brownie Bites Ahead of Time
- 7) Storing Leftover No-Bake Brownie Bites
- 8) Try these Desserts next!
- 9) No-Bake Brownie Bites
- 10) Nutrition
1) Key Takeaways
- What makes no-bake brownie bites so quick and easy to prepare?
- Can you really make delicious brownies without an oven?
- What are the best tips for getting the perfect fudgy texture?
- How long do no-bake brownie bites stay fresh in the refrigerator?

2) Easy No-Bake Brownie Bites Recipe
Look, I’m all about quick snack recipes that don’t require me to heat up my entire kitchen. These no-bake brownie bites are exactly that. When I first stumbled upon the idea of making brownies without turning on the oven, I was skeptical. Can something that easy actually taste good? Spoiler alert: it can, and it does.
What makes these quick snack recipes so brilliant is the simplicity. You mix everything in one bowl, roll them into balls, dip them in chocolate, and you’re done. No waiting for the oven to preheat. No checking if they’re done every five minutes. No burnt edges or undercooked centers. Just straightforward, foolproof chocolate goodness that comes together faster than you can decide what to watch on Netflix.
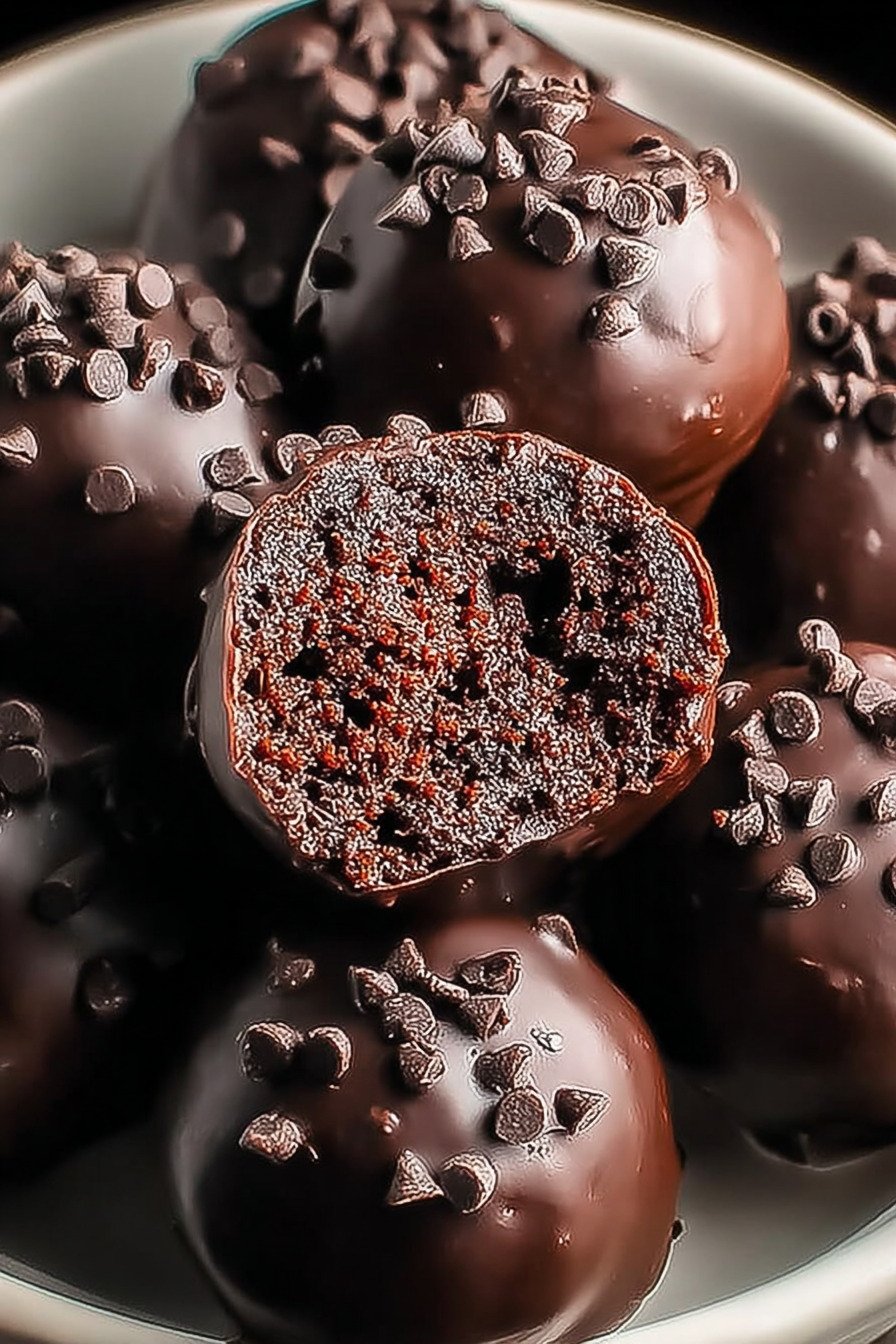
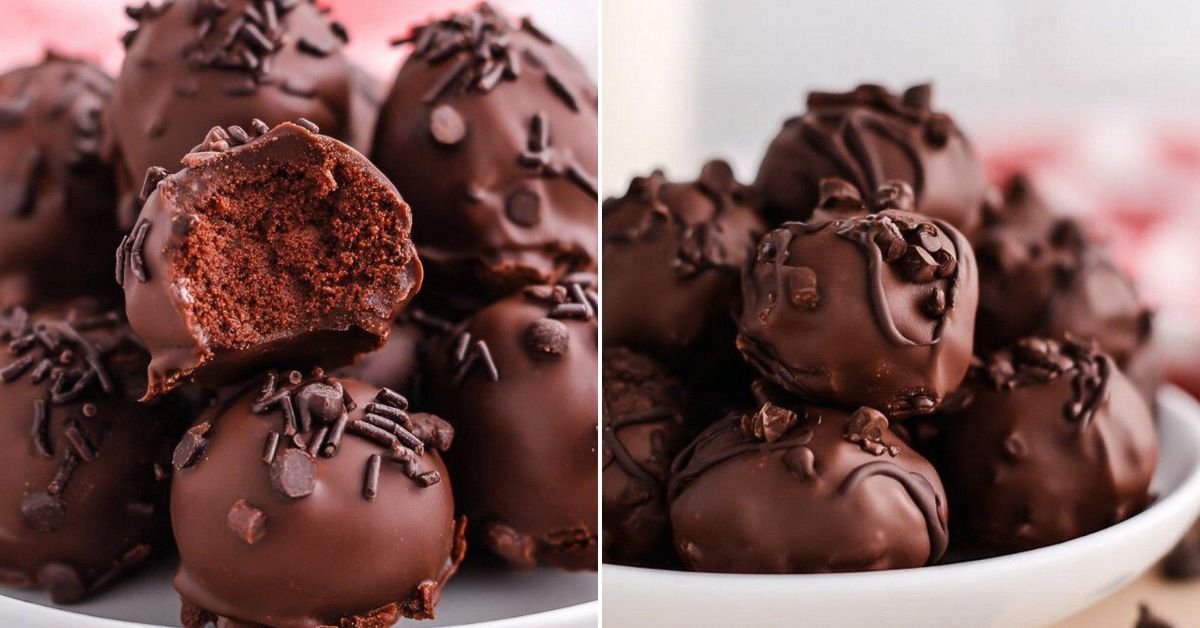
The texture is what gets me every single time. They’re fudgy and dense, kind of like a truffle had a baby with a brownie. The outside has that satisfying snap from the chocolate coating, and then you bite into this soft, rich center that melts on your tongue. My sister swears they taste better than regular brownies, and she’s a tough critic when it comes to chocolate desserts.
I’ve made these for everything from birthday parties to random Tuesday nights when I just needed something sweet. Kids go absolutely crazy for them at school events. Adults pretend to have just one and then sneak back for three more. They’re one of those 2 ingredient desserts concepts taken to the next level with just a handful of pantry staples.
The best part? You can customize them like crazy. Want to add crushed Oreos? Go for it. Feeling fancy with some sea salt on top? Do it. I’ve even rolled them in crushed pretzels for that sweet and salty combo that makes your taste buds do a happy dance. This 3 ingredient fudge recipe philosophy works perfectly here because you’re building on simple foundations to create something that tastes way more complicated than it actually is.

3) Ingredients for No-Bake Brownie Bites
Brown Sugar and Granulated Sugar: These two sugars work together to give you that perfect sweetness and texture. The brown sugar adds a slight molasses flavor and keeps everything moist, while the granulated sugar provides structure. Don’t try to use just one or the other. Trust me on this. I tried it once and the texture was all wrong. You need both to get that authentic brownie taste we’re going for here.
Butter: Make sure your butter is softened to room temperature. This isn’t negotiable. Cold butter won’t mix properly and you’ll end up with lumps. I usually take mine out about an hour before I start baking, or if I’m impatient (which is most of the time), I’ll cut it into small pieces and let it sit for 20 minutes. That stick of butter is what makes these bites so rich and decadent.
Vanilla Extract: Please use real vanilla extract, not the imitation stuff. Can you technically use imitation? Sure. Will it taste as good? Absolutely not. Real vanilla adds this depth of flavor that you just can’t fake. I keep a big bottle in my pantry because I use it in everything. It’s one of those ingredients worth spending a little extra money on for these 5 ingredient or less recipes.
All-Purpose Flour: Here’s the thing about the flour in this recipe. We’re going to toast it first, and I know that sounds weird, but it’s super important. Raw flour can contain bacteria, and since we’re not baking these, we need to heat treat it. Just five minutes in the oven and you’re good to go. It’s a small step that makes these completely safe to eat. Plus, toasted flour has a slightly nutty flavor that actually makes the bites taste better.
Cocoa Powder: This is where the chocolate flavor comes from, so don’t skimp here. I use Dutch-processed cocoa when I have it because it has a deeper, more intense chocolate flavor. Regular unsweetened cocoa works great too. Just make sure it’s fresh. Old cocoa powder loses its flavor and can taste kind of dusty. These 5 minute recipes for prep rely on good quality ingredients since there aren’t many of them.
Mini Chocolate Chips: I prefer mini chips because they distribute more evenly throughout the dough. But if you only have regular chips, just give them a rough chop. You want little pockets of melty chocolate in every bite. I’ve used dark chocolate chips, milk chocolate chips, even white chocolate chips when I’m feeling rebellious. They all work beautifully in this no bake desserts recipe.
German Sweet Chocolate: This is what we use for coating, and it makes such a difference. German sweet chocolate is milder and sweeter than regular chocolate, and it melts like a dream. You can find it in the baking aisle near the chocolate chips. If you can’t find it, you can substitute with milk chocolate or semi-sweet chocolate. I’ve done both in a pinch, and while it’s slightly different, it’s still delicious.
4) How to Make No-Bake Brownie Bites
Step 1: Get your oven going to 350°F and spread that flour out on a baking sheet. Pop it in for exactly five minutes. This step is what makes these safe to eat raw, so don’t skip it. I usually set a timer on my phone because it’s easy to forget about. When it comes out, let it cool completely on the counter. I usually move on to other prep while it’s cooling, like softening my butter or measuring out the other ingredients.
Step 2: Grab your biggest mixing bowl and throw in the brown sugar, granulated sugar, and that lovely softened butter. Beat them together until everything looks creamy and well combined. I use my hand mixer for this, but a wooden spoon and some elbow grease works too. It should take about two minutes with a mixer, maybe five by hand. You’ll know it’s ready when the mixture is light and fluffy.
Step 3: Add your vanilla extract and mix it in thoroughly. The smell at this point is absolutely incredible. If you’re not tempted to eat the mixture with a spoon right now, you’re stronger than me. Quick snack ideas like this always make my kitchen smell amazing, and my family starts wandering in asking what I’m making.
Step 4: Time to add the cooled flour and cocoa powder. Mix everything together until it forms a soft dough. It might look a bit dry at first, but keep mixing and it’ll come together. The dough should be soft but not sticky. If it seems too dry, you can add a tiny splash of milk, but I’ve never needed to. The mixture should form a ball that holds together nicely.
Step 5: Now fold in those chocolate chips with a rubber spatula. Use a gentle folding motion so you don’t break the chips. You want them whole so you get those little bursts of chocolate when you bite into the finished product. This is where the recipe starts looking like actual brownie dough, and it’s getting harder not to just eat it all right now.
Step 6: Roll the dough into balls about one inch across. I use a small cookie scoop to keep them uniform, but you can absolutely just use your hands. I usually get around 20 to 24 bites depending on how generous I’m feeling. Line them up on a baking sheet covered with parchment paper. Try to make them roughly the same size so they chill evenly and look nice when you’re done.
Step 7: Stick the whole tray in your fridge for about 20 minutes. They need to firm up before we coat them in chocolate, otherwise they’ll fall apart when you try to dip them. I use this time to clean up my workspace and melt the chocolate. Multitasking for the win. These quick snack recipes are all about efficiency.
Step 8: Melt your German chocolate. You can use a double boiler if you have one, or just use your microwave like I do. Put the chocolate in a microwave-safe bowl and heat it in 20-second bursts, stirring between each one. This prevents burning, which is surprisingly easy to do with chocolate. When it’s smooth and melted, you’re ready for the fun part.
Step 9: Take your chilled brownie balls out of the fridge. Using a fork or a toothpick, dip each one into the melted chocolate. Let the extra chocolate drip off before placing them back on the parchment paper. This part is oddly satisfying. I find it kind of meditative, just dipping and placing, dipping and placing. Keep going until all your bites are coated in that glossy chocolate shell.
Step 10: Let them sit at room temperature until the chocolate sets, which takes about 30 minutes. If you’re impatient like me, pop them back in the fridge for 10 minutes to speed things up. Once that chocolate is firm, they’re ready to eat. Store any leftovers in an airtight container in the fridge, but let’s be real, there probably won’t be many leftovers.
5) Tips for Making No-Bake Brownie Bites
Room temperature ingredients make everything easier. When your butter is properly softened, it mixes so much better with the sugars. You get a smoother, more consistent dough. I learned this the hard way after trying to make these with butter straight from the fridge. It was a lumpy mess and took forever to combine. Now I’m religious about taking my butter out ahead of time.
Don’t rush the chilling step. I know 20 minutes feels like forever when you’re excited to eat these, but it’s necessary. If the dough isn’t firm enough, the balls will lose their shape when you dip them in chocolate. You’ll end up with weird, flat brownie blobs instead of cute little bites. Set a timer and resist the urge to check them every five minutes.
Be careful when melting chocolate. It burns faster than you think. I always use 20-second intervals in the microwave and stir thoroughly between each heating. The chocolate will continue melting from residual heat even after you take it out, so stop microwaving when there are still a few small lumps. They’ll melt as you stir.
Keep your hands slightly damp when rolling the dough. This prevents sticking and makes the balls smoother. I keep a small bowl of water nearby and dip my fingertips in it between every few balls. It’s a small trick that makes a big difference in how professional they look. Nobody wants rough, craggy brownie bites when you can have smooth, perfect ones.
Experiment with toppings before the chocolate sets. Sprinkles, crushed nuts, sea salt flakes, even crushed candy canes during the holidays. Once you’ve dipped a bite, you have about 30 seconds before the chocolate starts to set. That’s your window to add whatever topping you want. Get creative with it. I’ve made batches with five different toppings and let people pick their favorite.
6) Making No-Bake Brownie Bites Ahead of Time
These are perfect for making ahead of time. Actually, they might even taste better the next day after all the flavors have had time to meld together in the fridge. I make them all the time for parties and events. Being able to prepare them a few days in advance takes so much stress out of party planning.
You can make them up to five days before you need them. Just keep them in an airtight container in the refrigerator. They stay perfectly fresh and fudgy. I’ve never had them last longer than five days because they always get eaten, but I imagine they’d be fine for up to a week.
If you’re really planning ahead, you can freeze them too. I roll the dough into balls, freeze them on a baking sheet until solid, then transfer them to a freezer bag. They’ll keep for up to three months. When you’re ready to use them, let them thaw in the fridge overnight, then dip them in chocolate. It’s like having homemade treats on standby whenever you need them.
You can even freeze them after they’re coated in chocolate. I do this when I’ve made a huge batch and know I won’t eat them all right away. Just make sure they’re in a single layer in your freezer until the chocolate is completely hard, then you can stack them with parchment paper between the layers. They thaw quickly at room temperature, usually in about 15 minutes.
One thing I’ve learned is to bring them to room temperature before serving if you’ve had them in the fridge. They taste good cold, but they’re absolutely perfect at room temperature. The texture is just right, not too firm, not too soft. I usually take them out about 30 minutes before I want to serve them.
7) Storing Leftover No-Bake Brownie Bites
Storage is super simple with these. Just grab an airtight container and layer them carefully. I like to put a piece of parchment paper between layers if I’m stacking them. This keeps the chocolate coating from getting scratched or sticking together. They’ll stay fresh in the fridge for up to a week, though I’ve never seen a batch last that long in my house.
Keep them refrigerated. Room temperature is fine for a few hours, like if you’re serving them at a party, but for longer storage, the fridge is your friend. The chocolate coating can get soft and sticky if they sit out too long, especially in warm weather. Plus, they taste better cold. That fudgy texture is at its peak when they’re chilled.
Don’t store them with other foods that have strong smells. Chocolate absorbs odors like crazy. I learned this when I stored them next to leftover garlic bread. Not my finest moment. Give them their own container, or at least make sure whatever else is in there doesn’t smell too strong.
If the chocolate coating looks a little dull after being in the fridge, don’t worry. That’s called chocolate bloom and it’s totally normal. It happens when the chocolate gets cold and then warms up again. It doesn’t affect the taste at all, just the appearance. If it bothers you, you can let them warm up slightly and the shine will come back a bit.
For freezer storage, use a freezer-safe container or heavy-duty freezer bags. Press out as much air as possible to prevent freezer burn. Label them with the date so you remember when you made them. When you want to eat them, thaw them in the fridge overnight or at room temperature for a few hours. They’ll be just as good as the day you made them.
8) Try these Desserts next!

9) No-Bake Brownie Bites

Quick Snack Recipes: No-Bake Brownie Bites Ready in Minutes
Ingredients
- 1/2 cup brown sugar
- 1/4 cup granulated sugar
- 1/2 cup butter, softened (that’s 1 stick, room temp is key here)
- 1 teaspoon vanilla extract (use the real stuff if you can)
- 3/4 cup all-purpose flour (we’ll toast this for safety, promise it’s worth it)
- 1/3 cup cocoa powder (the good kind makes a difference)
- 1/2 cup mini chocolate chips (or regular, chopped up works too)
- 8 ounces German sweet chocolate, chopped into chunks
Instructions
- First things first, preheat your oven to 350°F. Spread that flour on a baking sheet and pop it in for 5 minutes. This step makes the flour safe to eat raw, so don’t skip it! Let it cool down completely before using.
- Grab your mixing bowl and toss in the brown sugar, granulated sugar, and that lovely softened butter. Beat them together with a hand mixer or wooden spoon until everything’s combined and looking creamy. Your arm might get a workout if you’re going the manual route!
- Pour in the vanilla extract and give it another good mix. Can you smell that? That’s the smell of something delicious about to happen.
- Time to add your cooled flour and cocoa powder. Mix everything until it comes together into a soft, slightly sticky dough. If it seems too dry, you can add a tiny splash of milk, but usually it’s perfect as is.
- Now for the fun part: fold in those mini chocolate chips with a spatula. Try not to eat too many straight from the bag. I won’t judge if you do though.
- Roll the dough into balls about 1 inch in diameter. I usually get around 20-24 bites depending on how generous I’m feeling. Place them on a baking sheet lined with parchment paper.
- Stick the whole tray in the fridge for about 20 minutes. They need to firm up before we coat them in chocolate. This is a good time to clean up or, you know, scroll through your phone.
- Melt your German chocolate using either a double boiler or the microwave. If you’re using the microwave, go slow with 20 second bursts, stirring between each one. Nobody wants burnt chocolate, trust me.
- Once your brownie balls are chilled and your chocolate is melted and smooth, it’s dipping time! Use a fork or toothpick to dip each ball into the chocolate, letting the extra drip off before putting them back on the parchment paper.
- Let them sit at room temperature until the chocolate sets, or speed things up by popping them back in the fridge for 10 minutes. Then they’re ready to devour! Store any leftovers in an airtight container in the fridge.
10) Nutrition
Serving Size: 1 brownie bite (30g), Calories: 140, Sugar: 9 g, Sodium: 30 mg, Fat: 8 g, Saturated Fat: 4 g, Carbohydrates: 16 g, Fiber: 1 g, Protein: 2 g, Cholesterol: 15 mg


Leave a Comment